Transplanting Candle Bush: Easy Success for a Thriving Garden
Have you ever admired the vibrant, almost fiery blooms of the Candle Bush (Cassia alata) and wondered how to best introduce this tropical beauty to your own garden? Transplanting a plant can feel like a delicate operation, and for a showstopper like the Candle Bush, getting it right is key to ensuring its health, vigorous growth, and prolific flowering. This isn’t just about moving a plant; it’s about setting it up for a lifetime of success, contributing to a more beautiful, biodiverse, and rewarding gardening experience.
Quick Answer Box
Yes, you can successfully transplant Candle Bush. The best time to transplant Candle Bush is during its dormant season or periods of active growth, ensuring the root system is well-established and the plant is not under heat stress. Proper preparation of the new site and careful handling of the root ball are crucial for minimizing transplant shock and encouraging rapid establishment.
What is Transplanting Candle Bush and Why It’s Important in Gardening
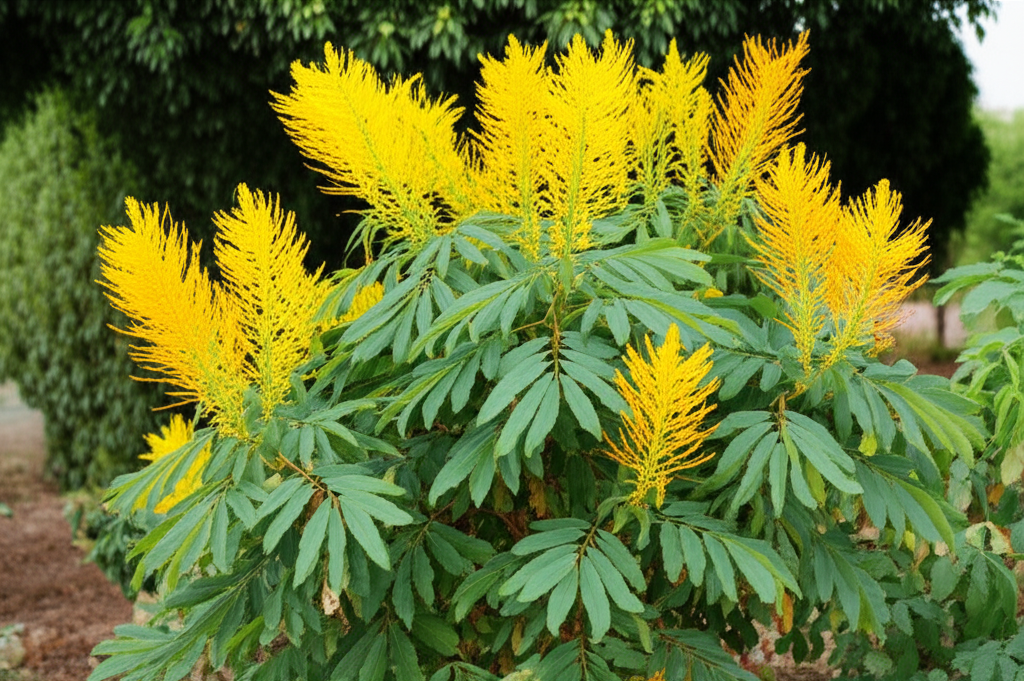
Transplanting Candle Bush refers to the process of carefully moving a Candle Bush plant from one location to another. This can be from a nursery pot to its permanent garden bed, from a crowded area to a more spacious one, or even dividing a larger plant to create new specimens. Successful transplanting is a fundamental gardening skill that directly impacts a plant’s ability to establish a strong root system, access essential nutrients and water, and ultimately thrive, bloom, and fulfill its horticultural potential. For the Candle Bush, a plant known for its striking yellow, candle-like flower spikes, a smooth transition means a quicker return to its glorious display and a more resilient plant for years to come. It’s an essential step in garden design and plant propagation, allowing gardeners to shape their landscapes and share their favorite plants.
Quick Recommendations or Key Insights about Transplanting Candle Bush
Timing is Crucial: Aim for the cooler, wetter parts of the year (late fall or early spring in most climates) or during periods of moderate growth.
Hydrate Before and After: Water the plant thoroughly before digging and the new location after planting.
Minimize Root Disturbance: Dig a generous root ball, keeping as much soil around the roots as possible.
Prepare the New Home: Ensure the new planting site has well-draining soil and adequate sunlight.
Mulch is Your Friend: Apply a layer of mulch to retain moisture and regulate soil temperature.
Patience is Key: Allow the plant time to recover; avoid fertilizing immediately after transplanting.
Detailed Breakdown of Transplanting Candle Bush
The Science Behind Successful Transplanting
From a botanical perspective, transplanting is essentially an interruption of a plant’s life cycle. Roots are the plant’s lifeline, responsible for absorbing water and nutrients and anchoring the plant. When a plant is transplanted, a significant portion of its root system is inevitably disturbed or severed. This leads to a period of transplant shock, where the plant experiences stress due to reduced water and nutrient uptake. The leaves may wilt, yellow, or drop as the plant struggles to maintain its water balance.
Candle Bush (Cassia alata), while generally robust, is native to tropical and subtropical regions. This means it prefers warm temperatures and consistent moisture. Transplanting it outside of its ideal conditions or mishandling its roots can exacerbate transplant shock. Understanding plant physiology helps us anticipate these challenges and implement strategies to mitigate them. For instance, the plant will prioritize root development over top growth after transplanting, meaning you might not see much leaf or flower production initially. The goal of proper transplanting is to minimize this period of stress and encourage rapid root regeneration, allowing the plant to resume normal growth as quickly as possible.
Practical Applications in the Garden: Step-by-Step Guide
Transplanting Candle Bush involves a series of careful steps, from preparation to aftercare.
1. Selecting the Right Time:
The ideal time to transplant Candle Bush is during its dormant season or during periods of active, but not stressed, growth.
Dormant Season (Late Fall to Early Spring): In regions where Candle Bush experiences a cooler period or even a slight dieback, transplanting after the last frost but before new growth truly kicks off is excellent. The plant is not actively expending energy on flowering or vigorous leaf production, and cooler temperatures reduce water loss.
Active Growth Periods (Spring to Early Summer): If you must transplant during the growing season, choose a period with moderate temperatures and regular rainfall. Avoid transplanting during extreme heat waves or drought conditions, as this will significantly increase the risk of transplant shock.
2. Preparing the New Location:
Sunlight: Candle Bush thrives in full sun (at least 6-8 hours of direct sunlight per day). Choose a location that receives ample light.
Soil Drainage: This is paramount. Candle Bush prefers well-draining soil. Amend heavy clay soils with organic matter like compost or well-rotted manure to improve aeration and drainage. If your soil is particularly prone to waterlogging, consider planting in raised beds.
Soil Preparation: Dig a hole that is at least twice as wide and as deep as the root ball of the plant you are transplanting. Loosen the soil at the bottom and sides of the hole to encourage root penetration. Mix some compost into the excavated soil.
3. Preparing the Plant for Moving:
Water Thoroughly: A day or two before transplanting, water the Candle Bush deeply. This helps hydrate the plant and can make the soil cling better to the roots, forming a more cohesive root ball.
Root Pruning (Optional, for established plants): For larger, well-established plants, you can optionally root prune a few weeks before transplanting. Dig a trench around the plant, about 1-2 feet away from the main stem, cutting through the roots. This encourages the development of new, fibrous roots closer to the main root ball, which can help reduce transplant shock. Backfill the trench with soil.
4. The Digging and Lifting Process:
Assess the Size: Determine the approximate size of the root ball you need to excavate. It’s generally recommended to take a root ball that is at least 10-12 inches in diameter for every foot of plant height, especially for younger plants. For larger specimens, a larger root ball is essential.
Digging: Start digging a trench around the plant, at least 6-12 inches away from the base. Dig down deep enough to encompass the entire root system.
Undercutting: Once the trench is dug, carefully work your shovel underneath the root ball, trying to slice cleanly through any encircling roots.
Lifting: With the root ball undercut, gently try to lift the plant. For smaller plants, you might be able to lift it by hand. For larger ones, you may need assistance or to use a tarp or burlap to help move the root ball. Keep the root ball as intact as possible.
5. The Transplanting Procedure:
Transport: Move the plant to its new location immediately. Minimize the time the roots are exposed to air. If you can’t plant it right away, keep the root ball moist and out of direct sunlight.
Placement: Place the root ball in the prepared hole. The top of the root ball should be level with the surrounding soil surface. Avoid planting too deep, as this can lead to root rot.
Backfilling: Backfill the hole with the amended soil, gently firming it around the root ball to eliminate air pockets.
6. Post-Transplant Care:
Watering: Water the plant thoroughly immediately after planting. This settles the soil and ensures good root-to-soil contact.
Mulching: Apply a 2-3 inch layer of organic mulch (like wood chips, compost, or straw) around the base of the plant, keeping it a few inches away from the stem. Mulch helps retain soil moisture, suppress weeds, and regulate soil temperature.
Support (If necessary): If the plant is tall or top-heavy, you might need to stake it temporarily to prevent it from toppling over while its roots establish.
Fertilizing: Do not fertilize immediately after transplanting. Wait for at least 4-6 weeks, or until you see signs of new growth. Fertilizing too soon can further stress the plant.
Common Myths to Avoid
Myth: You can transplant anytime.
Reality: While Candle Bush is somewhat forgiving, transplanting during extreme heat or drought significantly increases the risk of failure. Always consider the plant’s stress levels and the environmental conditions.
Myth: The bigger the root ball, the better.
Reality: While a substantial root ball is important, an unnecessarily massive one can be unwieldy and lead to more root damage during the move. Aim for a size proportionate to the plant’s above-ground growth.
Myth: Waterlogging is fine after transplanting.
Reality: Overwatering after transplanting is a common killer. While consistent moisture is needed, soggy soil can suffocate roots and lead to rot, especially if drainage is poor.
Myth: You should fertilize to help it recover.
Reality: Fertilizers provide nutrients, but they also encourage top growth. After transplanting, the plant’s priority is root establishment. Fertilizing too early can divert energy from root growth and stress the plant further.
Expert Tips or Pro Insights
Consider the “Balled and Burlapped” Method: For larger specimens, wrapping the root ball in burlap before lifting and moving can help it stay intact, significantly reducing root disturbance. Ensure the burlap is natural and biodegradable; synthetic materials can impede root growth.
The “Containerized Transplant”: If you’re moving a plant from a pot to the ground, or from one pot to another, try to get a root ball that is at least as large as the original pot. Gently loosen any circling roots at the bottom before placing it in the new hole or pot.
“Hydro-mulching” for Stress Reduction: Some professionals use a mixture of peat moss, compost, and water to create a thick slurry that is packed around the root ball after planting. This acts like a super-moisturizing bandage, helping to retain moisture and provide nutrients during the critical recovery phase.
Observe Your Plant: After transplanting, keep a close eye on your Candle Bush. Wilting is normal for a short period, but if it persists for weeks, or if leaves turn yellow and drop excessively, the plant is likely experiencing severe transplant shock. Adjust watering accordingly (slightly more if dry, slightly less if waterlogged) and be patient.
Seasonal or Climate Considerations
Candle Bush is a tropical to subtropical plant, meaning its ideal growing conditions are warm temperatures and ample moisture. Its transplanting needs are therefore heavily influenced by your climate.
Tropical and Subtropical Climates: In regions where frost is rare or non-existent, you have a broader window for transplanting. The ideal times are typically during the rainy season when natural moisture is abundant, or during milder, less humid periods. Avoid transplanting during the hottest, driest months.
Temperate Climates (where Candle Bush is grown as an annual or overwintered): If you grow Candle Bush in a climate with frost, it’s usually treated as an annual or brought indoors for winter. Transplanting would typically occur in spring after the last frost, or in early fall before the first frost if you’re moving it to a protected location or a container for overwintering.
Drought-Prone Regions: In areas prone to drought, transplanting during the cooler, wetter seasons is even more critical. You will need to be diligent with supplemental watering to ensure the plant’s survival and establishment.
Buying Guide or Decision-Making Process
If you’re acquiring a new Candle Bush for transplanting, consider these factors:
Source: Purchase from a reputable nursery or garden center. Healthy plants are less prone to transplant shock.
Plant Health: Look for plants with vibrant green foliage, no signs of pests or diseases, and a well-formed root system (if visible). Avoid plants that are root-bound (roots circling tightly within the pot).
Size: Consider the size of the plant relative to your garden space and your ability to handle it. Smaller plants generally establish more quickly than larger, more mature specimens.
Container vs. Balled and Burlapped:
Container-grown: These are the most common and easiest to transplant. The root ball is contained, minimizing disturbance if handled carefully.
Balled and Burlapped (B&B): Larger, established plants are often sold this way. The root ball is wrapped in burlap and often secured with twine. These require more effort to handle but can be very successful if the root ball is intact.
Decision-Making Process:
1. Assess your garden’s conditions: Does it have full sun and well-draining soil?
2. Choose the right time: Based on your local climate and the plant’s ideal transplanting windows.
3. Select a healthy plant: Prioritize vigor and absence of disease.
4. Consider the plant’s size: Ensure it fits your space and your transplanting capabilities.
5. Prepare your site meticulously: This is often the most overlooked but crucial step.
FAQ Section for Transplanting Candle Bush
Q: How often should I water a transplanted Candle Bush?
A: Water deeply immediately after planting. For the first few weeks, keep the soil consistently moist but not waterlogged. Reduce watering frequency as the plant establishes, but continue to water during dry spells.
Q: My Candle Bush is wilting after transplanting. Is it dying?
A: Some wilting is normal as the plant adjusts. If the wilting persists for more than a week or two, check the soil moisture. If it’s dry, water more frequently. If it’s waterlogged, ensure good drainage and reduce watering. Patience is key.
Q: Can I prune my Candle Bush after transplanting?
A: It’s best to avoid heavy pruning immediately after transplanting. You can remove any dead or damaged branches, but refrain from significant shaping until the plant shows signs of new growth and has recovered.
Q: When can I expect my transplanted Candle Bush to bloom?
A: Blooming might be delayed in the first season after transplanting as the plant focuses energy on root development. If transplanted in spring, it may still bloom later that summer or fall. If transplanted in fall, expect blooming the following season.
Q: What kind of soil amendments are best for Candle Bush when transplanting?
* A: Compost or well-rotted manure are excellent for improving soil structure and fertility. They enhance drainage and provide slow-release nutrients, supporting root establishment.
Conclusion for Transplanting Candle Bush
Successfully transplanting your Candle Bush is a rewarding endeavor that unlocks its full potential for vibrant color and tropical flair in your garden. By understanding the delicate balance of root health, moisture, and environmental conditions, you can guide your plant through this transition with confidence. Remember to choose the right time, prepare the soil diligently, handle the root ball with care, and provide consistent aftercare. With these expert insights and practical steps, you’re well-equipped to minimize transplant shock and ensure your Candle Bush establishes a strong foundation for years of spectacular blooms. Now, go forth and give your Candle Bush the best possible start in its new garden home.

