
Can You Grow Genovese Basil Indoors for the Best Flavor? A Comprehensive Guide
Have you ever savored the vibrant, peppery notes of fresh Genovese basil in a pesto or caprese salad and wondered if you could replicate that exquisite flavor in your own kitchen, year-round? The pursuit of culinary perfection often leads us to seek out the best ingredients, and for many, that means growing their own Genovese basil. But can you truly achieve that signature, aromatic punch when cultivating this beloved herb indoors? Understanding the nuances of growing Genovese basil indoors is crucial not just for your taste buds, but for the health and vigor of your plants, directly impacting the quality of the leaves you harvest. Let’s dive into the world of indoor basil cultivation and unlock the secrets to unlocking its best flavor.
Quick Answer Box
Yes, you absolutely can grow Genovese basil indoors and achieve excellent flavor, provided you offer it the right conditions. This means mimicking its preferred outdoor environment with ample sunlight, consistent watering, and appropriate nutrients. With careful attention to these key factors, your indoor Genovese basil can rival its outdoor counterparts in aroma and taste.
What is a Genovese Basil Plant and Why It’s Important in Gardening
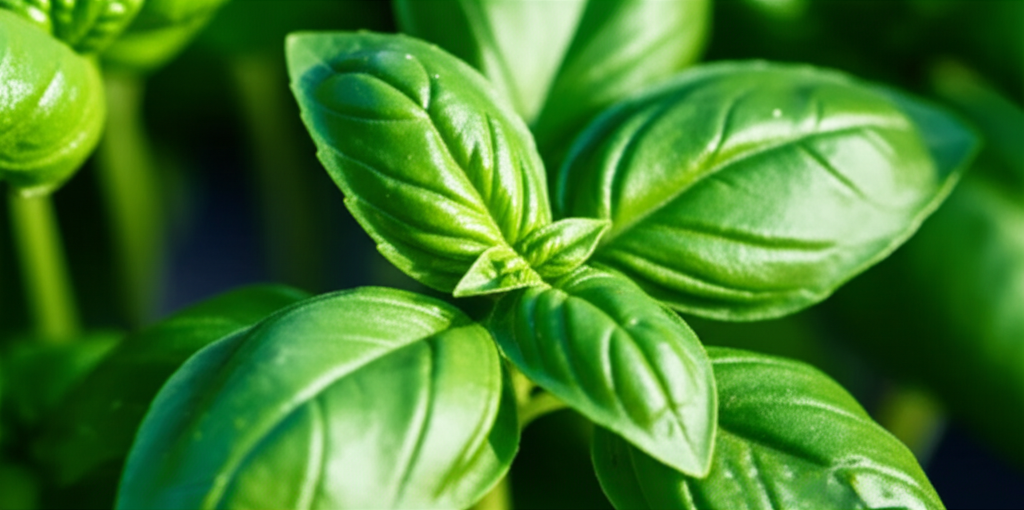
The Genovese basil plant (Ocimum basilicum ‘Genovese’) is a specific cultivar of sweet basil, renowned globally for its exceptional flavor and aroma. Originating from the Liguria region of Italy, it is the quintessential basil used in traditional pesto alla Genovese. Its large, glossy green leaves possess a complex flavor profile: sweet, slightly peppery, with hints of anise and mint, and a distinct clove-like aroma when crushed.
Its importance in gardening, especially for culinary enthusiasts, stems from its versatility and unparalleled flavor. Unlike some other basil varieties that can be more pungent or have subtle flavor differences, Genovese basil offers a consistently robust and authentic taste that forms the backbone of many classic Italian dishes. Growing it allows gardeners to have a fresh, readily available supply of this premium ingredient, elevating home cooking from ordinary to extraordinary. Furthermore, understanding how to grow it successfully indoors opens up possibilities for year-round harvests, making it a valuable addition to any kitchen gardener’s repertoire, regardless of season or climate.
Quick Recommendations or Key Insights about Genovese Basil Plant
Sunlight is King: Genovese basil needs at least 6-8 hours of direct sunlight daily. South-facing windows are ideal.
Well-Draining Soil: Use a high-quality potting mix that doesn’t retain too much moisture.
Consistent Watering: Water when the top inch of soil feels dry, but avoid waterlogged conditions.
Warm Temperatures: Basil thrives in temperatures between 65-80°F (18-27°C). Protect it from drafts.
Pinch Regularly: Pinching back the growing tips encourages bushier growth and more abundant harvests.
Harvesting for Flavor: Harvest leaves in the morning after the dew has dried for peak flavor.
Avoid Overcrowding: Give your Genovese basil plants enough space to grow and breathe.
Detailed Breakdown of Growing Genovese Basil Indoors for the Best Flavor
Growing a Genovese basil plant indoors to achieve its signature, best flavor requires replicating the optimal conditions it enjoys outdoors. This involves careful attention to light, water, soil, temperature, and harvesting techniques.
The Science Behind Basil’s Flavor and Indoor Growth
Basil’s aromatic compounds, primarily essential oils like linalool and eugenol, are responsible for its characteristic scent and taste. These compounds are synthesized through photosynthesis and are most abundant when the plant is healthy and unstressed. Factors that influence this include:
Light Intensity and Duration: Sufficient light fuels photosynthesis, directly impacting the production of these flavor compounds. Insufficient light leads to leggy growth and diluted flavor.
Temperature: Basil is a warm-season herb. Extreme temperatures or fluctuations can stress the plant, affecting oil production and overall flavor.
Nutrient Availability: While basil isn’t a heavy feeder, balanced nutrients are essential for healthy growth and oil synthesis.
Water Stress: Both over-watering and under-watering can stress the plant, negatively impacting its flavor profile.
Step-by-Step Guide to Growing Genovese Basil Indoors
1. Choosing the Right Container:
Material: Terracotta pots are excellent as they allow for good air circulation and help prevent overwatering by allowing some moisture to evaporate through the sides. Plastic pots are also suitable but require more careful watering.
Size: Start with a pot that is at least 6 inches in diameter. As the plant grows, you may need to transplant it to a larger pot (8-10 inches). Ensure the pot has adequate drainage holes.
Drainage: This is paramount. Basil hates “wet feet.” Ensure your chosen pot has drainage holes at the bottom.
2. Selecting the Ideal Potting Mix:
Composition: Use a high-quality, well-draining potting mix specifically formulated for containers. A good mix typically includes peat moss or coco coir for moisture retention, perlite or vermiculite for aeration and drainage, and compost or worm castings for nutrients.
Avoid Garden Soil: Never use soil directly from your garden, as it can be too dense, compact easily in pots, and may contain pests or diseases.
3. Sowing Seeds or Planting Seedlings:
From Seed: Genovese basil seeds are small and germinate best in warm conditions.
Fill your pot with moist potting mix.
Sow seeds thinly on the surface, about 1/8 inch deep.
Gently cover with a thin layer of soil.
Mist the surface lightly with water.
Cover the pot with a clear plastic lid or plastic wrap to maintain humidity.
Place in a warm spot (70-80°F / 21-27°C). Germination typically takes 5-10 days.
Once seedlings emerge, remove the cover and ensure they receive bright light.
When seedlings have their first set of true leaves, thin them to the strongest one or two per pot, or transplant them to individual pots if you started them in a seed tray.
From Seedlings: If you purchase seedlings, choose healthy, vibrant plants with no signs of yellowing leaves or pests.
Gently transplant the seedling into your chosen pot filled with potting mix.
Ensure the base of the stem is at the same level as it was in its original container.
Water thoroughly after transplanting.
4. Providing Adequate Light:
Natural Light: Place your Genovese basil plant in the sunniest window available, ideally a south-facing window that receives at least 6-8 hours of direct sunlight per day. Rotate the pot regularly to ensure even growth.
Grow Lights: If natural light is insufficient, invest in grow lights. Full-spectrum LED grow lights are energy-efficient and provide the necessary wavelengths for healthy basil growth. Position the lights 6-12 inches above the plant and run them for 12-16 hours per day.
5. Watering Techniques for Optimal Flavor:
Check Soil Moisture: The most reliable way to know when to water is to feel the soil. Insert your finger about an inch deep into the potting mix. If it feels dry, it’s time to water.
Water Thoroughly: When you water, water until you see water draining from the bottom of the pot. This ensures the entire root ball is hydrated.
Avoid Overwatering: Soggy soil can lead to root rot, which is detrimental to the plant’s health and flavor. Ensure proper drainage and allow the soil to dry slightly between waterings.
Watering Time: Water in the morning. This allows any excess moisture on the leaves to evaporate before nightfall, reducing the risk of fungal diseases.
6. Temperature and Humidity Control:
Ideal Temperature: Genovese basil thrives in temperatures between 65-80°F (18-27°C). Avoid placing it near cold drafts from windows or air conditioning vents.
Humidity: Basil prefers moderate to high humidity. In dry indoor environments, especially during winter months when heating systems are on, consider using a humidifier or placing the pot on a pebble tray filled with water. Ensure the bottom of the pot is not submerged in the water.
7. Fertilizing for Flavor:
Light Feeders: Basil is not a heavy feeder. Over-fertilizing can lead to a less intense flavor.
When to Fertilize: Start fertilizing about a month after planting or when you notice slower growth.
Type of Fertilizer: Use a balanced liquid fertilizer (e.g., 10-10-10 or 5-5-5) diluted to half strength. Organic options like fish emulsion or worm casting tea are also excellent.
Frequency: Fertilize every 4-6 weeks during the active growing season. Reduce or stop fertilizing during periods of slower growth or when the plant is not actively producing new leaves.
8. Pruning and Harvesting for Maximum Flavor:
Pinching Back: Once your Genovese basil plant reaches about 6 inches tall and has several sets of leaves, begin pinching back the growing tips. Pinch just above a leaf node (where leaves emerge from the stem). This encourages the plant to branch out, becoming bushier and producing more leaves.
Harvesting Leaves: Harvest leaves regularly by pinching or snipping them off. The best time to harvest for peak flavor is in the morning, after the dew has dried, as this is when the essential oils are most concentrated.
How to Harvest: Avoid taking more than one-third of the plant at any one time. Harvest from the top, leaving lower leaves to continue growing.
Removing Flower Stalks: As your basil plant matures, it will begin to form flower stalks. If left to flower, the plant’s energy will be diverted to seed production, and the leaf production will slow down, with a potential decline in flavor. Pinch off flower stalks as soon as you see them forming to encourage continued leaf growth and maintain a better flavor profile.
Practical Applications in the Garden
Growing Genovese basil indoors is a practical way to ensure a constant supply of fresh, flavorful herbs for your kitchen. Imagine stepping into your kitchen and snipping a few leaves of fragrant Genovese basil for your morning omelet, your afternoon tomato salad, or your evening pasta dish. This practice not only enhances your meals but also offers a therapeutic and rewarding gardening experience. It’s an excellent way for apartment dwellers or those with limited outdoor space to participate in growing their own food. The vibrant green leaves also add a touch of natural beauty to your indoor living space.
Common Mistakes to Avoid
Insufficient Light: This is the most common pitfall. Basil will become leggy, pale, and flavorless without adequate light.
Avoidance: Invest in a grow light or ensure your plant is in the absolute sunniest spot.
Overwatering: Basil is susceptible to root rot in soggy soil.
Avoidance: Always check soil moisture before watering and ensure your pots have excellent drainage.
Underwatering: While basil dislikes soggy soil, prolonged dryness will stress the plant and reduce flavor.
Avoidance: Stick to the finger test for soil moisture and water thoroughly when needed.
Neglecting to Pinch: Allowing the plant to become tall and spindly without pinching will result in fewer leaves and a less bushy plant.
Avoidance: Pinch back the growing tips regularly from an early stage.
Ignoring Flower Stalks: Letting basil flower significantly reduces leaf production and flavor.
Avoidance: Regularly scout for and remove flower buds.
Using Poor Quality Soil: Heavy, compacted soil will hinder root growth and drainage.
Avoidance: Always use a good quality, well-draining potting mix.
Expert Tips or Pro Insights
Succession Planting: To ensure a continuous harvest, sow new basil seeds every 3-4 weeks. This way, as one plant matures, another is just starting, guaranteeing a fresh supply.
Bouncing Back: If your basil plant looks a bit sad and leggy, a good pruning session (cutting back by about a third) and ensuring it has adequate light and water can often revive it and encourage new, vigorous growth.
Companion Planting (Indoors): While not strictly “companion planting” in the outdoor sense, consider the environmental needs of other herbs you might grow indoors. Basil generally likes similar conditions to many other herbs, but be mindful of drastic differences in light or watering requirements.
Enhancing Aroma: Some gardeners believe that slightly crushing a few leaves before harvesting can release more essential oils, thereby intensifying the aroma and flavor. This can be done subtly without harming the plant.
Temperature Fluctuations: Try to maintain a stable temperature. Significant drops or spikes can shock the plant and impact oil production.
Seasonal or Climate Considerations
Growing Genovese basil indoors completely bypasses the challenges of outdoor seasonality and climate. You create your own ideal environment. However, it’s important to be aware of how your home’s internal climate might change:
Winter: Indoor heating can significantly reduce humidity and increase the need for watering as the soil dries out faster. Monitor your plant closely and consider using a humidifier. You may also need to supplement with grow lights as natural daylight hours are shorter and less intense.
Summer: While you have control over the indoor environment, remember that basil still prefers warmth. If your home gets very hot or dry due to air conditioning, adjust your watering and humidity monitoring accordingly.
FAQ Section for Genovese Basil Plant
Q1: How much light does Genovese basil really need indoors?
A: Genovese basil needs at least 6-8 hours of direct sunlight per day. If you don’t have a sufficiently sunny window, a grow light is essential for healthy growth and good flavor.
Q2: My basil leaves are turning yellow. What could be wrong?
A: Yellowing leaves can be a sign of several issues. Most commonly, it’s either overwatering (leading to root rot) or underwatering (stressing the plant). It can also indicate a lack of nutrients if the plant has been in the same pot for a long time without fertilization, or insufficient light. Check your watering habits and light conditions first.
Q3: Can I grow Genovese basil from cuttings?
A: Yes, you can often propagate Genovese basil from stem cuttings. Take a cutting that has at least two sets of leaves, remove the lower leaves, and place the stem in a glass of water. Keep it in bright, indirect light. Roots should appear in 1-2 weeks. Once roots are established, you can transplant it into potting soil.
Q4: How often should I fertilize my indoor Genovese basil?
A: Basil is not a heavy feeder. Fertilize with a diluted balanced liquid fertilizer (half strength) every 4-6 weeks during the growing season. Over-fertilizing can actually diminish its flavor.
Q5: My indoor basil plant is getting leggy and tall. What should I do?
A: This is a clear sign of insufficient light. Move your plant to a sunnier location or supplement with a grow light. You should also pinch back the growing tips to encourage bushier growth.
Q6: When is the best time to harvest Genovese basil for the most flavor?
A: Harvest in the morning after the dew has dried. This is when the essential oil content, which contributes to the basil’s aroma and flavor, is typically at its peak.
Conclusion for Genovese Basil Plant
Successfully growing a Genovese basil plant indoors for the best flavor is entirely achievable with consistent care and attention to its fundamental needs. By providing ample sunlight, appropriate watering, well-draining soil, and regular pruning, you can cultivate a thriving herb that will elevate your culinary creations throughout the year. Don’t let limited outdoor space or changing seasons deter you from enjoying the unparalleled aroma and taste of fresh Genovese basil. Embrace the rewarding process of indoor herb gardening, and savor the difference that homegrown flavor makes in every dish. Start your indoor Genovese basil journey today and bring the vibrant taste of Italy into your kitchen.

