How to Propagate Basil Plant: Easy & Stunning Results for a Bountiful Harvest
Do you dream of an endless supply of fresh, fragrant basil for your pizzas, pastas, and pesto? Ever wondered if you could turn a single, thriving basil plant into a small army of deliciousness? If you’ve ever admired a lush basil bush and wished you could replicate its success, you’re in the right place! Understanding how to propagate basil plant is a cornerstone skill for any herb gardener, promising not only more basil but also a deeper connection to your plants and a more sustainable approach to your garden. This simple yet rewarding practice can dramatically increase your yield, save you money on purchasing new plants, and even allow you to share your basil bounty with friends and family.
Quick Answer Box
Yes, you can easily propagate basil plants through cuttings. This method involves taking a piece of the basil stem and encouraging it to grow roots in water or soil, allowing you to create new, identical plants from a healthy parent. It’s a fast, efficient, and incredibly satisfying way to expand your basil patch and ensure a continuous harvest throughout the growing season.
What is Basil Propagation and Why It’s Important in Gardening
Basil propagation refers to the process of creating new basil plants from existing ones. In horticulture, propagation is broadly divided into two categories: sexual propagation (using seeds) and asexual propagation (using vegetative parts like stems, leaves, or roots). When we talk about how to propagate basil plant for quick and reliable results, we’re primarily focusing on asexual propagation through stem cuttings.
Why is this so important?
Genetic Consistency: Cuttings produce clones of the parent plant, meaning they will have the exact same desirable traits – flavor, aroma, growth habit, and disease resistance. This is crucial for gardeners who have found a particularly excellent variety of basil.
Speed: Propagating from cuttings is often much faster than growing from seed, especially for herbs like basil which can be slow to germinate and establish. You can often have rooted cuttings ready to transplant within a few weeks.
Cost-Effectiveness: Instead of buying multiple new plants, you can generate as many as you need from just one or two parent plants, significantly reducing gardening expenses.
Plant Revival: As basil plants naturally tend to “bolt” (go to seed) and become woody as the season progresses, propagation allows you to create fresh, vigorous young plants to replace older ones, extending your harvest.
Sharing the Love: It’s a wonderful way to share your gardening success with others, gifting new basil plants to friends and family.
Quick Recommendations or Key Insights about Propagating Basil
Use Healthy Parent Plants: Always select cuttings from vigorous, disease-free basil plants.
Take Cuttings from Non-Flowering Stems: This encourages better root development and growth.
Cut Below a Leaf Node: This is where roots are most likely to form.
Remove Lower Leaves: Prevent them from rotting in water or soil.
Change Water Regularly: If rooting in water, fresh water prevents bacterial growth.
Provide Bright, Indirect Light: Direct sun can scorch delicate cuttings.
Patience is Key: Rooting can take anywhere from a week to several weeks.
Detailed Breakdown of How to Propagate Basil Plant
Propagating basil from cuttings is a straightforward process, but a little attention to detail can ensure spectacular success. Let’s break down the best methods and techniques.
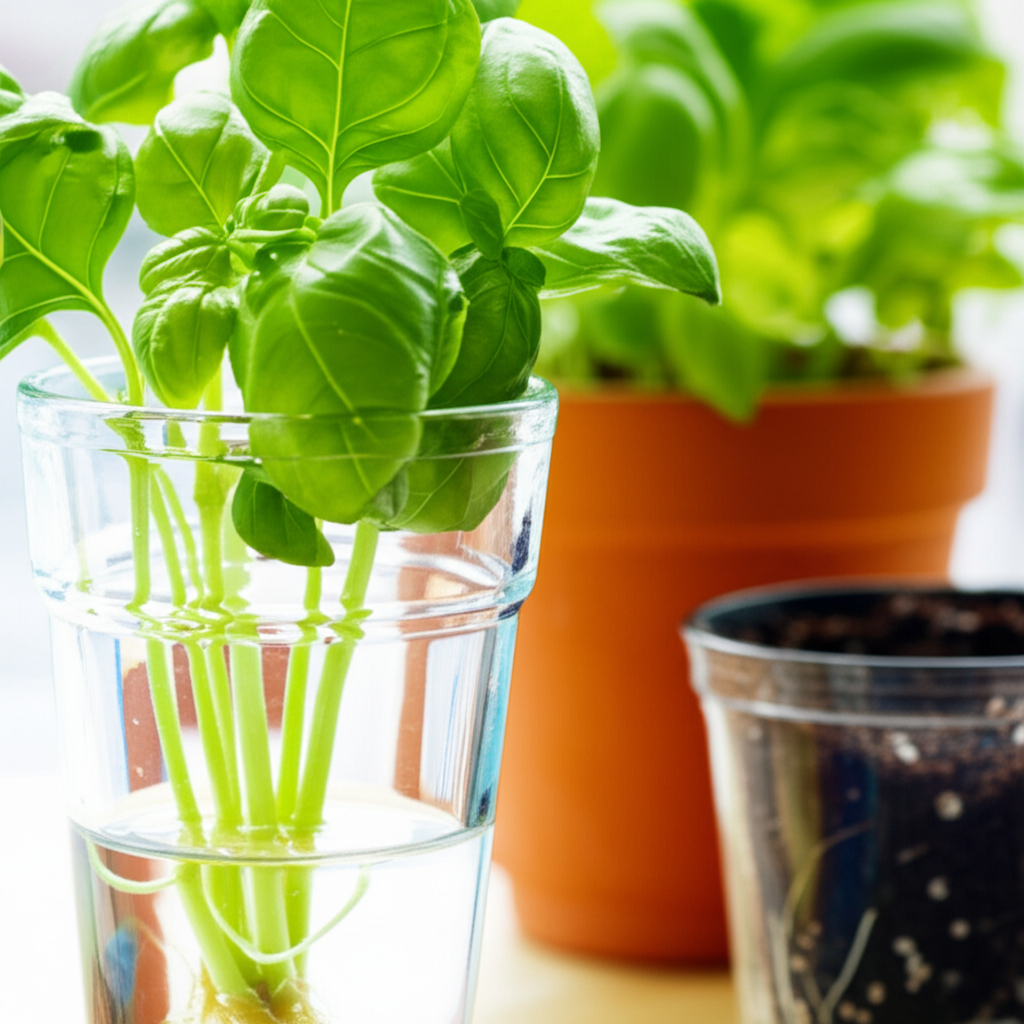
Method 1: Water Propagation – The Easiest Way to See Roots Grow
Water propagation is arguably the most popular and visually rewarding method for how to propagate basil plant. It’s simple, requires minimal materials, and allows you to witness the magic of root formation firsthand.
Step-by-Step Guide:
1. Select Your Cuttings:
Choose the Right Stem: Look for healthy, non-flowering stems on your basil plant. Stems that are just starting to get woody are less ideal than younger, more pliable ones. Aim for stems that are at least 4-6 inches long.
Make the Cut: Using clean, sharp scissors, pruning shears, or even a sharp knife, make a cut just below a leaf node (the point where leaves attach to the stem). This is crucial because roots will emerge from these nodes.
2. Prepare the Cuttings:
Strip Lower Leaves: Gently remove the leaves from the bottom 2-3 inches of the cutting, exposing the leaf nodes. This prevents the leaves from being submerged in the water, which can lead to rot and inhibit rooting. You can leave the top few sets of leaves intact.
3. Place in Water:
Container Choice: Use a clean glass jar, vase, or even a repurposed plastic bottle. Clear containers are best so you can monitor the water level and root development.
Water Quality: Fill the container with clean, room-temperature water. Filtered or distilled water is ideal, but tap water left out for 24 hours to allow chlorine to dissipate will also work.
Submerge the Nodes: Place the prepared cuttings into the water, ensuring that at least one or two leaf nodes are submerged. Do not let the remaining leaves touch the water.
4. Provide the Right Environment:
Location: Place the container in a warm spot that receives bright, indirect sunlight. A windowsill that doesn’t get harsh direct sun is perfect. Avoid direct, intense sunlight, which can overheat the water and damage the cuttings.
Temperature: Basil cuttings prefer warm temperatures, ideally between 65-75°F (18-24°C).
5. Maintain and Monitor:
Change Water: This is a critical step! Change the water every 2-3 days to keep it fresh and oxygenated, preventing bacterial growth and root rot.
Observe Root Development: Within 7-14 days, you should start to see small white roots emerging from the submerged leaf nodes. The cuttings are generally considered ready to be transplanted when the roots are at least an inch long.
6. Transplanting:
Prepare Potting Mix: Use a well-draining potting mix. You can start with a seed-starting mix or a standard potting mix amended with perlite or sand for better drainage.
Planting: Gently transplant the rooted cuttings into small pots filled with the prepared potting mix. Bury the roots and the lower part of the stem that has developed roots.
Water In: Water thoroughly after planting to settle the soil around the roots.
Aftercare: Keep the newly potted cuttings in a bright location, but out of direct sun for the first few days. Mist them lightly or cover them with a plastic bag (with a few holes for ventilation) to maintain humidity until they establish themselves.
Method 2: Soil Propagation – Direct to Potting
While water propagation allows for easy observation, rooting directly in soil is also highly effective and can sometimes lead to less transplant shock.
Step-by-Step Guide:
1. Select and Prepare Cuttings: Follow the same steps as for water propagation to select and prepare your basil cuttings (healthy, non-flowering stems, cut below a node, lower leaves removed).
2. Optional: Use Rooting Hormone: While basil roots readily without it, a rooting hormone can sometimes speed up the process and increase success rates. Dip the cut end of the stem into a rooting hormone powder or gel. Tap off any excess.
3. Prepare Pots and Soil:
Pot Choice: Use small pots (3-4 inches) or seed trays with drainage holes.
Soil Mix: A good quality, well-draining potting mix is essential. You can use a seed-starting mix or a blend of potting soil, perlite, and a bit of compost. Moisten the soil so it’s damp but not waterlogged.
4. Plant the Cuttings:
Make an Opening: Use a pencil or your finger to create a small hole in the soil for each cutting. This prevents the rooting hormone (if used) from being rubbed off.
Insert Cuttings: Place the prepared cuttings into the holes, ensuring the leaf nodes are buried in the soil. Gently firm the soil around the stems.
5. Provide the Right Environment:
Location: Place the pots in a warm location with bright, indirect sunlight.
Humidity: This is crucial for soil propagation. You can create a mini-greenhouse effect by covering the pots with a clear plastic bag or a propagation dome. Ensure there are a few small holes for air circulation to prevent fungal diseases.
Temperature: Maintain warm temperatures (65-75°F or 18-24°C).
6. Watering and Care:
Initial Water: Water the soil gently after planting to ensure good contact between the soil and the cutting.
Maintain Moisture: Keep the soil consistently moist but not soggy. Check the moisture level by poking your finger about an inch into the soil. If it feels dry, water gently.
Ventilation: If using a plastic bag, open it for a few minutes each day to allow for air exchange.
7. Checking for Roots:
Gentle Tug Test: After 2-3 weeks, you can gently tug on a cutting. If you feel resistance, it means roots have begun to form.
Visual Cues: You might also see new leaf growth, which is a good indicator of successful rooting.
8. Transplanting (if started in trays): Once the cuttings have established a good root system and show signs of new growth, they can be transplanted into larger pots or directly into your garden beds, depending on the weather and your climate.
Scientific Perspective: The Magic of Nodes
Basil plants, like many other herbaceous plants, possess adventitious roots. These are roots that grow from non-root tissues, such as stems or leaves. The leaf nodes are packed with dormant buds and vascular tissues that are primed to develop into roots when provided with the right conditions: moisture, warmth, and darkness (or at least protection from drying out). The hormones present in the stem, particularly auxins, are stimulated at the node to initiate root cell development. This is why cutting below a node is so important – it’s the biological “launchpad” for new roots.
Practical Applications in the Garden
Succession Planting: Propagate basil every few weeks throughout the spring and summer. This ensures you have a continuous supply of young, tender plants as older ones start to flower and become less productive.
Replacing Bolting Plants: As soon as you notice your basil starting to send up a flower stalk (bolting), take cuttings from it. This not only gives you new plants but also redirects the parent plant’s energy back into leaf production, delaying bolting for a short while longer.
Creating a Dedicated Basil Pot: Dedicate a pot or a section of your garden solely for propagation. This makes it easy to manage your cuttings and have a ready supply of fresh basil.
Overwintering: In cooler climates, you can bring basil cuttings indoors to root and grow them as houseplants under lights, ensuring you have fresh basil even in winter.
Common Mistakes to Avoid
Using Woody or Old Stems: These are less vigorous and harder to root. Stick to younger, green stems.
Leaving Too Many Leaves: Overcrowding the cutting with leaves, especially submerged ones, leads to rot and fungal issues, preventing root formation.
Using Dirty Tools or Containers: This can introduce bacteria or fungi that will kill your cuttings. Always use clean equipment.
Overwatering or Underwatering Soil Cuttings: Too much water leads to rot; too little causes the cuttings to dry out before they can root. Aim for consistently moist, not soggy, soil.
Too Much Direct Sunlight: Young cuttings are delicate and can scorch easily. Bright, indirect light is best.
Not Changing Water: Stagnant water breeds bacteria, which can kill the cuttings. Frequent water changes are essential for water propagation.
Planting Too Deeply in Soil: Burying the leaves will also lead to rot. Ensure only the stem and nodes are in the soil.
Expert Tips or Pro Insights
The Pinching Technique: Once your propagated basil cuttings have been transplanted and are growing well, pinch back the top leaves. This encourages bushier growth, leading to more leaves to harvest and propagate.
Rooting Hormone Stimulus: For even faster results, after applying rooting hormone, you can gently wound the stem by making a very shallow slit lengthwise at the base of the cutting, before dipping in hormone. This exposes more cambium tissue, which is rich in the cells that can form roots.
Layering for a Different Approach: While less common for basil, you can also try layering. Bend a low-hanging stem down to the soil, nick the underside of the stem at a node, and bury that nicked section in the soil. Anchor the rest of the stem with a landscape staple or rock. The buried section will root, and you can then cut it from the parent plant.
Experiment with Varieties: Different basil varieties might root at slightly different rates. Experiment with Sweet Basil, Thai Basil, Lemon Basil, and Genovese Basil to see which ones you find easiest to propagate.
Seasonal or Climate Considerations
Spring and Summer are Ideal: Basil thrives in warm weather. Propagating during the peak growing season (late spring through summer) will yield the fastest and most successful results due to optimal temperatures and sunlight.
Indoors in Cooler Climates: If you live in a region with short summers or cold winters, you can successfully propagate basil indoors year-round. You may need grow lights to supplement natural light, especially during the darker months.
Transitioning Outdoors: When transplanting rooted cuttings outdoors, harden them off first. Gradually expose them to outdoor conditions over a week or two. Plant them out after the last frost date for your region.
FAQ Section for How to Propagate Basil Plant
Q1: How long does it take for basil cuttings to root?
A: Basil cuttings typically start showing roots within 7-14 days when kept in water under optimal conditions. Rooting in soil might take a bit longer, usually 2-3 weeks for significant root development.
Q2: Can I propagate basil from a single leaf?
A: While some herbs can be propagated from a single leaf, basil generally requires a stem segment with at least one leaf node to successfully root. A single leaf without a node is unlikely to develop roots.
Q3: My basil cuttings are rotting. What am I doing wrong?
A: Rotting usually occurs due to stagnant water, too many leaves submerged in water, or overly wet soil that lacks aeration. Ensure you change the water frequently, remove lower leaves, and use well-draining soil for soil propagation.
Q4: When is the best time of day to take basil cuttings?
A: It’s generally best to take cuttings in the morning after the dew has dried but before the heat of the day sets in. This is when the plant is most hydrated and less stressed.
Q5: Can I plant rooted basil cuttings directly into the garden?
A: Yes, once your cuttings have developed a strong root system (at least an inch long) and your last frost date has passed, you can transplant them directly into your garden beds, provided the soil is warm and well-prepared. Remember to harden them off first.
Conclusion for How to Propagate Basil Plant
Mastering how to propagate basil plant from cuttings is one of the most rewarding skills a gardener can acquire. It’s a simple, efficient, and incredibly effective way to ensure a continuous supply of this beloved herb, transforming a single plant into a lush, fragrant abundance. By following these detailed steps, understanding the science behind root development, and avoiding common pitfalls, you can confidently create healthy new basil plants, extend your harvest, and share the joy of gardening with others. So, grab your scissors, find a healthy basil plant, and start propagating – your taste buds will thank you for it.

