
Absolutely! Here’s a comprehensive blog post structured around the keyword “how to plant a basil seed,” designed to be SEO-optimized, informative, and engaging for gardeners of all levels.
—
How to Plant a Basil Seed: Your Guide to a Bountiful and Fragrant Harvest
Are you dreaming of fresh, aromatic basil gracing your kitchen, ready to elevate your pasta dishes, salads, and pesto? The journey from a tiny speck to a lush, leafy plant is incredibly rewarding, but sometimes, the first step – planting the seed – can feel a little daunting. This guide will demystify the process, ensuring you can confidently plant a basil seed and achieve stunning, fragrant results. Understanding how to plant a basil seed correctly is fundamental to unlocking the plant’s full potential, leading to healthier growth, robust flavor, and a more productive harvest.
Quick Answer Box
Planting a basil seed is straightforward and highly rewarding. To plant a basil seed successfully, sow seeds about 1/4 inch deep in well-draining soil, keeping them consistently moist and warm (ideally 70-80°F). Provide ample sunlight, and you’ll see germination within 5-10 days, leading to vibrant basil plants ready for your culinary adventures.
What is Planting a Basil Seed and Why It’s Important in Gardening
“Planting a basil seed” refers to the process of sowing the small seeds of the Ocimum basilicum plant into a suitable growing medium with the intention of germination and subsequent growth into a mature basil plant. This foundational step is crucial for several reasons: it’s the genesis of your basil crop, directly influencing the health, vigor, and ultimate yield of your plants. Proper seed starting techniques ensure that the delicate seedlings receive the optimal conditions to emerge strong, establishing a robust root system that will support them throughout their life cycle. Getting this right means healthier plants, better pest and disease resistance, and ultimately, a more abundant and flavorful harvest for your kitchen.
Quick Recommendations or Key Insights about Planting a Basil Seed
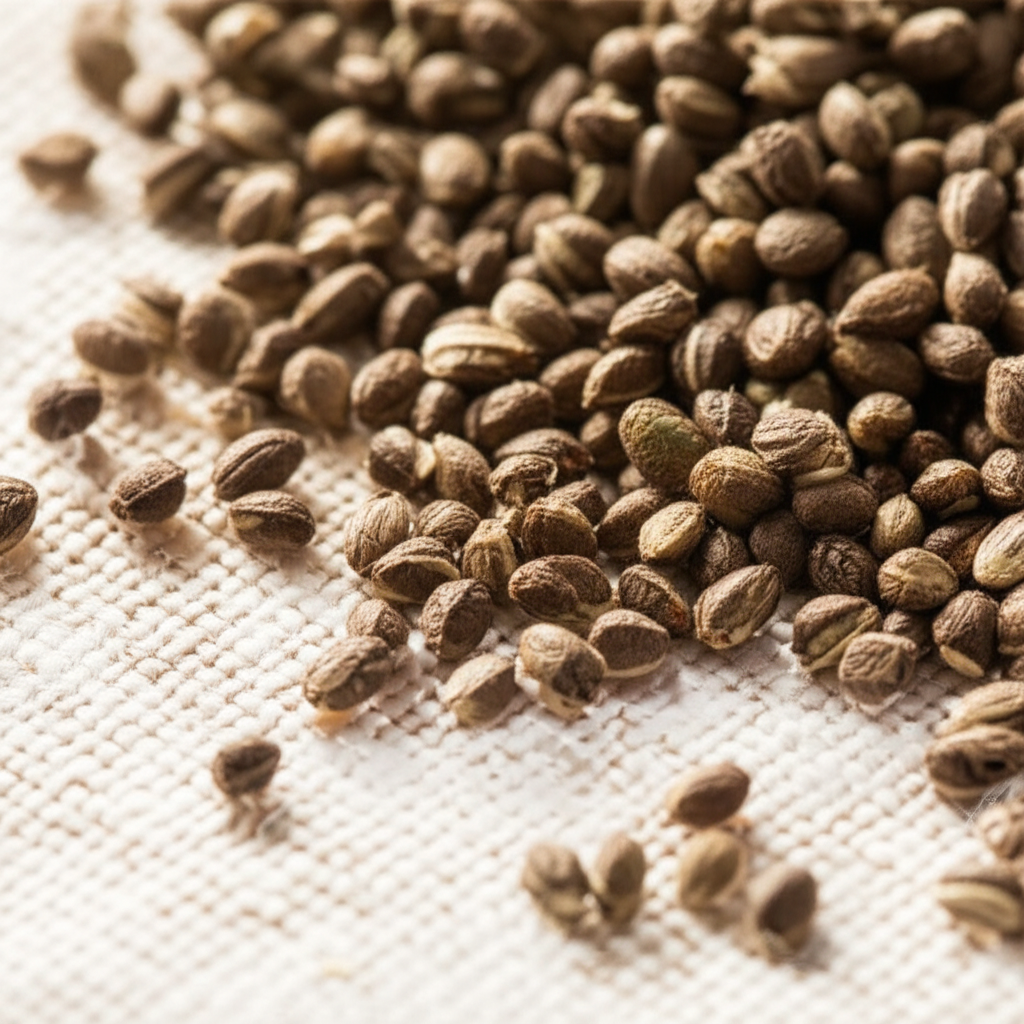
Seed Quality Matters: Start with fresh, viable basil seeds from a reputable supplier for the best germination rates.
Warmth is Key: Basil seeds germinate best in warm soil, around 70-80°F (21-27°C).
Moisture, Not Muck: Keep the soil consistently moist but never waterlogged to prevent rot.
Light After Sprouting: Once seedlings emerge, they need plenty of bright, direct sunlight.
Don’t Sow Too Deep: Basil seeds are small and need light to germinate, so a shallow planting depth is vital.
Patience Pays Off: Germination can take anywhere from 5 to 10 days, sometimes longer, so resist the urge to overwater or disturb the soil.
Thinning is Crucial: Once seedlings have a couple of true leaves, thin them to prevent overcrowding.
Detailed Breakdown of How to Plant a Basil Seed
Let’s delve into the essential steps to ensure your basil seeds thrive from the very beginning.
1. Choosing Your Basil Variety
Before you even think about planting, consider the vast world of basil! There are dozens of varieties, each with unique flavors, aromas, and growth habits. Some popular choices include:
Genovese Basil (Ocimum basilicum ‘Genovese’): The classic pesto basil, known for its large, crinkled leaves and sweet, slightly peppery flavor.
Sweet Basil (Ocimum basilicum ‘Sweet’): A widely available and versatile variety, similar to Genovese but often with smoother leaves.
Thai Basil (Ocimum basilicum ‘Thai’): Features a distinctive anise-like flavor with notes of licorice, perfect for Asian cuisine.
Lemon Basil (Ocimum basilicum ‘Lemon’): Offers a bright, citrusy aroma and flavor, ideal for seafood and desserts.
Purple Basil (Ocimum basilicum ‘Purpurascens’): Adds a beautiful color to the garden and a milder, clove-like flavor.
Choosing a variety that suits your culinary preferences and growing conditions is the first step to a successful basil crop.
2. Gathering Your Supplies
To plant basil seeds, you’ll need a few essential items:
Basil Seeds: Fresh seeds from a reputable source.
Seed Starting Mix or Potting Soil: A light, well-draining mix is crucial. Avoid heavy garden soil for starting seeds indoors.
Seed Starting Trays, Small Pots, or Containers: Choose containers with drainage holes. Biodegradable pots are excellent as they can be planted directly into the ground.
Watering Can with a Fine Rose or Spray Bottle: For gentle watering.
Labels and Marker: To identify your basil varieties.
Optional: Seedling Heat Mat: To maintain optimal germination temperatures.
Optional: Grow Lights: If you’re starting seeds indoors and don’t have a sunny windowsill.
3. Preparing Your Seed Starting Medium
The right soil provides the foundation for healthy seedling growth.
Seed Starting Mix: This is typically a sterile, lightweight blend of peat moss, perlite, and vermiculite. It’s designed for excellent drainage and aeration, preventing damping-off disease, a common problem for seedlings.
Moistening the Mix: Before filling your containers, lightly moisten the seed starting mix. It should be damp, like a wrung-out sponge, not soggy. You can do this in a separate bucket or by gradually adding water to the mix in its bag.
Filling Containers: Fill your seed trays or pots with the moistened mix, leaving about 1/2 inch of space at the top. Gently firm the soil, but don’t compact it heavily.
4. Sowing the Basil Seeds
This is the moment of truth! Basil seeds are tiny, so a delicate touch is required.
Depth: Basil seeds should be planted about 1/4 inch (6 mm) deep. You can create small divots with your finger or a pencil, or simply sprinkle the seeds on the surface and gently press them in with the soil.
Spacing: For individual pots or trays, sow 2-3 seeds per pot or cell. If sowing in a larger container or garden bed, space them about 1-2 inches apart. You’ll thin them later if multiple seeds germinate in the same spot.
Covering: Gently cover the seeds with a thin layer of the seed starting mix.
Watering: Lightly mist the surface with water using a spray bottle or a watering can with a fine rose attachment. The goal is to settle the soil around the seeds without dislodging them.
5. Providing the Right Germination Conditions
Temperature and moisture are critical for basil seed germination.
Temperature: Basil seeds germinate best in soil temperatures between 70-80°F (21-27°C). A seedling heat mat is ideal for maintaining this consistent warmth, especially if your home is cooler. Placing the trays in a warm spot, like on top of a refrigerator, can also help.
Moisture: Keep the soil consistently moist. A light misting every day or two might be necessary, depending on your environment. Covering the seed tray with a clear plastic dome or plastic wrap helps retain humidity, creating a mini-greenhouse effect. Ensure there’s some ventilation to prevent mold.
Light: Basil seeds do not require light to germinate. In fact, it’s often better to keep them in a slightly shaded area until they sprout.
6. Post-Germination Care: Light and Air
Once you see tiny green shoots emerging (typically 5-10 days), it’s time to adjust the conditions.
Remove Coverings: As soon as you see seedlings, remove any plastic coverings to improve air circulation and prevent fungal diseases.
Light: Basil seedlings need plenty of bright light to grow strong and prevent them from becoming leggy. If you’re using a windowsill, ensure it gets at least 6-8 hours of direct sunlight per day. If natural light is insufficient, use grow lights, positioning them about 2-4 inches above the seedlings and keeping them on for 14-16 hours a day.
Watering: Continue to keep the soil consistently moist, but avoid overwatering. Water from the bottom if possible by placing the trays in a shallow pan of water for 15-30 minutes, allowing the soil to wick up moisture. This encourages stronger root development.
Temperature: While warmth is good for germination, slightly cooler temperatures (around 65-70°F or 18-21°C) are fine once seedlings have emerged.
7. Thinning Your Seedlings
This is a crucial step for robust plant growth.
Why Thin? If you sowed multiple seeds per pot or cell, you’ll likely have more than one seedling. Overcrowding leads to competition for light, water, and nutrients, resulting in weak, spindly plants.
When to Thin: Thin when the seedlings have developed their first set of “true leaves” – the leaves that look like mature basil leaves, not the initial rounded cotyledons.
How to Thin: The easiest method is to use small scissors to snip off the weaker seedlings at the soil line. This avoids disturbing the roots of the stronger seedling. Alternatively, you can gently pull out the weaker seedlings, but be very careful not to disturb the roots of the one you want to keep. Aim for one strong seedling per pot or cell.
8. Transplanting Seedlings (If Necessary)
If you started seeds in small cells or trays and they are outgrowing their space, or if you want to move them to larger pots before planting outdoors, transplanting is necessary.
When to Transplant: Transplant when seedlings have several sets of true leaves and have developed a good root system (you might see roots emerging from the drainage holes).
Hardening Off: Before moving seedlings outdoors, they need to be “hardened off.” This process gradually acclimates them to outdoor conditions (sunlight, wind, temperature fluctuations). Start by placing them in a sheltered spot outdoors for a few hours each day for about a week, gradually increasing the time and exposure.
Transplanting: Gently remove the seedling from its container, disturbing the roots as little as possible. If transplanting into a larger pot, use a slightly larger container filled with good quality potting soil. If planting directly into the garden, ensure all danger of frost has passed and the soil has warmed up. Plant the seedling at the same depth it was growing, or slightly deeper if it’s a bit leggy.
Practical Applications in the Garden
Mastering how to plant a basil seed opens up a world of culinary possibilities right in your backyard or on your windowsill.
Kitchen Garden Staple: Grow basil in pots near your kitchen door for easy access. A few well-placed pots of various basil varieties can provide a constant supply for your cooking.
Container Gardening: Basil thrives in containers. Whether on a patio, balcony, or windowsill, ensure the pot has good drainage and receives at least 6 hours of sunlight daily.
Companion Planting: Basil is an excellent companion plant for tomatoes, peppers, and strawberries. It’s believed to deter pests like tomato hornworms and flies, and some gardeners swear it improves the flavor of neighboring plants.
Succession Planting: For a continuous harvest throughout the growing season, sow basil seeds every 3-4 weeks. This ensures you always have young, tender leaves available.
Indoor Growing: With adequate light (grow lights are often necessary), you can grow basil indoors year-round, bringing that fresh flavor to your table even in winter.
Common Mistakes to Avoid
Even with simple steps, a few common pitfalls can hinder basil seed success.
Overwatering: This is the most common mistake, leading to root rot and damping-off disease. Ensure good drainage and allow the soil surface to dry slightly between waterings.
Underwatering: Conversely, letting the soil dry out completely can kill delicate seedlings. Consistent moisture is key.
Planting Too Deep: Basil seeds need some light to germinate and are very small. Planting them too deep means they won’t have the energy to reach the surface.
Insufficient Light After Germination: Leggy, weak seedlings are a direct result of not enough light once they’ve sprouted.
Too Cold Temperatures: Basil is a heat-loving plant. Germinating or growing seedlings in cold conditions will stunt their growth or kill them.
Crowding: Not thinning seedlings leads to weak, unproductive plants that are more susceptible to disease.
Transplanting Too Early: Moving seedlings outdoors before the last frost or before they are hardened off can be fatal.
Expert Tips or Pro Insights
Seasoned gardeners often have a few tricks up their sleeves for maximizing basil seed success.
“Scarifying” Tough Seeds: While not usually necessary for basil, some gardeners lightly nick or rub tougher seeds with sandpaper to encourage germination. This is rarely needed for common basil varieties.
Using a Clear Dome: A clear plastic dome or even a piece of plastic wrap over your seed tray creates a humid environment that dramatically speeds up germination. Just remember to ventilate it once seedlings appear.
The “Paper Towel” Method: For a quick germination check, place a few basil seeds between two damp paper towels, put them in a plastic bag or between two plates, and keep them in a warm place. You can then transfer germinated seeds (sprouts) to your soil.
Don’t Fertilize Too Early: Seed starting mixes usually contain enough nutrients for the initial growth. Wait until your seedlings have developed a few sets of true leaves before considering a very diluted liquid fertilizer.
Pinching for Bushiness: Once your seedlings are a few inches tall and have several sets of true leaves, pinch off the very top set of leaves. This encourages the plant to branch out, resulting in a bushier, more productive plant.
Seasonal or Climate Considerations
Basil is a warm-season herb, making its planting and growth heavily influenced by your local climate.
Spring Planting (Indoors): Start basil seeds indoors 4-6 weeks before your last expected frost date. This gives you a head start and protects young seedlings from cold weather.
Spring/Summer Planting (Outdoors): Once all danger of frost has passed and the soil has warmed to at least 60°F (15°C), you can sow basil seeds directly into the garden or transplant your hardened-off seedlings. Basil loves heat and will thrive in full sun.
Fall Harvest: In cooler climates, basil will stop producing as temperatures drop and will be killed by the first frost. To extend your harvest, you can bring potted basil plants indoors before the first frost.
Climate Zones: Basil is typically grown as an annual in most temperate climates (Zones 3-10). In frost-free regions (Zones 10-11), it can sometimes overwinter or even grow as a perennial, though it often becomes woody and less productive over time.
Buying Guide or Decision-Making Process
When purchasing basil seeds, consider these factors:
Freshness: Check the “packed for” or expiration date on seed packets. Older seeds have lower germination rates. Buy from reputable garden centers or online seed suppliers.
Variety: As discussed, choose a variety based on your culinary preferences and desired growth habit.
Organic vs. Conventional: If you prefer to grow organically, look for certified organic seeds.
Heirloom vs. Hybrid: Heirloom varieties are open-pollinated and have been passed down through generations, often offering unique flavors and colors. Hybrid varieties are bred for specific traits like disease resistance or uniform growth.
* Quantity: Seed packets vary in the number of seeds. Consider how many plants you want to grow and whether you plan for succession planting.
FAQ Section for How to Plant a Basil Seed
Q1: How long does it take for basil seeds to sprout?
A: Basil seeds typically germinate in 5 to 10 days when kept consistently warm (70-80°F) and moist.
Q2: Can I plant basil seeds directly in the garden?
A: Yes, you can plant basil seeds directly into the garden, but only after the danger of frost has passed and the soil has warmed to at least 60°F. For a head start, it’s often better to start them indoors.
Q3: Why are my basil seeds not germinating?
A: Common reasons for poor germination include old seeds, insufficient warmth, soil that is too dry or too wet, or planting the seeds too deep.
Q4: How many basil seeds should I plant per pot?
A: It’s recommended to plant 2-3 basil seeds per pot or cell. Once they sprout and develop true leaves, thin them to the strongest single seedling.
Q5: Do basil seeds need light to germinate?
A: No, basil seeds do not require light to germinate. They should be planted about 1/4 inch deep and kept moist and warm.
Q6: Can I use regular potting soil to start basil seeds?
A: While you can use regular potting soil, a specialized seed starting mix is highly recommended as it’s lighter, sterile, and provides better aeration and drainage, reducing the risk of seedling diseases.
Conclusion
Successfully learning how to plant a basil seed is a gateway to enjoying the vibrant flavors and intoxicating aromas of this beloved herb throughout the season. By providing the right warmth, moisture, and light, and by paying attention to crucial steps like thinning and hardening off, you can transform tiny seeds into a flourishing basil patch. Embrace the process, experiment with different varieties, and get ready to harvest your own fresh basil for an endless array of culinary delights. Your taste buds will thank you for the effort, and your garden will be all the more fragrant for it.
—

