
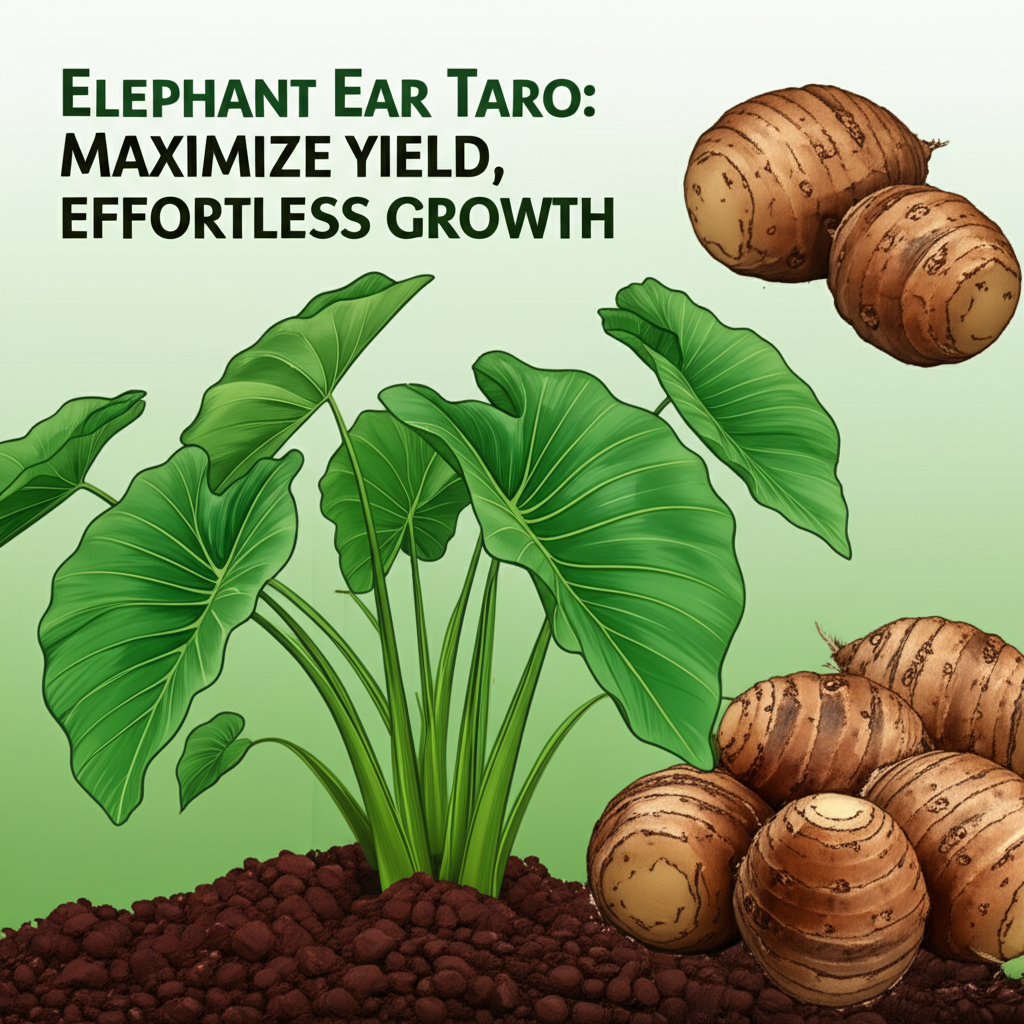
How to Maximize the Yield of Your Elephant Ear Taro: From Bulb to Bounty
Ever gazed at a magnificent Elephant Ear Taro (Colocasia esculenta) and wondered how to coax even more impressive growth and a more abundant harvest from this tropical beauty? If you’re striving for larger leaves, more robust growth, and ultimately, a more generous yield of its edible tubers, you’ve landed in the right place. Understanding the specific needs of this fascinating plant is key to unlocking its full potential, transforming your garden into a haven of lush foliage and delicious rewards.
Quick Answer Box
To maximize the yield of your Elephant Ear Taro, focus on providing consistent moisture, rich and well-draining soil, ample sunlight, and adequate nutrients. Proper spacing and timely harvesting of tubers will further enhance your harvest.
What is Elephant Ear Taro and Why It’s Important in Gardening
Elephant Ear Taro, scientifically known as Colocasia esculenta, is a tropical perennial plant celebrated for its dramatic, oversized leaves that can reach several feet in length and width, resembling the ears of an elephant. While widely admired for its ornamental value, particularly in water gardens or as a striking focal point, the taro plant is also a crucial food source in many tropical and subtropical regions worldwide. Its starchy tubers, when properly prepared, are a staple carbohydrate, rich in vitamins and minerals. In gardening, understanding how to maximize its yield means not only appreciating its aesthetic appeal but also potentially harvesting a significant food crop, contributing to self-sufficiency and a unique addition to your culinary repertoire.
Quick Recommendations or Key Insights about Maximizing Elephant Ear Taro Yield
Water is Life: Taro thrives in consistently moist conditions, mimicking its native boggy environments.
Feed the Beast: These plants are heavy feeders, requiring nutrient-rich soil and regular fertilization.
Sunlight Savvy: Aim for at least 6-8 hours of direct sunlight daily for optimal growth and tuber development.
Drainage is Key: While loving moisture, taro hates “wet feet” that can lead to root rot. Ensure excellent drainage.
Space it Out: Give your taro plants ample room to spread their leaves and develop their underground tubers.
Harvest Wisely: Timing your tuber harvest is crucial for maximizing size and quantity.
Detailed Breakdown: Cultivating a Bountiful Elephant Ear Taro Harvest
Understanding the Taro’s Growth Cycle and Needs
To maximize yield, it’s essential to understand the life cycle of Colocasia esculenta. This tropical plant typically grows from corms (often referred to as bulbs or tubers) that, under ideal conditions, will produce multiple daughter corms and a larger main corm. The large, heart-shaped leaves are the plant’s primary energy producers through photosynthesis, fueling the development of these subterranean tubers. Maximizing yield is therefore directly linked to promoting vigorous leaf growth and ensuring the plant has the resources to convert sunlight into stored energy in the tubers.
The Science Behind Bigger Taro Tubers: Botany and Biology
The growth and size of taro tubers are influenced by several botanical factors:
Photosynthesis: The larger and healthier the leaves, the more sugars are produced through photosynthesis. These sugars are then transported to the developing tubers, where they are stored as starch, leading to larger and more numerous tubers.
Corm Development: A taro plant starts from a single corm. As it grows, it produces lateral buds that develop into new corms (daughter corms) attached to the parent corm. These daughter corms can mature into substantial tubers themselves, contributing to the overall yield.
Nutrient Uptake: The plant’s root system, primarily focused on absorbing water and nutrients from the soil, directly impacts tuber development. A healthy root system is crucial for efficient nutrient and water supply to the entire plant.
Environmental Signals: Temperature, water availability, and photoperiod (daylight hours) all act as environmental signals that can influence the plant’s growth phase, encouraging vegetative growth (leaves) or reproductive growth (tuber formation). For Colocasia esculenta, warm temperatures and consistent moisture signal an extended growing season, ideal for tuber enlargement.
Practical Applications in the Garden: Setting the Stage for Success
1. Site Selection: The Foundation of Yield
Sunlight: Choose a location that receives at least 6-8 hours of direct sunlight per day. While taro can tolerate partial shade, full sun exposure generally leads to more vigorous growth and larger tubers.
Moisture: Taro is a water-loving plant, native to swampy areas. It thrives in consistently moist soil. Ideal locations include the edges of ponds, streams, or areas that naturally retain moisture. If your soil drains too quickly, consider amending it or planting in containers.
Wind Protection: The large leaves of taro can be susceptible to wind damage. Planting in a sheltered spot or providing windbreaks can help protect the foliage, ensuring maximum photosynthetic activity.
2. Soil Preparation: The Nutrient-Rich Bed
Rich Organic Matter: Taro is a heavy feeder. Incorporate generous amounts of compost, well-rotted manure, or other organic matter into the soil before planting. This not only provides essential nutrients but also improves soil structure and water retention.
Drainage: This might seem contradictory to its love for moisture, but taro needs well-draining soil. Waterlogged conditions can lead to root rot. If planting in heavy clay soil, consider raised beds or adding perlite or coarse sand to improve drainage. A loamy, fertile soil is ideal.
pH Level: Taro prefers slightly acidic to neutral soil, with a pH range of 5.5 to 7.0. You can test your soil pH and amend it if necessary.
3. Planting the Corms: Getting Started
Source Quality Corms: Start with healthy, firm corms. Look for corms that have visible “eyes” or buds, indicating they are ready to sprout.
Planting Depth and Spacing: Plant corms about 4-6 inches deep, with the growing points (eyes) facing upwards. Spacing is crucial for maximizing tuber yield. Give each plant at least 2-3 feet of space, especially if you are growing for the tubers. Overcrowding will lead to smaller, less developed tubers.
Container Gardening: If space is limited or your soil isn’t ideal, taro can be grown successfully in large containers (at least 10-15 gallons). Ensure the container has drainage holes and is filled with a rich, well-draining potting mix.
4. Watering: The Consistent Flow
Keep it Moist, Not Soaked: The most critical factor for taro yield is consistent moisture. Aim to keep the soil consistently damp, like a wrung-out sponge. Water regularly, especially during dry spells.
Watering Methods: Drip irrigation or soaker hoses are excellent for maintaining consistent moisture levels without waterlogging. If watering by hand, ensure you water thoroughly at the base of the plant.
Water Features: Taro is one of the few garden plants that can thrive in shallow water, such as at the edge of ponds or in bog gardens. The water level should ideally not exceed a few inches around the base of the plant.
5. Fertilization: Fueling the Growth
Heavy Feeders: Taro plants are hungry! They benefit from regular feeding throughout the growing season.
Balanced Fertilizer: Use a balanced, slow-release fertilizer (e.g., 10-10-10) at planting.
Nitrogen Boost: As the plant establishes and begins producing large leaves, supplement with a nitrogen-rich fertilizer to encourage lush foliage growth, which in turn fuels tuber development. A side-dressing of compost or a liquid fertilizer high in nitrogen can be applied every 4-6 weeks.
Potassium for Tubers: As the growing season progresses, a fertilizer with higher potassium content can be beneficial for tuber development.
6. Mulching: Conserving Moisture and Suppressing Weeds
Benefits of Mulch: Apply a thick layer of organic mulch (such as straw, shredded bark, or compost) around the base of your taro plants. This helps to retain soil moisture, suppress weed growth (which compete for nutrients and water), and regulate soil temperature.
7. Hilling (Optional but Beneficial): Encouraging Tuber Growth
What is Hilling? As the plant grows and develops tubers, you can gently hill soil or compost around the base of the plant. This encourages more tubers to form along the underground stems and can help protect developing tubers from frost if you are in a marginal climate.
Common Mistakes to Avoid for Maximum Taro Yield
Underwatering: This is perhaps the most common mistake. Dry soil severely stunts growth and reduces tuber size and quantity.
Overwatering/Poor Drainage: While taro loves moisture, stagnant, waterlogged soil will cause the corms to rot, leading to plant death and no yield.
Insufficient Sunlight: Planting in deep shade will result in leggy growth and significantly smaller tubers.
Overcrowding: Planting taro too closely together means plants compete for light, water, and nutrients, leading to a reduced yield per plant.
Inadequate Fertilization: Taro is a heavy feeder. Without enough nutrients, it cannot produce the large leaves needed for robust tuber development.
Ignoring Pests and Diseases: While relatively hardy, taro can be susceptible to some pests (like aphids or spider mites) and diseases. Regular inspection and prompt treatment are essential.
Expert Tips or Pro Insights for Advanced Taro Cultivation
“Chitting” Your Corms: For an earlier start, you can “chit” your corms indoors a few weeks before the last frost. Place them in a shallow tray with moist potting mix or even just damp paper towels in a warm, bright location. This encourages sprouting and gives your plants a head start.
Mimicking Tropical Conditions: If you live in a cooler climate, consider growing taro in containers that can be moved to a protected, warm location (like a greenhouse or sunny porch) during cooler periods.
Hydroponic Taro: For the most controlled environment, advanced gardeners can explore hydroponic systems specifically designed for taro. This requires precise nutrient delivery and water management but can lead to very impressive yields.
Soil Temperature: Taro corms will not sprout in cold soil. Ensure the soil temperature is consistently above 60-65°F (15-18°C) before planting outdoors.
Harvesting “Baby” Taro: For a different culinary experience and to encourage further growth from the main corm, you can carefully dig around the base of the plant and harvest some of the smaller, developing tubers while the plant is still actively growing. Be gentle to avoid damaging the main corm.
Seasonal or Climate Considerations
Tropical and Subtropical Climates: In regions with long, warm growing seasons and high humidity, taro can thrive with minimal intervention beyond consistent watering and feeding. Harvest can typically occur 8-12 months after planting, depending on the variety and growing conditions.
Temperate Climates: In areas with shorter growing seasons and frost, taro can be grown as an annual. Plant after the last frost when the soil has warmed. For the best tuber development, aim for the longest possible frost-free period. If a light frost is expected, you can cover the plants with frost cloth or mulch heavily to protect them. In these climates, it’s common to harvest the tubers before the first hard freeze.
Winter Care: If you are in a zone where taro can overwinter, you can either leave the corms in the ground (with heavy mulching for protection) or dig them up, cure them, and store them in a cool, dry, frost-free place for replanting the following spring.
Buying Guide: Selecting the Best Taro Corms
When purchasing taro corms for planting, keep these factors in mind:
Firmness: Choose corms that are firm and free from soft spots, mold, or excessive damage.
“Eyes” or Sprouts: Look for corms with visible buds or small sprouts. These indicate the corm is viable and ready to grow.
Size: While larger corms might seem more appealing, even smaller ones can produce a robust plant if they are healthy.
Variety: Different varieties of taro exist, some bred for ornamental value and others for tuber size and flavor. Research varieties suited to your climate and desired outcome. If growing for tubers, look for varieties specifically known for good tuber production.
* Source: Purchase from reputable nurseries or seed suppliers to ensure you are getting disease-free planting material.
FAQ Section for Maximizing Elephant Ear Taro Yield
Q1: How long does it take for taro tubers to mature?
A1: The time to maturity for taro tubers can vary significantly depending on the variety, growing conditions, and climate, but typically ranges from 8 to 12 months in ideal tropical conditions. In temperate climates grown as an annual, you’ll aim for the longest possible frost-free period.
Q2: Can I grow taro in pots to maximize yield?
A2: Yes, taro can be grown successfully in large pots. Ensure the pot is at least 10-15 gallons, has good drainage, and is filled with rich, moist potting mix. Regular watering and feeding are crucial for good tuber development in containers.
Q3: What are the best companion plants for taro?
A3: Taro generally prefers to be grown on its own due to its substantial size and specific needs. However, in water garden settings, aquatic plants that tolerate similar moisture levels can be complementary. Avoid planting it too close to smaller, less vigorous plants that might be overshadowed.
Q4: How do I know when my taro tubers are ready to harvest?
A4: The leaves may begin to yellow and die back as the plant approaches maturity, signaling that the tubers are ready. You can also gently probe the soil around the base to check the size of the tubers. Harvesting is typically done before the first hard frost in cooler climates, or after 8-12 months in warmer regions.
Q5: My taro leaves are yellowing, but it’s not time to harvest. What could be wrong?
A5: Yellowing leaves can indicate several issues, including underwatering, nutrient deficiency (especially nitrogen), or root rot from overwatering. Inspect the soil moisture and consider a balanced fertilizer application if the soil is adequately moist.
Conclusion for How to Maximize the Yield of Your Elephant Ear Taro
By understanding and catering to the specific needs of Elephant Ear Taro – its insatiable thirst for consistent moisture, its demand for nutrient-rich soil, and its love for ample sunlight – you can transform this striking plant from a beautiful ornamental to a productive garden asset. Prioritizing rich soil, diligent watering, regular feeding, and adequate spacing are the cornerstones of maximizing tuber yield. By avoiding common pitfalls like inconsistent watering or overcrowding, and by implementing expert tips, you are well on your way to enjoying a bountiful harvest of delicious taro tubers, proving that with the right knowledge and care, your Elephant Ear Taro can indeed be a source of both aesthetic delight and culinary reward.
.

