
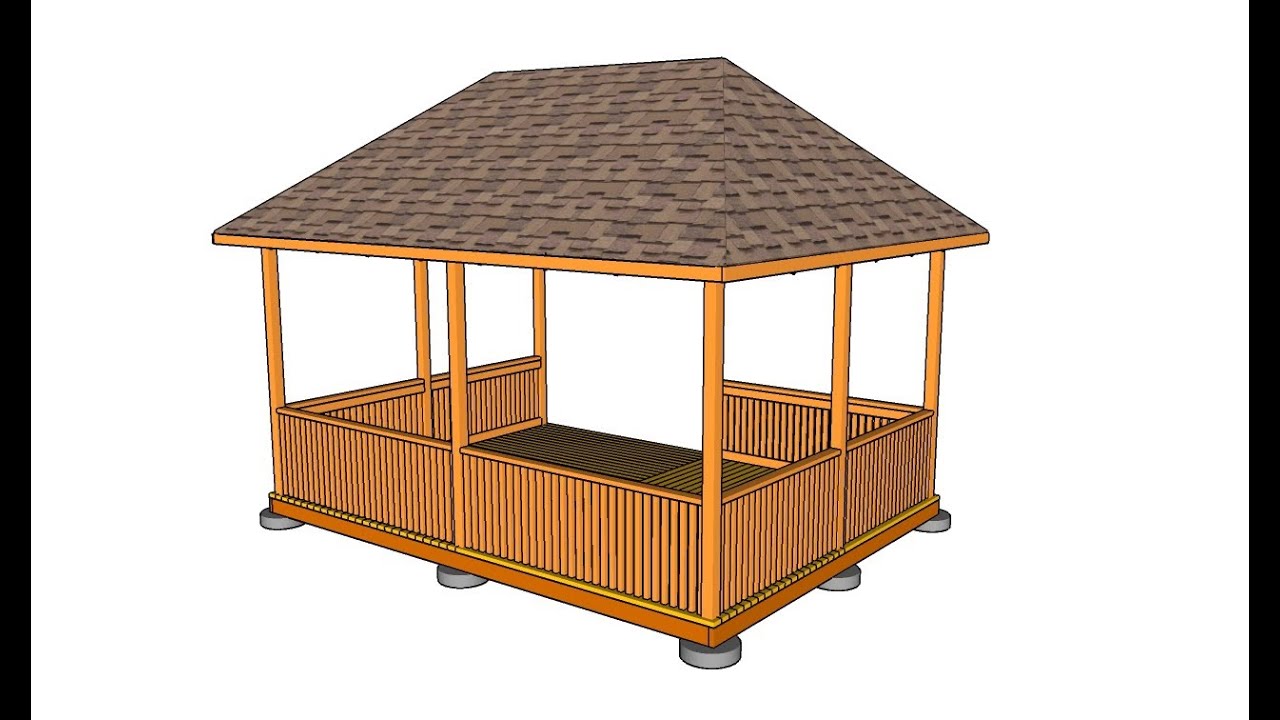
Building a rectangular gazebo is a great way to add an outdoor living space to your home. Gazebos are relatively easy to build and can be made from a variety of materials, including wood, metal, or even concrete. The first step in building a rectangular gazebo is to determine the size and location of the gazebo.
Once you have decided on the size and location, you will need to prepare the site by leveling the ground and adding gravel for drainage. Next, you will need to build the foundation and floor of the gazebo using pressure-treated lumber. Once the floor is complete, you can begin adding the walls and roof of your gazebo.
When choosing materials for the walls and roof, make sure to select materials that will withstand weathering and wind damage.
- Start by measuring and marking out the location for your gazebo
- You will need to excavate the area to a depth of about 6 inches
- Next, install a layer of gravel in the excavation and compact it down with a tamper
- This will provide drainage for your gazebo foundation
- Now you can begin to lay the blocks for your foundation walls
- Start with the corners and work your way inward, using mortar between each block to adhere them together
- Once the foundation walls are complete, you can begin working on the flooring system for your gazebo
- A popular option is to use decking boards laid over joists supported by 4×4 posts set into concrete footings
- Finish off your gazebo roof by installing shingles or another type of roofing material
Credit: www.youtube.com
Is It Cheaper to Build Your Own Gazebo?
The cost of building a gazebo can vary widely depending on the materials you use, the size and complexity of the design, and whether you build it yourself or hire someone to do it for you. In general, though, it is usually cheaper to build your own gazebo than to buy one ready-made. The biggest expense when building a gazebo is usually the materials; depending on what kind of wood or other materials you use, the cost can range from several hundred dollars to several thousand.
But even if you spend a little more on materials, you’ll still save money overall by doing the work yourself. And, of course, the satisfaction of knowing you built your own gazebo is priceless!
How Do You Build a Gazebo Step by Step?
Building a gazebo from scratch might seem like a daunting task, but with careful planning and execution it can be a fun and rewarding experience. Here are some tips to help you get started:
1. Choose the location for your gazebo carefully.
You’ll want to pick a spot that’s level, has good drainage, and is far enough away from trees or other structures that could potentially damage it.
2. Decide on the size and shape of your gazebo. Will it be octagonal, square, or something else?
How big do you want it to be? Keep in mind that bigger isn’t always better – a smaller gazebo can actually be more intimate and inviting.
3. Once you have the basic layout planned out, start mapping out where each post will go.
4×4 pressure-treated lumber is typically used for the posts, so keep that in mind when determining their placement. You’ll also need to factor in the size of any railings or steps you plan on adding.
4. With the posts marked, start digging holes for them using a power auger (renting one is usually cheaper than buying one).
The holes should be about 2 feet deep and 10 inches in diameter.
5. To help set the posts in place, mix up some quick-setting concrete and pour it into the bottom of each hole before inserting the posts themselves. Make sure they’re level as you go!
Can a Gazebo Be Rectangular?
Yes, a gazebo can be rectangular. In fact, many gazebos are rectangular in shape. A rectangular gazebo typically has a slightly higher roofline than a square or round gazebo, which gives it a more dramatic look.
Rectangular gazebos also tend to offer more floor space than other shapes, making them ideal for entertaining or for simply enjoying your backyard space.
What Wood Do You Use to Build a Gazebo?
There are a few different types of wood that can be used to build a gazebo. The most common type of wood used is pressure-treated lumber, which is treated with chemicals to resist rot and pests. Other woods that can be used include cedar and redwood, which are naturally resistant to rot and pests.
If you want a more decorative look for your gazebo, you could use mahogany or teak.
Rectangular Gazebo Plans
Free Gazebo Plans Pdf
If you’re looking for free gazebo plans, look no further! We’ve compiled a list of the best free plans available, so you can get started on building your own gazebo.
The first step in any project is to gather the right materials and tools.
For a gazebo, you’ll need lumber, posts, beams, rafters, and shingles. You’ll also need a hammer, saw, drill, screws, and nails. Once you have everything you need, it’s time to start building!
Building a gazebo can seem like a daunting task, but with our step-by-step instructions and detailed illustrations, it’s easy! We’ll walk you through every step of the process from start to finish. And when you’re done creating your masterpiece, be sure to invite all your friends over for a party – they won’t believe how beautiful your new gazebo is!
Free 12X12 Square Gazebo Plans
If you’re looking for free 12×12 square gazebo plans, you’ve come to the right place. I’ve put together a collection of resources that will help you get started on your project.
The first thing you’ll need to do is decide what type of material you want to use for your gazebo.
There are a variety of options available, including wood, metal, and vinyl. Each has its own set of pros and cons, so it’s important to do some research before making a decision.
Once you’ve chosen a material, it’s time to start planning the design of your gazebo.
There are a few things to keep in mind as you sketch out your plans:
– The size and shape of your gazebo will be determined by the amount of space you have available in your yard. Make sure to measure the area before beginning any construction.
– It’s important to consider the climate in your area when choosing a design. If you live in an area with harsh winters, for example, you’ll need to make sure that your gazebo is properly insulated against the cold weather.
– Don’t forget about aesthetics!
The appearance of your gazebo should complement the overall look of your home and property. Spend some time browsing through pictures online or in magazines for inspiration.
How to Build a Gazebo
If you’re looking to add a gazebo to your backyard, there are a few things you need to keep in mind. Here’s how to build a gazebo the right way.
The first step is to choose the location for your gazebo.
You want it to be in a spot that’s level and has good drainage. Once you’ve found the perfect spot, mark out the dimensions of your gazebo with string or stakes.
Next, start digging the footings for your gazebo.
The depth will depend on your local building code, but it’s typically about two feet deep. Once the footings are dug, pour concrete into them and let it cure for 24 hours.
Now it’s time to start assembling the frame of your gazebo.
If you’re using lumber, make sure to use pressure-treated wood so it will withstand the elements. Secure the frame together with screws or nails, then cover it with plywood or OSB panels.
At this point, you can start installing the roof of your gazebo.
The type of roof you choose will depend on personal preference and budget. Shingles are common, but metal roofs are also an option if you want something more durable. Install gutters around the edges of the roof so rainwater can drain properly.
10X16 Gazebo Costco
If you’re looking for a gazebo that’s both stylish and spacious, the 10×16 Gazebo from Costco is a great option. This gazebo features a metal frame with a powder-coated finish, making it durable and weather-resistant. The canopy is made from UV-protected fabric, ensuring that your gazebo will stay cool and comfortable even on the hottest days.
The 10×16 Gazebo also comes with mosquito netting, which makes it perfect for outdoor gatherings.
Assembling the 10×16 Gazebo is easy, thanks to the included instructions. Once assembled, this gazebo provides plenty of space for entertaining guests or simply enjoying your backyard.
The 10×16 Gazebo is an excellent way to add style and function to your outdoor space.
Gazebo Plans 12X20
A gazebo is a freestanding structure that provides shade and protection from the elements. A 12×20 gazebo plan can provide you with the perfect amount of space to entertain guests or simply enjoy your backyard. When choosing a gazebo plan, it’s important to consider the size and shape of your yard, as well as your budget.
There are a variety of gazebo plans available online and in home improvement stores. With a little bit of research, you should be able to find the perfect plan for your needs.
How to Build a Hip Roof for a Gazebo
Building a hip roof for a gazebo is not as difficult as it may seem at first. With some basic carpentry skills and the right tools, you can easily build a hip roof that will add character and charm to your outdoor space. Here are some tips on how to build a hip roof for a gazebo:
1. The first step is to determine the size of the Hip Roof you will need. To do this, you will need to measure the width and length of the Gazebo base. Once you have these measurements, you can calculate the amount of lumber needed using a standard formula (width x length)/2 = amount of lumber needed in feet).
2. Next, cut all of the rafters to size using a saw. The rafters should be equal in length and should extend beyond the Gazebo base by about 2 feet on each side.
3. Once all of the rafters are cut, it’s time to assemble them into pairs.
To do this, take two rafters and nail them together at one end using 3-inch nails. Repeat this process until all of the rafters are paired up.
4. Now it’s time to start assembling the Hip Roof frame itself.
To do this, take two pairs of rafters and nail them together at their apex (the highest point). Then continue nailing pairs of rafters together until all 4 sides are complete. At this point, your Hip Roof frame should look like a pyramid with its top cut off!
5 .The next step is to sheath the Hip Roof frame with plywood or OSB (oriented strand board). Nail these panels into place starting at the bottom edge and working your way up towards the peak.
Make sure that each panel is flush with the one below it; otherwise, water will be able to penetrate through any gaps and could cause serious damage over time . 6 .Now it’s time to install fascia boards around all 4 sides of finish off your Hip Roof . These boards should be nailed into place along lower edge of sheathing material . 7 once 8 finally , install ridge cap shingles along peak of Hip Roof frame . These shingles help protect exposed edges of sheathing material from weather damage 9 That’s it! You’ve now successfully built yourself a hip roof for a gazebo!
12X16 Hip Roof Gazebo Plans
If you’re looking for a gazebo that will make a bold statement in your backyard, then consider building a 12×16 hip roof gazebo. This type of gazebo has a unique look that is sure to turn heads, and it’s also relatively easy to build. In this article, we’ll show you how to build a 12×16 hip roof gazebo using basic construction techniques.
Building a hip roof gazebo is not significantly different than building any other type of gazebo. The main difference is the addition of the overhanging eaves on all four sides. These eaves give the gazebo its characteristic look, and they also provide some protection from the elements.
The first step in building your hip roof gazebo is to create a foundation. You can do this by pouring concrete footings or by setting pre-cast concrete pads into the ground. Once your foundation is complete, you can begin assembling the floor frame.
We recommend using pressure-treated lumber for all of the framing components, as it will resist rot and insect damage over time.
Once the floor frame is complete, you can start working on the walls. Again, pressure-treated lumber should be used for all of the wall studs and rafters.
As you work on assembling the walls, be sure to leave openings for windows and doors. Once the walls are up, you can add sheathing and trim before moving on to the roof framework.
The most important part of any hip roof structure is ensuring that all of the rafters are properly aligned before attaching them to the plate (the topmost horizontal beam).
To do this, use a level or plumb line to mark out each rafter’s placement on both ends before nailing them into place. Once all of the rafters are installed, you can add purlins (horizontal support beams) along both sides if desired; these will help support any additional weight that may be placed on top of the roof (such as snow).
Conclusion
A rectangular gazebo is a great way to add an outdoor living space to your home. They are relatively easy to build and can be customized to fit your specific needs. Be sure to follow the instructions in this blog post carefully so that you end up with a beautiful and sturdy gazebo that will provide you with years of enjoyment.

