Introduction to Honeyberry Winter Hardiness
Honeyberry shrubs (also known as Haskap) are celebrated for their resilience and early-blooming, nutrient-rich berries. Native to cooler climates, they possess a remarkable natural hardiness. However, even these robust plants can benefit from supplemental winter protection, especially in regions with unpredictable weather patterns or exceptionally harsh winters. Understanding the specific needs of your honeyberry plants can significantly improve their survival rates and ensure a bountiful harvest in the spring. This guide will delve into effective winter protection methods to safeguard your valuable honeyberry shrubs.
Understanding Honeyberry Vulnerabilities

While honeyberries are generally cold-hardy, certain factors can make them more susceptible to winter damage. These include:
- Young Plants: Recently planted honeyberries have less established root systems and can be more vulnerable to frost heave and extreme cold.
- Unseasonal Warmth Followed by Deep Freeze: Periods of unseasonable warmth in late fall or winter can trick the plant into breaking dormancy. Subsequent sudden, deep freezes can then damage this newly active tissue.
- Wind Exposure: Desiccating winds can strip moisture from branches and buds, leading to drying and damage, even in cold temperatures.
- Lack of Snow Cover: Snow acts as a natural insulator. Areas with minimal snowfall are more prone to greater soil temperature fluctuations.
- Poor Drainage: Waterlogged soil can freeze and expand, damaging roots and increasing the risk of root rot.
Key Facts About Honeyberry Winter Protection
Here’s a quick overview of essential considerations for protecting your honeyberry shrubs:
| Factor | Impact on Honeyberry | Protection Strategy |
|---|---|---|
| Plant Age | Young plants are more vulnerable | Mulching, wrapping, windbreaks |
| Soil Moisture | Excess moisture can lead to root damage | Ensure good drainage |
| Wind | Causes desiccation and breakage | Windbreaks, burlap wrapping |
| Temperature Fluctuations | Can damage buds and new growth | Mulching, burlap |
| Snow Cover | Provides natural insulation | Avoid disturbing snow cover |
Effective Honeyberry Shrub Winter Protection Methods
A multi-pronged approach often yields the best results when it comes to protecting your honeyberry shrubs. Here are several proven methods:
1. Mulching: The Foundation of Protection
Mulching is perhaps the most crucial winter protection technique for honeyberry shrubs. A generous layer of organic mulch offers several benefits:
- Insulation: It helps to regulate soil temperature, preventing extreme freezing and thawing cycles that can heave young plants and damage roots.
- Moisture Retention: Mulch helps retain soil moisture, which is vital for plant health throughout the winter.
- Weed Suppression: It smothers emerging weeds that can compete for resources in spring.
- Soil Improvement: As organic mulch decomposes, it adds valuable nutrients to the soil.
Choosing the Right Mulch
Ideal mulching materials for honeyberries include:
- Shredded Bark: Long-lasting and aesthetically pleasing.
- Wood Chips: Readily available and effective.
- Straw or Hay: Excellent for insulation, but ensure it’s free of weed seeds.
- Compost: Nutrient-rich and improves soil structure.
Application Techniques
Apply a layer of mulch 2-4 inches deep around the base of the honeyberry shrub. Crucially, keep the mulch a few inches away from the main stem to prevent moisture buildup and potential rot. This is especially important for young, newly planted shrubs. Extend the mulch layer out to the drip line of the branches to maximize the area of soil protected.
2. Watering Before Winter: Hydration is Key
While it might seem counterintuitive to water plants before winter, proper hydration is essential for their survival. A well-hydrated plant is more resilient to cold temperatures.
- Deep Watering: In late fall, before the ground freezes solid, give your honeyberry shrubs a deep watering. This allows the water to penetrate the soil and reach the root zone.
- Timing: Aim to water when the weather is still mild enough for the water to soak in, rather than freezing on the surface.
3. Windbreaks and Shelter: Battling the Bluster
Honeyberry branches, particularly young and tender ones, can be susceptible to wind damage and desiccation. Creating a windbreak can significantly mitigate these risks.
- Natural Windbreaks: Planting taller, hardy shrubs or trees on the windward side of your honeyberry planting can act as a natural barrier.
- Artificial Windbreaks: In exposed areas, consider using burlap screens, snow fencing, or even temporary structures to shield the plants from prevailing winds.
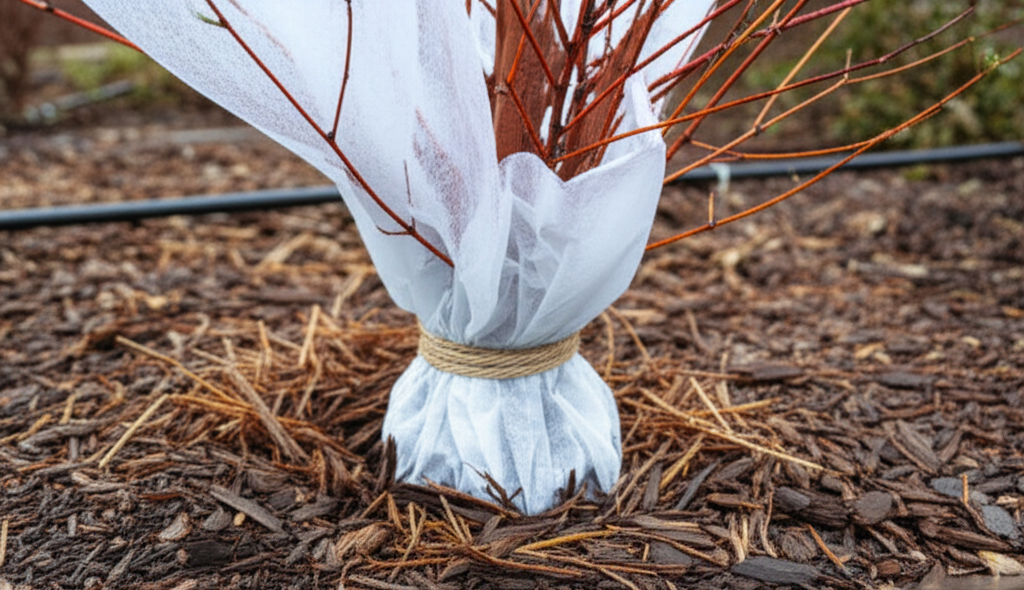
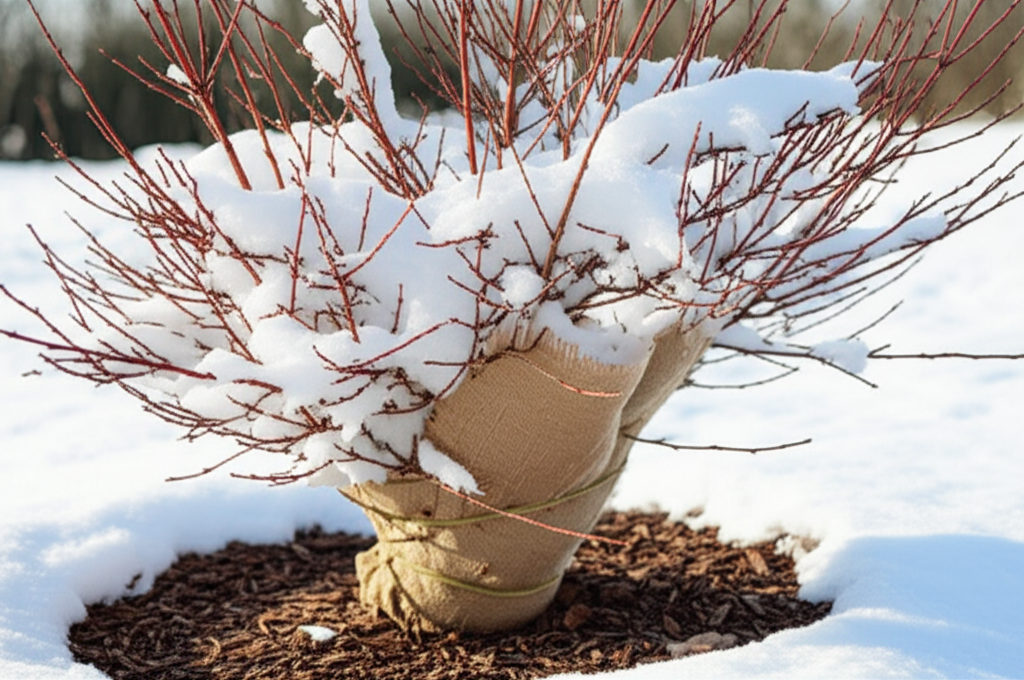
4. Burlap Wrapping: A Cozy Cocoon
For young or particularly vulnerable honeyberry shrubs, especially in very cold climates or exposed locations, burlap wrapping can offer an extra layer of protection.
- How-To: Stake wooden or bamboo poles around the plant, ensuring they are taller than the shrub. Drape burlap over the poles, creating a protective enclosure. You can also wrap burlap directly around the shrub, tying it loosely with twine.
- Benefits: This shields the branches from harsh winds and helps retain some moisture, preventing drying. It also offers some insulation.
- Caution: Ensure the burlap is not too tight, allowing for air circulation. Remove the burlap promptly in early spring as temperatures consistently rise to prevent overheating and fungal growth.
5. Snow: Nature’s Insulating Blanket
As mentioned earlier, snow cover is an excellent natural insulator. Avoid disturbing snow that accumulates around your honeyberry shrubs.
- Do Not Remove: Unless the snow is so deep it’s causing branches to break (which is rare for established honeyberries), leave it in place.
- Banking Snow: In areas with little natural snowfall, you can carefully shovel snow from surrounding areas around the base of your plants to create a protective layer.
6. Protecting Against Rodents and Pests
Winter can also bring other threats, such as rodents like voles and rabbits, which may gnaw on bark to survive.
- Tree Guards: Install plastic or wire mesh tree guards around the base of young shrubs to prevent gnawing. Ensure they extend at least 1-2 feet above the expected snow line.
- Hardware Cloth: A more robust solution, hardware cloth can be formed into cylinders around the trunk.
- Repellents: Commercial repellents can also be used, but reapplication may be necessary after rain or snow.
Pros and Cons of Winter Protection Methods
Different protection methods offer varying levels of benefit and effort. Here’s a comparison:
| Method | Pros | Cons |
|---|---|---|
| Mulching | Excellent insulation, retains moisture, improves soil, relatively low effort | Can harbor pests if applied too close to the trunk, can retain excess moisture if drainage is poor |
| Deep Watering | Increases plant resilience, essential for root health | Requires adequate rainfall or manual watering before ground freezes |
| Windbreaks | Protects against desiccation and physical damage, enhances overall plant health | Can require significant planning and effort to establish, may shade plants if not positioned correctly |
| Burlap Wrapping | Provides significant protection against wind and cold, especially for young plants | Labor-intensive, can lead to overheating if not removed promptly in spring, potential for fungal issues |
| Snow Banking | Excellent natural insulation, free and readily available in snowy regions | Requires snowfall, can be difficult to implement in areas with little snow, can compact if walked on |
| Rodent Guards | Prevents bark damage from gnawing animals | Requires initial investment and installation, needs to be adjusted as plants grow |
When to Apply Winter Protection
The timing of winter protection is crucial for its effectiveness.
- Late Fall: Begin applying mulch once the soil has cooled significantly but before it freezes solid. This is also the time for deep watering.
- As Temperatures Drop: If you are using burlap wrapping or artificial windbreaks, these are typically put in place as temperatures begin to consistently drop into freezing ranges.
- Snow: Natural snow cover should be undisturbed as it accumulates.
When to Remove Winter Protection
The removal of protection is as important as its application.
- Early Spring: As soon as the risk of severe frost has passed and the soil begins to thaw, it’s time to remove protective coverings.
- Gradual Removal: For burlap wraps or artificial windbreaks, consider a gradual removal to allow plants to acclimatize to changing conditions. For instance, remove one side of the burlap first, then the rest a few days later.
- Mulch: While some mulch can remain, you may want to lightly rake it away from the immediate crown of the plant to improve soil warming and air circulation, especially if you notice any signs of excessive moisture.
Specific Considerations for Different Honeyberry Varieties
While the general principles apply to all honeyberry varieties, some may have slightly different tolerances. Research your specific cultivars to understand their nuances. However, as a general rule, treating all your honeyberry shrubs with a degree of winter care, particularly when they are young, is a prudent practice.
Conclusion: A Resilient Future for Your Honeyberries
By implementing these winter protection methods, you are investing in the long-term health and productivity of your honeyberry shrubs. A little proactive care during the colder months can prevent damage, promote strong spring growth, and ultimately lead to a more bountiful and delicious harvest of these exceptional berries. Happy winterizing!


