The Sweet Rewards of Propagating Honeyberry Shrubs
Honeyberries, also known as Haskap or Lonicera caerulea, are increasingly popular for their delicious, antioxidant-rich berries and their remarkable hardiness. These fascinating shrubs offer an early harvest, often preceding strawberries, and their unique sweet-tart flavor is gaining a devoted following. For gardeners eager to expand their honeyberry patch or share these delightful plants with friends, propagating them from softwood cuttings is an effective and rewarding method. This guide delves deep into the process, equipping you with the knowledge and techniques to successfully multiply your honeyberry shrubs.
Understanding Softwood Cuttings: The Ideal Time and Material

Softwood cuttings are taken from the current season’s growth, typically in late spring or early summer when the stems are flexible but have started to firm up. This new growth possesses a high degree of plasticity, meaning it readily forms roots when provided with the right conditions. Unlike hardwood cuttings (taken in dormancy) or semi-hardwood cuttings (taken later in the season), softwood cuttings are generally faster to root and establish.
The ideal softwood cutting for honeyberries will be:
- From a healthy, vigorous parent plant.
- Tender and pliable, bending without snapping.
- Free from flowers or developing fruit, as these can divert the plant’s energy away from root development.
- About 4-6 inches in length.
Key Facts: Honeyberry Softwood Cuttings
| Best Time for Cuttings: | Late spring to early summer (May-July, depending on climate). |
| Type of Growth: | Current season’s new, semi-flexible growth. |
| Cutting Length: | 4-6 inches (10-15 cm). |
| Leaf Removal: | Remove lower leaves, leave 2-4 at the top. |
| Rooting Medium: | Well-draining mix (peat moss/perlite, vermiculite/perlite). |
| Rooting Hormone: | Recommended for increased success rates. |
| Environment: | High humidity, bright indirect light, warmth. |
| Rooting Time: | Typically 3-6 weeks. |
Step-by-Step Guide to Propagating Honeyberry Softwood Cuttings
Embarking on honeyberry propagation requires precision and attention to detail. Follow these steps carefully for the best chance of success.
Step 1: Preparation and Tool Sanitization
Before you begin taking cuttings, gather all your materials and ensure they are clean. This is crucial to prevent the transmission of diseases.
- Sterile Pruning Shears or Knife: Use a sharp tool that has been sterilized with rubbing alcohol or a bleach solution (1 part bleach to 9 parts water).
- Rooting Medium: A mixture of equal parts peat moss and perlite, or vermiculite and perlite, provides excellent drainage and aeration.
- Rooting Hormone: Available in powder, gel, or liquid forms.
- Small Pots or Propagation Trays: With drainage holes.
- Clear Plastic Bags or Propagator Lid: To maintain humidity.
- Water: For misting and watering.
Step 2: Taking the Cuttings
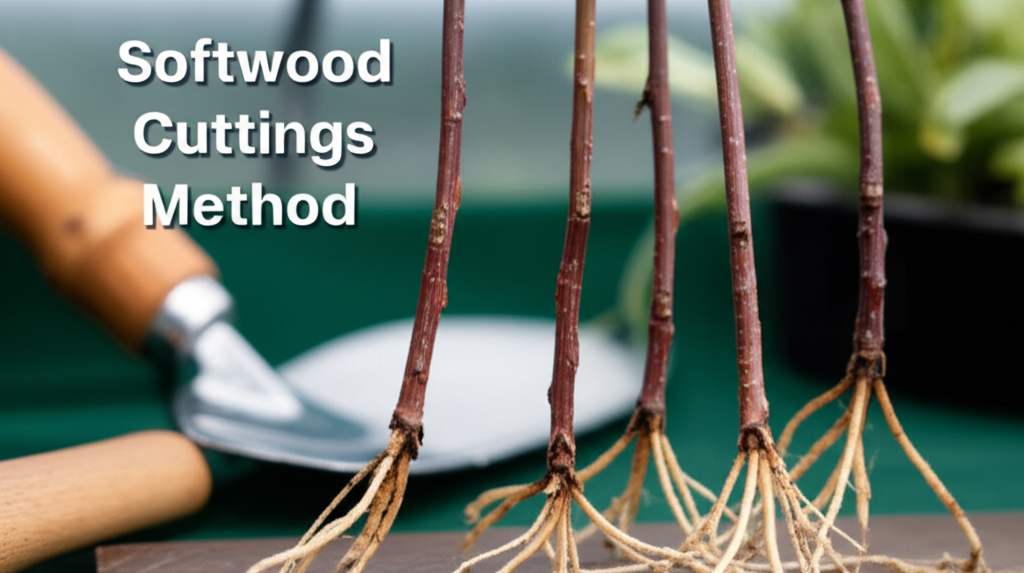
Select healthy stems from your parent honeyberry plant. Look for shoots that are about pencil-thick and have started to firm up but are still flexible.
- Using your sterilized shears or knife, make a clean cut just below a leaf node (the point where a leaf attaches to the stem). This is where the highest concentration of rooting hormones is found.
- Aim for cuttings that are 4 to 6 inches in length.
- Remove the leaves from the bottom two-thirds of each cutting. Leave only 2 to 4 leaves at the very top. If the remaining leaves are very large, you can cut them in half horizontally to reduce water loss through transpiration.
- Make a fresh cut at the base of the cutting, angled slightly.
Step 3: Applying Rooting Hormone
Rooting hormone significantly increases the likelihood of successful root formation and speeds up the process.
- Pour a small amount of rooting hormone into a separate container to avoid contaminating the main supply.
- Dip the cut end of each honeyberry cutting into the rooting hormone, ensuring the lower 1-2 inches are coated.
- For powder, tap off any excess. For gel, ensure a good coating. For liquid, follow the manufacturer’s instructions regarding dilution.
Step 4: Planting the Cuttings
Proper planting technique is vital for encouraging root development.
- Fill your pots or propagation trays with the prepared, moist rooting medium.
- Use a pencil or your finger to create a pilot hole in the medium, slightly wider than the diameter of the cutting’s base.
- Gently insert the base of the cutting into the hole, ensuring the hormone-coated part is in contact with the medium.
- Firm the medium gently around the base of the cutting to ensure good contact and eliminate air pockets.
- Space cuttings adequately to allow for air circulation and prevent overcrowding. If using trays, one cutting per cell is ideal. If using pots, you can place 2-3 cuttings per pot, ensuring they don’t touch.
Step 5: Creating a Humid Environment
Honeyberry cuttings are susceptible to drying out, so maintaining high humidity is paramount for successful rooting.
- Water the rooting medium gently to settle it around the cuttings.
- Cover the pots or trays with a clear plastic bag, securing it with a rubber band or tape, or place them under a propagator lid. This creates a mini-greenhouse effect.
- Ensure the plastic does not touch the leaves of the cuttings. You can use stakes or small sticks to prop it up if necessary.
- Place the cuttings in a location that receives bright, indirect light. Avoid direct sunlight, which can scorch the tender cuttings and overheat the enclosed environment.
- Maintain a warm temperature, ideally between 70-75°F (21-24°C). A heat mat can be beneficial for maintaining consistent warmth.
Step 6: Care and Monitoring
Consistent care and observation are key to the rooting process.
- Humidity: Check the humidity levels daily. If condensation on the plastic appears to be diminishing, you may need to mist the cuttings lightly with water.
- Watering: The rooting medium should remain consistently moist but not waterlogged. Water sparingly if it starts to dry out.
- Air Circulation: If using plastic bags, you can periodically open them for a few minutes each day to allow for some air exchange and prevent fungal diseases.
- Inspection: Look for signs of new growth, such as small leaves emerging from the leaf nodes.
Step 7: Checking for Roots
Root development typically takes 3 to 6 weeks, but it can vary depending on the conditions and the specific honeyberry variety.
- Gently tug on a cutting. If it offers resistance, it has likely formed roots.
- Another method is to carefully remove a cutting from the pot to inspect the base for root formation. Do this gently to avoid damaging any developing roots.
Step 8: Acclimatization and Transplanting
Once roots have formed, the cuttings need to be gradually acclimatized to normal conditions before being transplanted.
- Begin by gradually increasing the ventilation. If using a propagator lid, lift it slightly or remove it for increasing periods each day. If using plastic bags, open them wider or remove them for longer durations.
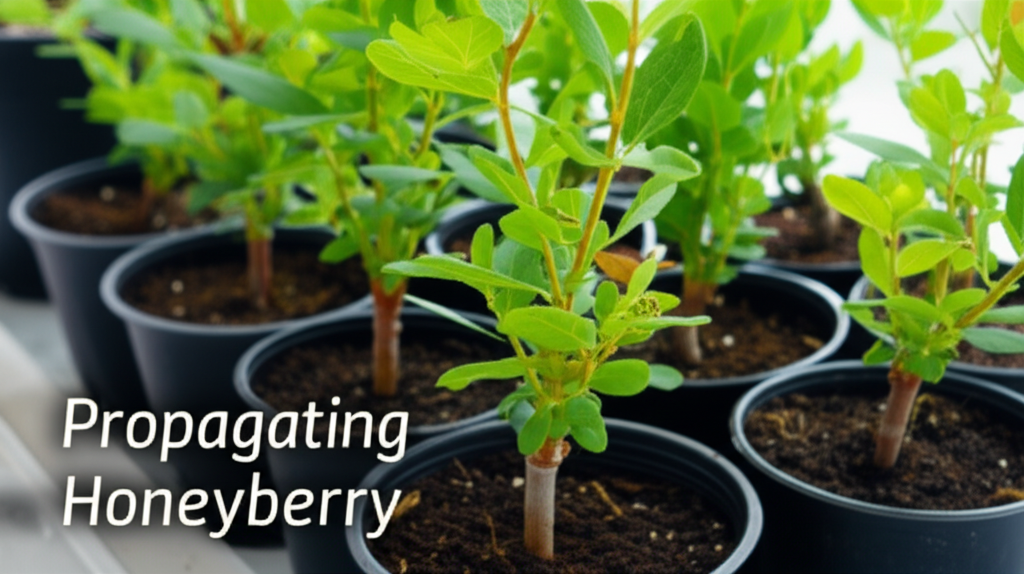
- Once the cuttings have adapted to lower humidity, they can be transplanted into individual, slightly larger pots filled with a good quality potting mix.
- Water them thoroughly after transplanting and continue to provide bright, indirect light.
- Keep the newly transplanted cuttings in a protected location, such as a cold frame or a sheltered outdoor spot, until they have established themselves.
- You can transplant them to their final outdoor location in the fall or the following spring, once they have developed a strong root system and are hardy enough to withstand the elements.
Troubleshooting and Maximizing Success
Even with the best practices, propagation can sometimes present challenges. Understanding common issues and their solutions can significantly improve your success rate.
Common Problems and Solutions
| Problem: Cuttings wilting or dying | Possible Cause: Too much direct sunlight, insufficient humidity, overwatering leading to rot, or using unhealthy parent material. | Solution: Move to indirect light, increase humidity, ensure good drainage, and use only healthy cuttings. |
| Problem: No root formation | Possible Cause: Cuttings taken too early or too late, lack of rooting hormone, poor environmental conditions (too cold, too dry). | Solution: Ensure correct timing for cuttings, use rooting hormone, and maintain consistent warmth and humidity. |
| Problem: Fungal growth (mold) on cuttings | Possible Cause: Overwatering, poor air circulation, or contaminated tools/medium. | Solution: Reduce watering, improve air circulation (ventilate daily), and ensure all materials are sterile. |
| Problem: Cuttings rot at the base | Possible Cause: Waterlogged medium, too much humidity without ventilation, or bacteria. | Solution: Ensure excellent drainage, ventilate regularly, and sterilize tools and medium thoroughly. |
Tips for Enhanced Success
- Variety Matters: Some honeyberry varieties may root more readily than others. If you have multiple types, try propagating from each to see which performs best.
- Multiple Cuttings: Always take more cuttings than you need, as not all of them will successfully root. A success rate of 50-70% is considered good.
- Record Keeping: Keep a journal of when you took cuttings, the conditions, and the results. This will help you refine your technique over time.
- Patience is Key: Propagation takes time. Don’t be discouraged if you don’t see immediate results. Consistent care is more important than rapid change.
When to Use Softwood Cuttings vs. Other Methods
While softwood cuttings are excellent for honeyberries, understanding other propagation methods provides a broader perspective.
Pros and Cons of Softwood Cuttings for Honeyberries
| Pros: | Cons: |
| Fastest rooting time compared to other cutting types. | Requires specific timing (late spring/early summer). |
| High success rate when conditions are optimal. | More susceptible to drying out and disease due to their tender nature. |
| Easy to work with due to their flexibility. | Requires maintaining high humidity, which can sometimes lead to fungal issues. |
| Provides a way to increase plant numbers quickly. | Cuttings may be more vulnerable to pests. |
Comparison with Other Propagation Methods
- Hardwood Cuttings: Taken during the dormant season (late fall/winter). They are slower to root but are generally more robust. This method is also suitable for honeyberries.
- Layering: Involves bending a low-growing branch to the ground and covering a section with soil to encourage root formation while it’s still attached to the parent plant. This is a reliable method but produces fewer plants at a time.
- Seed Propagation: While possible, honeyberry seeds often exhibit dormancy, and the resulting plants may not come true to type, meaning they might not possess the desirable characteristics of the parent plant. For reliable fruit production and specific varieties, vegetative propagation (like cuttings) is preferred.
Conclusion: The Joy of a Self-Sufficient Honeyberry Garden
Propagating honeyberry shrubs from softwood cuttings is a fulfilling endeavor that allows you to expand your garden, share the bounty with others, and deepen your connection with these exceptional plants. By mastering the techniques outlined in this guide, you’ll be well on your way to a thriving honeyberry collection. The sweet rewards of your efforts will be measured not only in delicious berries but also in the satisfaction of horticultural success. Happy propagating!


