Maximizing Space and Sweetness: The Honeyberry Shrub Vertical Trellis Revolution
Honeyberries, also known as Haskaps, are increasingly popular for their early spring blooms, vibrant edible berries, and impressive hardiness. However, as these shrubs mature, they can become quite sprawling, occupying a significant amount of garden space. For those with limited areas or looking to optimize their yields, a vertical trellis system offers a brilliant solution. This article explores the benefits of trellising honeyberry shrubs, provides practical DIY trellis designs, and delves into effective garden layouts to transform your honeyberry patch into a space-saving, high-producing oasis.
Why Trellis Your Honeyberry Shrubs?
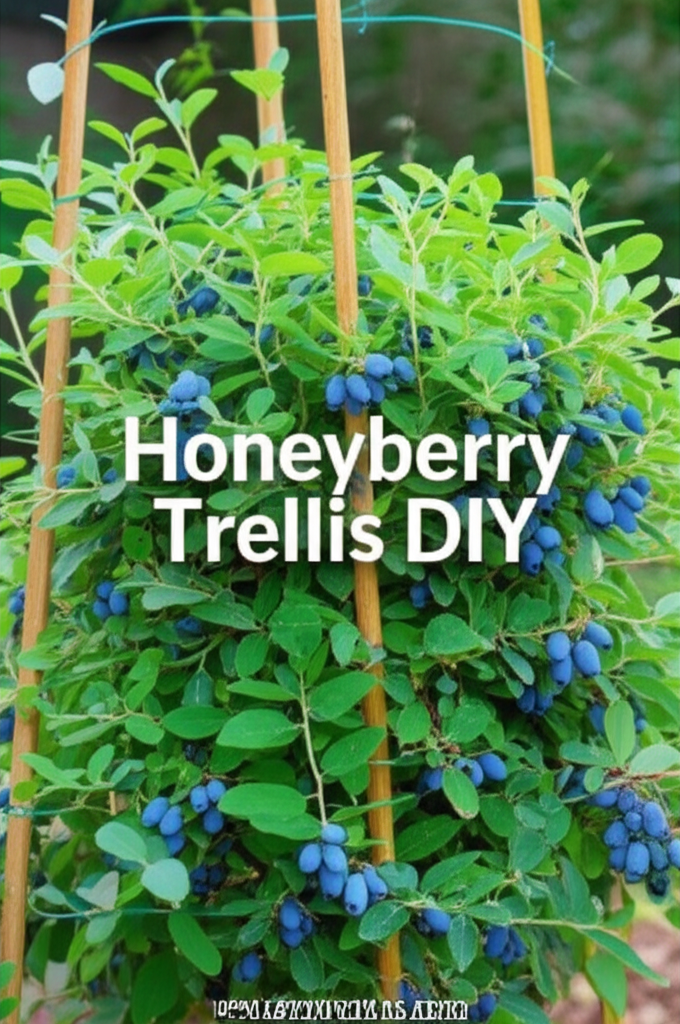
Traditional gardening wisdom often envisions honeyberries as free-standing shrubs. While this is perfectly acceptable, trellising unlocks a new level of horticultural potential. The advantages are numerous and directly contribute to healthier plants and more abundant harvests.
- Space Efficiency: This is arguably the most significant benefit. By training the honeyberry branches upwards, you confine the plant’s footprint, allowing you to grow more plants in a smaller area or dedicate more space to other crops. This is particularly advantageous for urban gardeners or those with compact yards.
- Improved Air Circulation: A well-trellised plant allows air to flow freely through its branches. This reduces humidity around the foliage and fruit, significantly lowering the risk of fungal diseases like powdery mildew, a common concern for many berry producers.
- Enhanced Sunlight Penetration: Vertical training exposes more of the plant’s surface area to direct sunlight. This is crucial for optimal photosynthesis, leading to stronger growth, more flower buds, and, ultimately, sweeter, more developed berries.
- Easier Harvesting: Reaching for berries that are at waist height or chest height is far more comfortable than bending down to search through dense, low-lying foliage. This makes the harvesting process more enjoyable and less physically demanding.
- Pest and Disease Management: With better air circulation and sunlight, plants are generally healthier and more resilient. Additionally, raised fruit is less accessible to ground-dwelling pests like slugs and snails.
- Aesthetic Appeal: A well-maintained vertical honeyberry garden can be a striking visual feature. The cascading berries and structured form add a unique architectural element to your landscape.
DIY Vertical Trellis Designs for Honeyberry Shrubs

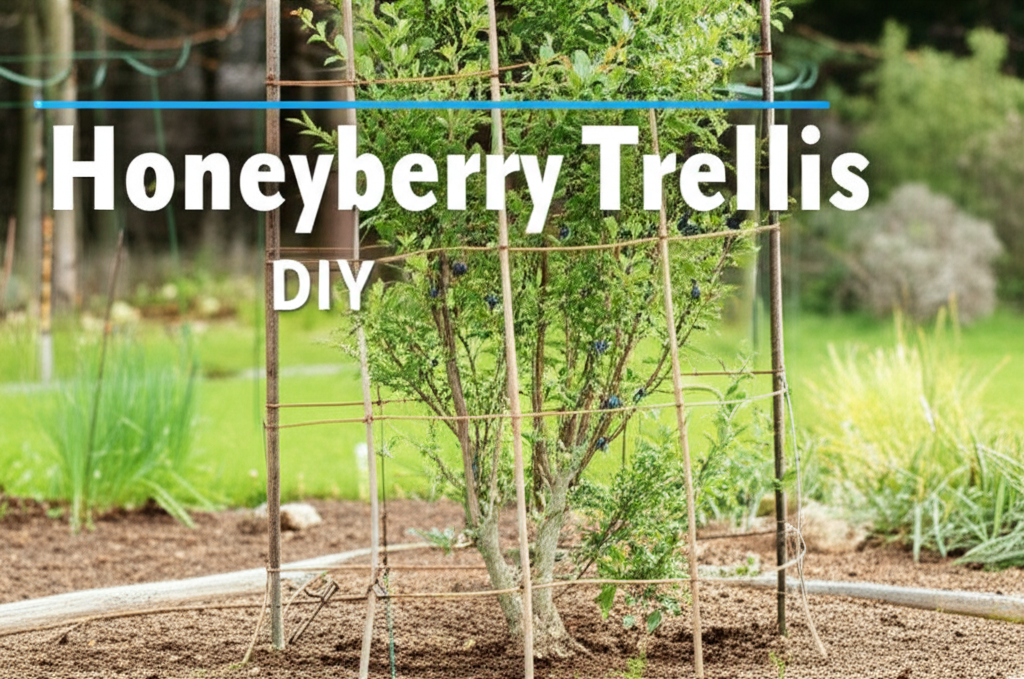
Constructing a trellis for your honeyberry shrubs doesn’t require advanced carpentry skills. The key is to create a sturdy framework that supports the weight of mature branches and fruit, while also allowing for flexibility as the plant grows. Here are a few popular and effective DIY designs.
The Simple Post and Wire Trellis
This is a straightforward and cost-effective option, ideal for beginners.
Materials:
- 4×4 inch treated lumber posts (length depends on desired height, typically 6-8 feet)
- Galvanized wire or sturdy twine (UV-resistant)
- Eye screws or screw hooks
- Post hole digger or shovel
- Gravel for drainage
- Zip ties or plant ties
Construction Steps:
- Install Posts: Dig holes for your posts, at least 1-2 feet deep, depending on soil stability and desired height. Ensure the holes are deep enough to provide good support. Add a few inches of gravel at the bottom of each hole for drainage. Place the posts in the holes and backfill with soil, tamping it down firmly. If planting multiple shrubs in a row, space posts appropriately (3-5 feet apart, depending on the mature size of your honeyberry variety).
- Attach Eye Screws: Once the posts are securely in place, screw eye screws or hooks into the posts at intervals along their height. Plan for at least three to four levels of support wires.
- String the Wires: Thread your galvanized wire or twine through the eye screws. You can run wires horizontally between posts to create a fan or lattice effect, or vertically up each post. Ensure the wires are taut.
- Train the Branches: As your honeyberry shrub begins to grow, gently guide the main branches towards the wires. Use zip ties or plant ties to loosely secure the branches to the wires. Avoid tying too tightly, which can restrict growth and damage the bark.
The Sturdy Arbor or Pergola Trellis
For a more decorative and robust structure, an arbor or pergola offers excellent support and can create a beautiful focal point in your garden.
Materials:
- Pressure-treated lumber (e.g., 2x4s, 4x4s) for posts, beams, and cross-members
- Deck screws or lag bolts
- Post anchors or concrete mix
- Saw, drill, measuring tape, level
- Wire mesh or lattice panels (optional)
Construction Steps:
- Plan Your Design: Sketch out the dimensions of your arbor or pergola, considering the mature size of your honeyberry plants. Decide on the height and width.
- Install Posts: Set your main support posts securely in the ground using post anchors or by setting them in concrete. Ensure they are plumb and stable.
- Assemble the Frame: Construct the horizontal beams and cross-members using your lumber and screws/bolts. You can create a simple rectangular frame or a more elaborate design with arched elements.
- Add Support (Optional): If desired, attach wire mesh or lattice panels to the frame to provide additional surfaces for the honeyberry branches to grow on and attach to.
- Train the Branches: Guide the growing branches of your honeyberry shrub onto the arbor or pergola frame. As the branches mature, they will naturally weave and grow through the structure. Use ties sparingly for initial guidance.
The Espalier Method
Espalier is a technique of training woody plants to grow in a flat, two-dimensional plane against a support. This is excellent for limited spaces and creates a striking visual effect.
Materials:
- Sturdy wall, fence, or a dedicated trellis system (e.g., wire grid)
- Pruning shears
- Soft plant ties
Training Process:
- Initial Planting: Plant your honeyberry shrub a few inches away from the wall or trellis.
- Select Main Leaders: Choose one or two strong central branches (leaders) that will grow vertically.
- Train Laterals: As side branches (laterals) emerge, train them horizontally along the support structure using ties. Aim for a symmetrical pattern, like a candelabra or a series of horizontal tiers.
- Prune Regularly: Consistent pruning is key to espalier. Remove any branches that grow outwards, backwards, or disrupt the desired flat shape. Prune to encourage fruiting spurs along the lateral branches.
Key Facts and Trellis Comparison
Choosing the right trellis depends on your available space, budget, and aesthetic preferences. Here’s a quick comparison to help you decide.
| Trellis Type | Best For | Ease of Construction | Cost | Aesthetic Appeal | Support Strength |
|---|---|---|---|---|---|
| Post and Wire | Small to medium spaces, beginners | Easy | Low | Functional | Moderate |
| Arbor/Pergola | Larger gardens, creating garden features | Moderate to Difficult | Moderate to High | High | High |
| Espalier | Very limited spaces, vertical gardening | Requires consistent training | Low to Moderate (depends on support) | Very High | Depends on support structure |
Honeyberry Garden Layouts with Vertical Trellises
Integrating vertical trellises into your garden design opens up a world of possibilities for efficient and attractive planting.
The Linear Row Planting
This is the most straightforward layout, perfect for maximizing yield along property lines or pathways.
- Setup: Install rows of posts and wires, or build a long arbor structure.
- Planting: Space your honeyberry shrubs according to their mature width, but with the understanding that the trellis will manage their spread. You can often plant them closer together (e.g., 3-4 feet apart) when using a vertical system.
- Benefits: Easy maintenance, efficient use of linear space, good for defining garden boundaries.
The Vertical Wall Garden
Utilizing existing walls or fences is an excellent way to save space and add greenery to often-underused vertical surfaces.
- Setup: Train honeyberry plants against a south-facing wall or fence using an espalier method or by attaching branches to a wire grid attached to the wall.
- Planting: Plant shrubs a foot or two away from the wall, allowing their branches to be guided towards it.
- Benefits: Extreme space-saving, can benefit from reflected heat from the wall, creates a living green wall.
The Backyard Feature Garden
An arbor or pergola trellis can become a central design element in your garden.
- Setup: Construct a freestanding arbor or pergola in a prominent location, such as over a seating area or at the end of a path.
- Planting: Plant one or two honeyberry shrubs on either side of the structure, training them to grow up and over the arbor/pergola.
- Benefits: Creates a beautiful focal point, provides shade and structure, frames views.
Companion Planting with Vertical Honeyberries
To further enhance your garden’s productivity and biodiversity, consider companion planting.
- Low-growing herbs: Thyme, oregano, and mint can be planted at the base of the trellised honeyberries. They enjoy similar growing conditions and can help deter pests.
- Edible flowers: Nasturtiums and calendula can add color and attract beneficial insects.
- Ground cover: Wild strawberries or clover can help suppress weeds and improve soil health around the base of the plants.
Key Considerations for Trellised Honeyberries
While trellising offers many advantages, a few specific considerations are important for success.
Honeyberry Varieties and Trellising
Not all honeyberry varieties have the same growth habit. Some are naturally more upright, while others are more sprawling. Research the specific variety you have or plan to purchase to understand its growth characteristics and how best to train it. Early-season varieties are often the most vigorous and benefit greatly from trellising.
Pollination Partners
Honeyberries require cross-pollination to produce fruit. Ensure you have at least two different varieties planted within proximity of each other. When trellising, this means placing your complementary varieties close enough for bees to easily move between them. Spacing of 3-5 feet between pollinator pairs is generally recommended.
Pruning and Maintenance
Regular pruning is essential for trellised honeyberries.
- Annual Pruning: Prune in late winter or early spring before new growth begins. Remove any dead, damaged, or crossing branches. Thin out crowded areas to improve air circulation.
- Training Pruning: As the plant grows throughout the season, tie new branches to the trellis as needed and prune any shoots that grow away from the desired shape.
- Fruit Spur Development: Honeyberries fruit on older wood, often on short, spur-like branches. Pruning should aim to encourage the development of these spurs while removing older, less productive wood.
Pros and Cons of Trellising Honeyberries
Weighing the benefits against potential drawbacks is always wise before embarking on a new gardening project.
| Pros | Cons |
|---|---|
| Increased yield per square foot | Requires initial investment in materials and time |
| Improved air circulation and reduced disease risk | Can require more diligent pruning and training |
| Easier harvesting and better access | Trellis structure may not be aesthetically pleasing to everyone |
| Enhanced sunlight exposure for fruit development | Winter cold can sometimes damage exposed young branches on trellises |
| Greater control over plant shape and size | May need to adjust watering for plants in elevated positions |
| Can be a visually appealing garden feature | Potential for strong winds to damage less robust trellis systems |
Conclusion: A Sweet Future for Vertical Honeyberry Gardens
Embracing vertical trellising for your honeyberry shrubs is a forward-thinking approach to berry cultivation. It’s a practical solution for maximizing space, enhancing plant health, and ultimately, enjoying a more bountiful harvest of these delicious and nutritious berries. Whether you opt for a simple post-and-wire system or a grand arbor, the rewards of a well-trellised honeyberry garden are sure to sweeten your gardening experience. By understanding the techniques, choosing appropriate designs, and implementing smart garden layouts, you can transform your honeyberry patch into a model of efficiency and productivity.


