
Growing Elephant Ear Taro in Hot, Dry Climates: Your Guide to Thriving Edible Landscapes
Can you really grow Elephant Ear Taro (Colocasia esculenta) and expect a bountiful harvest in conditions that feel more like a desert than a tropical paradise? Many gardeners assume this lush, tropical plant is strictly for humid, water-rich environments. However, the secret to unlocking its potential in hot, dry climates lies not in defying nature, but in understanding and working with it. Mastering this art not only allows you to enjoy the impressive foliage of Elephant Ear Taro but also to cultivate its nutritious edible corms, transforming challenging gardening spaces into productive and beautiful edible landscapes.
—
Quick Answer Box
Yes, it is absolutely possible to grow Elephant Ear Taro in hot, dry climates, but it requires specific strategies to mimic its preferred conditions. Success hinges on providing consistent moisture, ample sunlight, and nutrient-rich soil, often through container gardening, raised beds, or careful site selection and mulching.
—
What is Growing Elephant Ear Taro in Hot, Dry Climates and Why It’s Important in Gardening
Growing Elephant Ear Taro, scientifically known as Colocasia esculenta, in hot, dry climates refers to the practice of cultivating this tropical plant outside its native, water-abundant environment, specifically in regions experiencing high temperatures and limited rainfall. While Elephant Ear Taro is famously found in wetlands, swamps, and along riverbanks in its native Southeast Asia and Pacific Islands, adapting it to drier conditions is a testament to horticultural ingenuity.
The importance of this practice lies in several key areas:
Expanding Crop Viability: It allows gardeners in arid or semi-arid regions to diversify their edible crops, introducing a nutritious staple that might otherwise be inaccessible. Taro corms are a significant food source for millions worldwide, rich in carbohydrates, vitamins, and minerals.
Sustainable Water Use: By understanding how to manage water efficiently for taro, gardeners can develop techniques applicable to other water-sensitive crops, promoting more sustainable gardening practices in water-scarce areas.
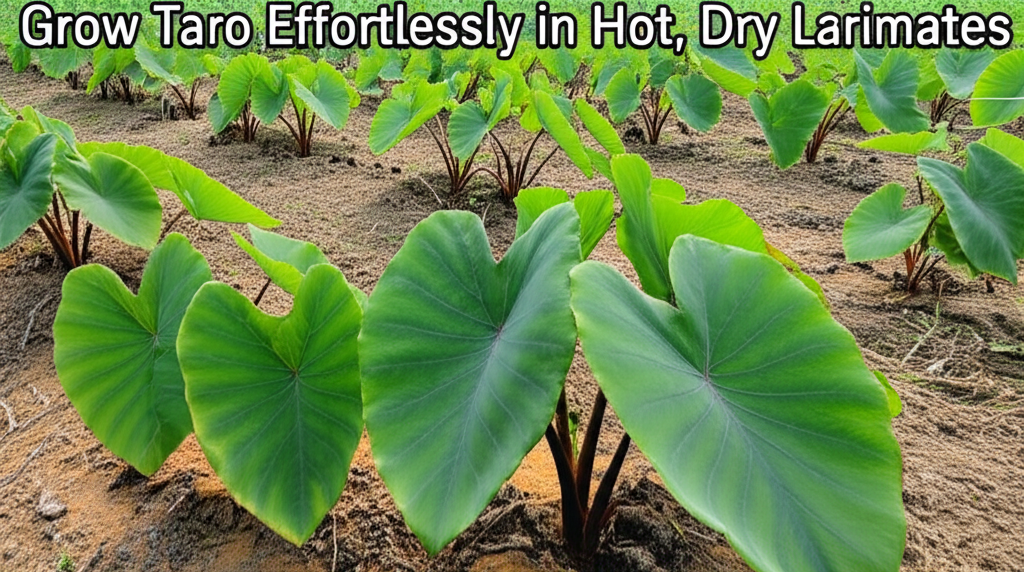
Aesthetic and Edible Landscaping: Elephant Ear Taro’s dramatic, large leaves make it a striking ornamental plant. Successfully growing it in challenging climates means you can create visually stunning gardens that are also edible, blurring the lines between beauty and function.
Resilience and Adaptability: Learning to grow taro in less-than-ideal conditions builds gardener resilience, teaching valuable lessons about plant needs, microclimates, and innovative solutions that can be applied to many other gardening challenges.
—
Quick Recommendations or Key Insights about Growing Elephant Ear Taro in Hot, Dry Climates
Water is King: Consistent, deep watering is paramount. Aim for soil that is moist but not waterlogged.
Embrace the Shade: While taro needs sun, intense afternoon sun in hot, dry climates can scorch leaves. Dappled shade or morning sun is often ideal.
Container Power: Growing taro in containers offers the best control over soil moisture and allows for easy relocation to more favorable microclimates.
Mulch, Mulch, Mulch: A thick layer of organic mulch is your best friend for retaining soil moisture and keeping roots cool.
Nutrient Boost: Taro is a heavy feeder. Amend your soil generously with compost and organic matter.
Humidity Helpers: Grouping plants or using a nearby water feature can increase local humidity.
Know Your Variety: Some taro varieties are more drought-tolerant or adaptable than others. Research local or specialized cultivars.
—
Detailed Breakdown of Growing Elephant Ear Taro in Hot, Dry Climates
The Scientific Perspective: Understanding Taro’s Needs
Colocasia esculenta is a perennial herbaceous plant belonging to the Araceae family. Its natural habitat is characterized by warm temperatures, high humidity, and consistently moist to waterlogged soil. The plant produces a large underground corm, which is the primary edible part, along with smaller corms (cormels) that branch off. Water Needs: Taro originates from subtropical and tropical regions, where it thrives in areas with ample rainfall or standing water. The plant has a high transpiration rate, meaning it loses water rapidly through its leaves, especially in hot and dry conditions. This makes consistent soil moisture absolutely critical for its survival and growth. The large, paddle-shaped leaves maximize surface area for photosynthesis but also for water loss.Temperature Requirements: Taro prefers warm temperatures, ideally between 70°F and 85°F (21°C to 29°C). It is sensitive to frost and will not tolerate freezing temperatures. While it can survive in hotter conditions, growth slows significantly, and leaves can scorch without adequate moisture and shade.
Sunlight Preferences: In its natural, humid environment, taro often grows in dappled shade or on the edges of water bodies where it receives filtered sunlight. In hot, dry climates, direct, intense sunlight, especially during the hottest part of the day, can be detrimental. It leads to rapid soil drying and can cause leaf burn. Therefore, partial shade, particularly afternoon shade, is often beneficial.
Soil Composition: Taro thrives in rich, organic, and well-draining soil that can retain moisture. While it tolerates some waterlogging, it performs best in soil that is consistently moist but not stagnant. The soil needs to be fertile to support the significant growth of the corm.
Practical Applications: Adapting Taro to Arid Environments
The key to successfully growing taro in hot, dry climates is to artificially create or simulate the conditions it naturally prefers. This involves meticulous water management, strategic planting locations, and soil enrichment.
1. Container Gardening: This is arguably the most effective method for hot, dry climates.
How to do it:
Pot Selection: Choose large, opaque pots to prevent root overheating. Dark colors absorb more heat, so lighter colors might be preferable, or you can place dark pots inside larger, lighter ones for insulation. Ensure excellent drainage holes.
Soil Mix: Use a rich potting mix amended with plenty of compost and aged manure. Adding perlite or vermiculite can improve aeration and moisture retention. A good starting point is 1/3 potting soil, 1/3 compost, and 1/3 peat moss or coco coir.
Planting: Plant a healthy taro corm (or a starter plant) about 4-6 inches deep.
Watering: Water deeply and consistently. Check the soil moisture daily, especially during hot spells. The soil should feel like a wrung-out sponge.
Location: Place containers in a location that receives morning sun and afternoon shade. If afternoon sun is unavoidable, consider placing the pot in a larger container filled with mulch or sand to provide insulation, or group it with other plants to create a more humid microclimate.
2. Raised Beds: Raised beds offer better drainage than in-ground planting and allow for easier control over soil composition.
Why it works: You can build a raised bed specifically with taro’s needs in mind, ensuring a rich, moisture-retentive soil mix. The elevated soil also warms up faster in spring, which can be beneficial.
How to do it:
Construction: Build a bed at least 12-18 inches high. Line the bottom with landscape fabric if desired, though for taro, some retention is good.
Soil Filling: Fill with a blend of topsoil, compost, aged manure, and perhaps some peat moss or coco coir. Aim for a deep, fertile medium.
Planting: Space plants about 2-3 feet apart to allow for mature leaf spread. Plant corms 4-6 inches deep.
Watering & Mulching: Water thoroughly after planting and apply a thick layer of organic mulch (straw, wood chips, shredded leaves) around the plants. This is crucial for retaining moisture. Water frequently, checking soil moisture regularly.
3. Site Selection for In-Ground Planting (Less Ideal, but Possible):
Why it works: If you must plant in the ground, choose the most advantageous spot.
How to do it:
Microclimate: Look for a location that naturally receives afternoon shade, such as the north or east side of a building or large tree.
Water Source Proximity: If possible, select a spot near a water source or where water naturally collects, but ensure it doesn’t become stagnant.
Soil Amendment: Dig a large planting hole (at least 2-3 feet wide and deep) and amend the soil heavily with compost and organic matter to improve its water-holding capacity.
Mulching and Watering: This becomes even more critical for in-ground planting. A very deep layer of mulch is essential. You may need to implement a consistent watering schedule, possibly using drip irrigation to deliver water directly to the root zone.
Step-by-Step Gardening Instructions: From Corm to Harvest
1. Sourcing and Preparing Corms:
Selection: Purchase healthy, firm taro corms from a reputable nursery or garden center. Look for corms with visible “eyes” or buds, which indicate viability. You can also buy “seed taro” specifically for planting.
“Chitting” (Optional but Recommended): In cooler parts of the season or if your corms are dormant, you can encourage sprouting. Place the corms in a shallow tray with moist potting mix or damp paper towels in a warm, bright location (but out of direct sun). Keep them moist. This process, called chitting, helps them start growing before planting.
Cutting Corms: If your corm is large, you can cut it into smaller pieces, ensuring each piece has at least one eye and a good portion of the corm flesh for energy. Allow cut surfaces to dry and callus over for a day or two before planting to prevent rot.
2. Planting:
Timing: Plant taro after the last frost has passed and the soil has warmed up. In hot, dry climates, this usually means late spring or early summer.
Depth: Plant corms 4-6 inches deep, with the eye facing upwards.
Spacing: If planting multiple plants, space them 2-3 feet apart in beds or containers to allow for their mature size (leaves can grow 3-6 feet tall and wide).
3. Watering Strategy:
Initial Watering: Water thoroughly immediately after planting.
Ongoing Watering: This is the most critical aspect.
Frequency: In hot, dry climates, you will likely need to water daily, especially during peak heat. Check soil moisture by sticking your finger a few inches into the soil. If it feels dry, it’s time to water.
Depth: Water deeply to encourage strong root growth. Shallow watering will lead to stress.
Method: Drip irrigation or soaker hoses are ideal for delivering water directly to the root zone and minimizing evaporation. If hand-watering, ensure you saturate the soil.
Container Care: Pots dry out much faster than garden beds. Expect to water containers daily, and possibly twice a day during extreme heat waves.
4. Feeding Your Taro:
Initial Feeding: Incorporate a generous amount of compost and a balanced organic fertilizer into the planting soil.
Regular Feeding: Taro is a heavy feeder, especially when grown for its corms. Start feeding with a balanced liquid fertilizer (like a 10-10-10 or fish emulsion) every 2-4 weeks once the plant is actively growing. You can also side-dress with compost or aged manure throughout the growing season. For edible corms, focus on fertilizers slightly higher in phosphorus and potassium to encourage root development.
5. Mulching:
Application: Apply a thick layer (3-4 inches) of organic mulch around the base of the plants, keeping it a few inches away from the stem to prevent rot.
Benefits: Mulch helps retain soil moisture, suppresses weeds (which compete for water and nutrients), keeps the soil cooler, and breaks down over time to enrich the soil.
6. Managing Pests and Diseases:
Common Issues: Taro is generally hardy, but in hot, dry conditions, stress can make it more susceptible to pests like spider mites, aphids, and mealybugs. Fungal diseases can also occur if there’s poor air circulation or inconsistent watering.
Prevention:
Healthy Plants: Keep plants well-watered and fertilized; healthy plants are more resistant.
Airflow: Ensure adequate spacing between plants.
Inspection: Regularly inspect leaves and stems for signs of pests.
Treatment: For minor infestations, a strong spray of water can dislodge pests. Neem oil or insecticidal soap are effective organic treatments for more persistent problems.
7. Harvesting:
Timing: Taro corms are typically ready for harvest 8-12 months after planting, depending on the variety and growing conditions. The plant will start to die back or yellow naturally when the corms are mature, usually in the fall or after a prolonged period of growth.
Process:
Preparation: Stop fertilizing a few weeks before harvest. If possible, let the soil dry slightly, but don’t let the plants completely desiccate.
Digging: Carefully dig around the base of the plant with a garden fork or spade, being careful not to damage the corms. Gently loosen the soil and lift the entire plant.
Separating Corms: Brush off excess soil. The main corm, along with any smaller cormels attached, will be at the base. You can separate the cormels from the main corm.
Curing (Optional but Recommended): Allow the corms to cure in a warm, dry, well-ventilated place for a few days to a week. This helps to harden the skin and improve storage life.
8. Storing Corms:
Method: Store cured corms in a cool, dry, dark place, preferably in a single layer on shelves or in breathable containers like burlap sacks or open crates. Avoid storing them in plastic bags, which can trap moisture and lead to rot.
Longevity: Properly stored taro corms can last for several months.
Common Mistakes to Avoid
Underwatering: This is the most common pitfall in hot, dry climates. Taro will wilt dramatically and may not produce viable corms if consistently underwatered.
Overwatering (leading to rot): While taro likes moisture, stagnant, waterlogged soil without adequate drainage can lead to root rot. Ensure your containers or beds have good drainage.
Too Much Direct Sun: Intense afternoon sun will scorch leaves and dry out the soil rapidly, stressing the plant.
Neglecting Fertilization: Taro requires significant nutrients for its large leaves and substantial corm development. Insufficient feeding will result in stunted growth.
Poor Soil Quality: Planting in compacted or nutrient-poor soil will severely limit growth. Taro needs rich, organic matter.
Not Mulching: In hot, dry conditions, skipping mulch is like signing your taro’s death warrant. It’s essential for moisture retention.
Planting Too Early: Planting before the danger of frost has passed can kill your taro.
Harvesting Too Soon: Be patient; taro needs a long growing season to develop large, edible corms.
Expert Tips or Pro Insights
The “Watering Can Trick”: For containers, place the pot inside a larger, empty container filled with 2-3 inches of water. The taro can then wick up moisture as needed. This can help maintain consistent moisture levels between waterings.
Companion Planting for Moisture: Plant taro near other plants that also appreciate moisture or provide some shade. This can create a slightly more humid microclimate around the taro. However, ensure plants aren’t too crowded, as this can hinder airflow.
Drip Irrigation Systems: Invest in a simple drip irrigation system. It’s the most efficient way to deliver water directly to the root zone, minimizing evaporation and ensuring consistent moisture. Use a timer for added convenience.
Soil Amendments are Key: Don’t skimp on compost. For containers, consider adding a bit of bentonite clay to the soil mix; it has excellent water-holding properties.
Observe Your Plants: Learn to read your taro. Wilting leaves can mean thirst, but they can also indicate root rot if the soil is waterlogged. Yellowing leaves might be nutrient deficiency or simply the end of the plant’s life cycle before harvest.
“Sacrificial Plants” for Shade: In extremely hot locations, consider planting a faster-growing, less valuable plant nearby specifically to provide afternoon shade for your taro.
Save Your Own Corms: Once you have a successful harvest, save some of the best corms to plant the following year. This can be more economical and ensures you have a reliable source of planting material.
Consider Raising the Water Table: If planting in a raised bed or in-ground, you can create a system where the soil is kept perpetually moist but not flooded, by building a small berm around the planting area and managing water input.
Seasonal or Climate Considerations
Spring: Focus on preparing planting sites (containers, beds) and sourcing corms. Plant only after all danger of frost has passed. Begin consistent watering as temperatures rise.
Summer: This is the peak growing season. Water and fertilize regularly. Provide afternoon shade if temperatures exceed 90°F (32°C) for extended periods. Watch for pests.
* Fall: Continue watering as needed, especially if the weather remains warm and dry

