
Effortless Basil Growth: How to Grow Basil From Seeds Easily
Ever dreamed of a kitchen counter overflowing with fragrant, fresh basil, ready to elevate your culinary creations? If you’ve ever hesitated to start basil from seed, thinking it’s a fiddly or complex process, prepare to be delighted. Growing your own basil from tiny seeds is not only achievable but incredibly rewarding, offering a direct connection to the vibrant flavors and aromas that define this beloved herb. Mastering this simple skill unlocks a season of delicious possibilities, from pesto and Caprese salads to infused oils and refreshing teas.
Quick Answer Box
Yes, you can absolutely grow basil from seeds effortlessly with the right approach! By providing consistent warmth, moisture, and light, even beginner gardeners can achieve a thriving basil patch. The key is to mimic the ideal growing conditions basil seeds need to germinate and establish strong seedlings.
What is Growing Basil From Seeds and Why It’s Important in Gardening
Growing basil from seeds refers to the process of germinating and nurturing basil plants starting from their very first stage of life – a seed. This fundamental horticultural practice is crucial for several reasons:
Cost-Effectiveness: Starting from seed is significantly more economical than purchasing established plants, allowing you to grow a larger quantity of basil for a fraction of the cost.
Variety Selection: Seed packets offer an incredible diversity of basil varieties, from the classic Genovese to unique flavors like cinnamon or lemon basil, which might not be readily available as starter plants.
Customization: You have complete control over the plant’s journey from seed to harvest, allowing you to tailor its environment and care precisely to your needs.
Sense of Accomplishment: There’s a unique satisfaction in nurturing a plant from its absolute beginning, fostering a deeper connection with your food and the gardening process.
Abundant Harvests: Successfully germinating seeds and growing healthy seedlings leads to a continuous supply of fresh basil throughout the growing season, far exceeding what you’d get from a few purchased plants.
Quick Recommendations or Key Insights about Growing Basil From Seeds Effortlessly
Warmth is Key: Basil seeds need consistent warmth (70-80°F / 21-27°C) to germinate.Moisture, Not Soggy: Keep the soil consistently moist but never waterlogged.
Light is Crucial: Once sprouted, basil needs plenty of bright light.
Don’t Sow Too Deep: Plant seeds shallowly, about 1/4 inch deep.
Patience Pays Off: Germination can take anywhere from 5 to 14 days.
Thinning is Important: Once seedlings have a few sets of true leaves, thin them to prevent overcrowding.
Successive Planting: Sow seeds every few weeks for a continuous harvest.
Detailed Breakdown: How to Grow Basil From Seeds Effortlessly
Embarking on the journey of growing basil from seeds is a straightforward and highly rewarding experience. The process can be broken down into several key stages, each requiring attention to detail to ensure your tiny seeds transform into lush, fragrant plants.
1. Choosing Your Basil Variety
Before you even touch a seed packet, consider the vast world of basil varieties. Each offers unique flavors, aromas, and growth habits:
Genovese Basil (Ocimum basilicum ‘Genovese’): The quintessential pesto basil, known for its large, glossy leaves and classic sweet, slightly peppery flavor. It’s a favorite for a reason.
Sweet Basil (Ocimum basilicum): A general term often used for Genovese or similar sweet-scented varieties.
Thai Basil (Ocimum basilicum var. thyrsiflora): Features a distinct anise or licorice-like flavor with purple stems and flowers. Excellent in Asian cuisine.
Lemon Basil (Ocimum basilicum ‘Citriodorum’): Offers a bright, citrusy aroma and flavor, perfect for fish, poultry, and desserts.
Purple Basil (e.g., ‘Dark Opal’, ‘Purple Ruffles’): Grown for its beautiful deep purple foliage and milder, sometimes slightly spicy flavor. Adds visual appeal to salads and garnishes.
Bush Basil (e.g., ‘Dwarf Greek’): Compact, bushy plants ideal for containers or smaller gardens, producing small, intensely flavored leaves.
Consider your intended use: For pesto, Genovese is king. For stir-fries, Thai basil is unmatched. For a unique twist, explore lemon or cinnamon basil.
2. Gathering Your Supplies
You don’t need a lot of fancy equipment to start basil seeds. Here’s what you’ll need:
Basil Seeds: Choose a reputable seed supplier.
Seed Starting Mix: A fine-textured, sterile potting mix designed for seedlings. Avoid using garden soil, which can be too heavy and may contain pathogens.
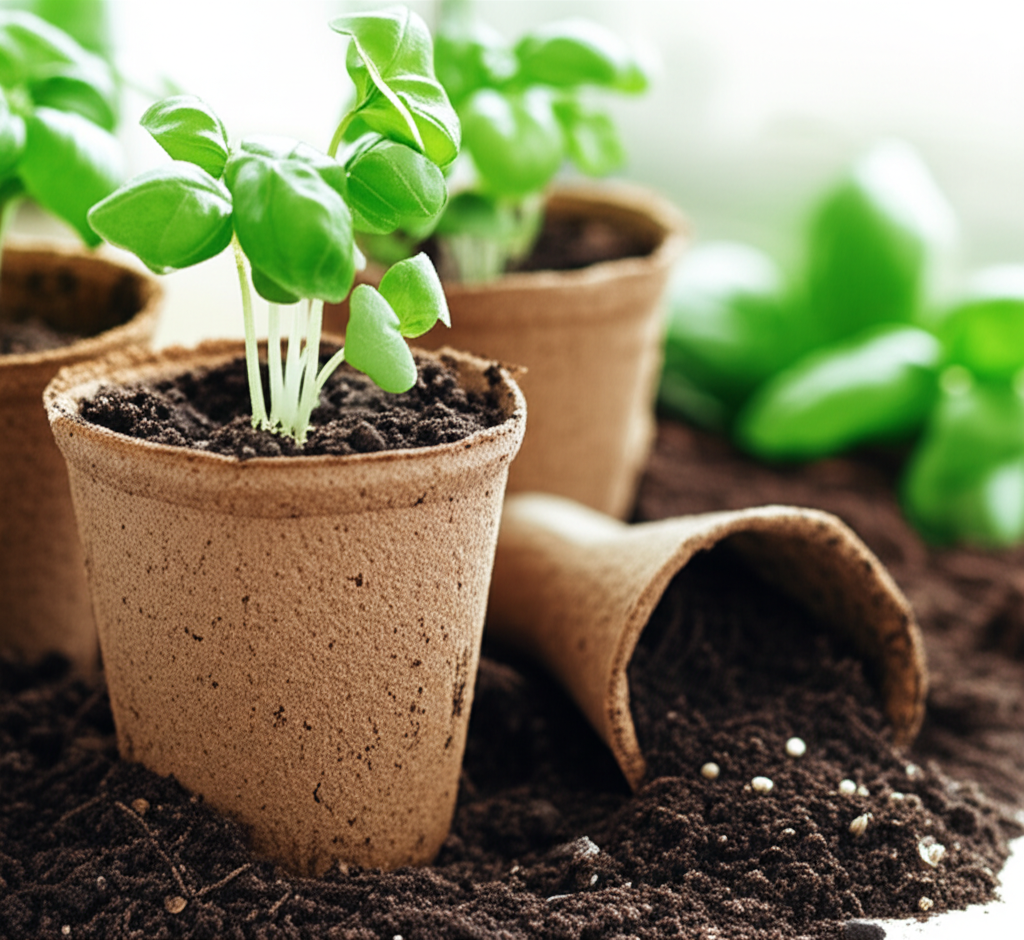
Containers: Seed starting trays with individual cells, small pots, peat pots, or even repurposed containers like yogurt cups (ensure drainage holes!).
Watering Can or Spray Bottle: For gentle watering.
Light Source: A sunny windowsill (south-facing is ideal) or grow lights.
Heat Mat (Optional but Recommended): To maintain consistent soil temperature for optimal germination.
Clear Plastic Dome or Wrap: To create a mini-greenhouse effect and retain moisture.
3. Sowing the Seeds: The Gentle Approach
This is where the magic begins. Basil seeds are small, so a delicate touch is essential.
Timing: Start basil seeds indoors 4-6 weeks before your last expected frost date. Basil is a warm-season herb and cannot tolerate any frost.
Prepare Your Containers: Fill your chosen containers with moist seed starting mix. Gently press the soil down to remove large air pockets, but don’t compact it too tightly.
Sowing: Basil seeds are tiny and do not need to be sown deeply. Sprinkle 2-3 seeds per cell or small pot.
Covering: Lightly cover the seeds with a thin layer of seed starting mix, about 1/4 inch (6 mm) deep. You can also gently press them into the surface of the soil and skip the covering, as basil seeds need light to germinate.
Watering: Mist the soil surface gently with a spray bottle or use a watering can with a fine rose. The goal is to moisten the soil without dislodging the seeds.
Creating a Humid Environment: Cover the containers with a clear plastic dome or plastic wrap. This traps humidity, which is crucial for germination.
4. Providing the Right Germination Environment
This is arguably the most critical phase for effortless seed starting. Basil is a tropical plant and thrives in warmth and consistent moisture.
Warmth: Basil seeds require soil temperatures between 70-80°F (21-27°C) for optimal germination.
Heat Mat: Placing your seed trays on a seedling heat mat is the most effective way to ensure consistent warmth, especially if your home is cooler.
Warm Location: If you don’t have a heat mat, place the trays in a consistently warm location, such as on top of a refrigerator or near a radiator (but not directly on it to avoid drying out).
Moisture: The seed starting mix should remain consistently moist but not waterlogged.
Misting: Continue to mist the surface gently if it starts to dry out, especially if you haven’t removed the plastic cover yet.
Bottom Watering (Once Seedlings Emerge): Once you see sprouts, it’s often better to water from the bottom by placing the trays in a shallow pan of water. This encourages stronger root growth and prevents damping off.
Light: While seeds don’t need light to germinate, it’s beneficial to place them in a bright location once you see the first sprouts appear. If they sprout in the dark, they will become leggy and weak immediately.
5. Caring for Seedlings: From Sprout to Strong Plant
Once your basil seeds have germinated, their needs shift slightly.
Remove the Cover: As soon as you see sprouts, remove the plastic dome or wrap to allow for air circulation and prevent fungal diseases like “damping off.”
Light, Light, Light! This is paramount. Basil seedlings need at least 6-8 hours of bright light per day.
Sunny Windowsill: A south-facing window is ideal. Rotate the trays daily so the seedlings grow evenly.
Grow Lights: If natural light is insufficient, use fluorescent or LED grow lights positioned just a few inches above the seedlings. Keep them on for 14-16 hours a day.
Watering: Continue to keep the soil consistently moist. As mentioned, bottom watering is excellent once seedlings are established. Allow the top layer of soil to dry slightly between waterings.
Temperature: Maintain a slightly cooler temperature now, around 65-70°F (18-21°C) during the day and a bit cooler at night. Avoid drafts.
Air Circulation: Good airflow helps prevent fungal diseases. A small fan set on low can be beneficial.
Fertilizing (Optional): Once seedlings have developed their first set of “true leaves” (the leaves that look like basil leaves, not the initial seed leaves or cotyledons), you can begin feeding them with a diluted liquid fertilizer (half-strength) every 2-3 weeks.
6. Transplanting Seedlings
You’ll know your basil seedlings are ready to be transplanted into larger pots or directly into the garden when they have several sets of true leaves and are at least 3-4 inches tall.
Harden Off: Before moving them outdoors, you must “harden them off.” This is a gradual process of acclimating them to outdoor conditions.
Week 1: Place seedlings in a sheltered, shady spot outdoors for a few hours each day, bringing them in at night.
Week 2: Gradually increase their exposure to sunlight and leave them out for longer periods, bringing them in only if temperatures drop significantly or extreme weather is expected.
Week 3: They should be able to withstand a full day outdoors.
Transplanting to Pots: If planting in larger pots, use a good quality potting mix. Gently loosen the seedling from its starter cell, being careful not to damage the roots. Plant it at the same depth it was growing in the starter tray. Water thoroughly.
Transplanting to the Garden:
Timing: Wait until all danger of frost has passed and nighttime temperatures are consistently above 50°F (10°C).
Location: Choose a spot that receives at least 6-8 hours of direct sunlight daily.
Soil Preparation: Amend the soil with compost or well-rotted manure to improve drainage and fertility.
Spacing: Space basil plants about 10-12 inches apart to allow for good air circulation and growth.
Planting: Dig a hole slightly larger than the seedling’s root ball. Gently remove the seedling from its container, place it in the hole, and backfill with soil. Plant at the same depth as it was in its original container. Water well.
7. Pinching and Pruning for Bushy Growth
This is a crucial step for maximizing your basil harvest and promoting a bushy, healthy plant.
Pinching the Tops: When your basil seedlings are about 6 inches tall and have several sets of leaves, pinch off the top set of leaves, just above a leaf node (where leaves emerge from the stem). This encourages the plant to branch out from those leaf nodes, resulting in a bushier plant with more leaves.
Regular Harvesting: Continue to pinch or snip leaves regularly as you need them. Always harvest from the top, cutting just above a leaf node. This will keep the plant producing more leaves.
Deadheading Flowers: If you see flower stalks starting to form, pinch them off immediately. Allowing the plant to flower will redirect its energy from leaf production to seed production, and the leaves can become more bitter once the plant flowers.
Practical Applications in the Garden
The knowledge of growing basil from seeds effortlessly translates directly into tangible benefits for your garden and kitchen:
Kitchen Garden Staple: Sow seeds in small pots to keep on your windowsill for an “always-on” supply of fresh herbs for cooking.
Container Gardening: Bush varieties are perfect for containers on patios, balconies, or even windowsills, making fresh basil accessible even in small spaces.
Successive Planting: To ensure a continuous harvest throughout the summer, sow new batches of basil seeds every 3-4 weeks. This prevents a gap in your supply as older plants mature.
Companion Planting: Basil is known to deter some pests, like aphids and whiteflies, and its fragrance can mask the scent of more vulnerable plants. Consider planting it near tomatoes, peppers, or cucumbers.
Edible Landscaping: Many purple basil varieties are not only delicious but also stunningly beautiful, adding color and fragrance to your ornamental beds.
Common Mistakes to Avoid
Even with the best intentions, a few common pitfalls can hinder your basil seed-starting success.
Sowing Too Deep: Basil seeds need light to germinate. Planting them too deep will prevent or significantly delay sprouting.
Avoid: Burying seeds more than 1/4 inch deep.
Tip: Lightly sprinkle them on the surface and lightly cover, or press them into the soil surface without covering.
Inconsistent Watering: Letting the soil dry out completely or keeping it waterlogged can be detrimental.
Avoid: Letting the seed starting mix dry out; it needs to stay consistently moist.
Avoid: Overwatering, which can lead to rot and fungal diseases.
Tip: Mist regularly and consider bottom watering once seedlings emerge.
Insufficient Light: Leggy, weak seedlings are a direct result of not enough light after germination.
Avoid: Keeping seedlings in a dark spot after they sprout.
Tip: Provide at least 6-8 hours of direct sunlight or 14-16 hours under grow lights.
Overcrowding: Planting too many seeds too close together leads to weak seedlings that compete for resources.
Avoid: Sowing more than 2-3 seeds per cell/pot.
Tip: Thin seedlings to the strongest one per cell once they have true leaves.
Skipping Hardening Off: Transplanting indoor-grown seedlings directly into the harsh outdoor environment can shock and kill them.
Avoid: Moving seedlings straight from indoors to outdoors.
Tip: Gradually acclimate them over 7-10 days.
Not Pinching: Failing to pinch the growing tips results in tall, lanky plants with fewer leaves.
Avoid: Letting plants grow tall without intervention.
Tip: Pinch the top set of leaves when the plant is 6 inches tall and continue regular harvesting from the tops.
Letting Them Flower: Allowing basil plants to bolt (flower) redirects energy and can reduce leaf flavor.
Avoid: Letting flower stalks develop.
Tip: Pinch off flower stalks as soon as you see them.
Expert Tips or Pro Insights
The “True Leaves” Rule: Always wait for your basil seedlings to develop their first set of true leaves before thinning or transplanting. These are the leaves that resemble mature basil leaves, not the initial rounded seed leaves (cotyledons).Seed Starting Mix Quality: Invest in a good quality, sterile seed starting mix. It’s formulated for optimal drainage and aeration, which is crucial for delicate seedlings. Avoid using soil from your garden, as it can be too dense and may harbor diseases.
The Power of the Heat Mat: While not strictly mandatory, a seedling heat mat can make a significant difference in germination speed and consistency, especially in cooler indoor environments. It provides the stable warmth basil seeds crave.
Don’t Be Afraid to Prune: Regular pinching and harvesting are not just about getting more basil; they are essential for plant health and vigor. Think of it as shaping and encouraging growth.
Successive Sowing Strategy: For the most consistent supply, sow a small batch of seeds every 2-3 weeks from early spring until about 6 weeks before your first fall frost. This ensures you always have young, productive plants.
Basil Loves Company: While basil is a great companion plant for many vegetables, it also appreciates company. Planting several basil plants together can create a microclimate that benefits all of them.
Seasonal or Climate Considerations
Basil is a heat-loving annual herb, making its growth cycle closely tied to the seasons and your climate.
Spring: This is the primary season for starting basil seeds indoors, ensuring seedlings are ready for transplanting after the last frost. In warmer climates, you might be able to direct sow basil seeds outdoors in late spring.Summer: This is basil’s peak growing season. Provide consistent watering, ample sunlight, and regular harvesting or pinching to encourage lush growth. In very hot and dry climates, afternoon shade can be beneficial to prevent scorching.
Fall: As temperatures begin to drop and frost threatens, basil growth will slow. Harvest any remaining basil before the first frost. You can also dry or freeze excess basil to preserve its flavor.
* Indoor Growing: Basil can be grown indoors year-round using grow lights and appropriate potting mix, providing a fresh supply even in winter. However, it requires consistent light and warmth.
Buying Guide or Decision-Making Process: Choosing Your Basil Seeds
When it comes to selecting basil seeds, several factors can influence your choice and ensure a successful growing experience.
1. Variety: As discussed, choose a variety based on your culinary preferences and desired plant characteristics (flavor, color, growth habit).
2. Seed Packet Quality: Look for reputable seed companies. Check the “packed for” or “harvest” date on the seed packet. Fresher seeds generally have higher


