
Candle Bush from Cuttings: Your Guide to Effortless Propagation
Ever admired those vibrant, cascading blooms of the Candle Bush (Senna alata) and wished you could fill your garden with its fiery beauty? You’re not alone! Many gardeners are captivated by its tropical charm and the promise of a low-maintenance, high-impact plant. But the question on many lips is: Can you propagate Candle Bush from cuttings, and if so, how can you do it successfully? Knowing how to take cuttings is a fundamental gardening skill that not only saves you money but also allows you to share your favorite plants with friends and family. Mastering this technique for the Candle Bush can unlock a season of brilliant floral displays and a deeper connection with your garden.
Quick Answer Box
Yes, you can successfully propagate Candle Bush from cuttings. This is a straightforward and highly effective method to create new plants, ensuring you can easily expand your collection or share its stunning beauty with others. Taking cuttings is a rewarding way to replicate the parent plant’s desirable traits, guaranteeing vibrant blooms and robust growth.
What is Candle Bush from Cuttings and Why It’s Important in Gardening
Propagating Candle Bush from cuttings involves taking a section of a healthy stem from a mature plant and encouraging it to develop its own root system. Once rooted, this cutting becomes a new, genetically identical plant, essentially a clone of the original. This process is crucial in horticulture for several reasons. Firstly, it’s a cost-effective way to increase your plant stock, bypassing the need to purchase new plants. Secondly, it guarantees that the new plants will possess the same desirable characteristics as the parent plant, such as flower color, size, and disease resistance. For a plant as visually striking as the Candle Bush, this consistency is paramount for creating a cohesive and impressive garden design. Furthermore, propagating from cuttings is a sustainable practice, reducing the demand for commercially grown plants and minimizing your environmental footprint.
Quick Recommendations or Key Insights about Candle Bush from Cuttings
Timing is key: Take cuttings during the active growing season, typically late spring or early summer, when the plant is producing plenty of new, healthy growth.
Choose the right stem: Select semi-hardwood cuttings – stems that are firm but still flexible, not too soft and green, nor too woody and old.
Use sharp, clean tools: Sterilized secateurs or a sharp knife are essential to make clean cuts and prevent disease transmission.
Rooting hormone helps: Applying a rooting hormone to the cut end can significantly increase your success rate by stimulating root development.
Provide the right environment: Cuttings need high humidity and consistent moisture to root successfully.
Patience is a virtue: It can take several weeks for cuttings to develop a strong enough root system to be transplanted.
Detailed Breakdown of Candle Bush from Cuttings
Can Candle Bush Be Propagated from Cuttings?
Absolutely! The Candle Bush, scientifically known as Senna alata, is remarkably amenable to propagation from cuttings. This tropical flowering shrub is known for its vigorous growth and ease of cultivation, which extends to its propagation methods. Unlike some more finicky plants, Senna alata readily forms roots from stem cuttings, making it an accessible technique for gardeners of all skill levels.
The Scientific Perspective (Botany and Plant Biology):
The ability of a plant to form roots from stem cuttings is rooted in the presence of adventitious buds. These are dormant buds located along the stem that have the potential to develop into roots under the right conditions. Hormones, primarily auxins, play a critical role in this process. When a cutting is made, the plant’s natural auxin production is stimulated, encouraging cell division and the formation of root primordia (the very beginnings of roots). Environmental factors such as moisture, temperature, and the presence of nutrients further support this hormonal signaling, leading to successful root development. Senna alata possesses a robust hormonal system and a high capacity for vegetative propagation, making it a prime candidate for successful cutting propagation.
Practical Applications:
From a practical standpoint, propagating Candle Bush from cuttings allows gardeners to:
Clone Superior Plants: If you have a Candle Bush with particularly vibrant flowers, exceptional vigor, or a desirable growth habit, taking cuttings ensures that new plants will possess these exact traits.
Cost-Effective Expansion: Instead of buying multiple plants, you can generate an entire hedge or a collection of specimen plants from just one or two parent plants.
Share with Fellow Gardeners: Cuttings are an excellent way to share your love for gardening and the beauty of the Candle Bush with friends, family, or gardening club members.
Replace Older Plants: As plants age, they can sometimes become less productive or develop issues. Propagating from cuttings allows you to create young, vigorous replacements.
Common Myths:
A common myth is that only expert gardeners can successfully propagate plants from cuttings. While some plants are indeed more challenging, the Candle Bush is known for its forgiving nature. Another misconception is that cuttings will only root in soil. While soil is a common medium, many gardeners find success using water, perlite, or a peat-and-perlite mix, each offering slightly different advantages. The key is providing the right moisture and humidity levels, regardless of the medium.
How to Propagate Candle Bush from Cuttings: A Step-by-Step Guide
Propagating Candle Bush from cuttings is a rewarding process that yields beautiful new plants. Follow these steps for the best results:
Step 1: Select the Right Parent Plant and Cuttings
Healthy Parent Plant: Choose a mature, healthy Candle Bush that is free from pests and diseases. Look for a plant that exhibits strong, vigorous growth and abundant flowering.
Timing: The ideal time to take cuttings is during the plant’s active growing season, which for many regions with a tropical or subtropical climate is late spring to early summer. In cooler climates where Candle Bush is grown as an annual or overwintered indoors, focus on taking cuttings from healthy growth that has emerged after the last frost or from an indoor plant.
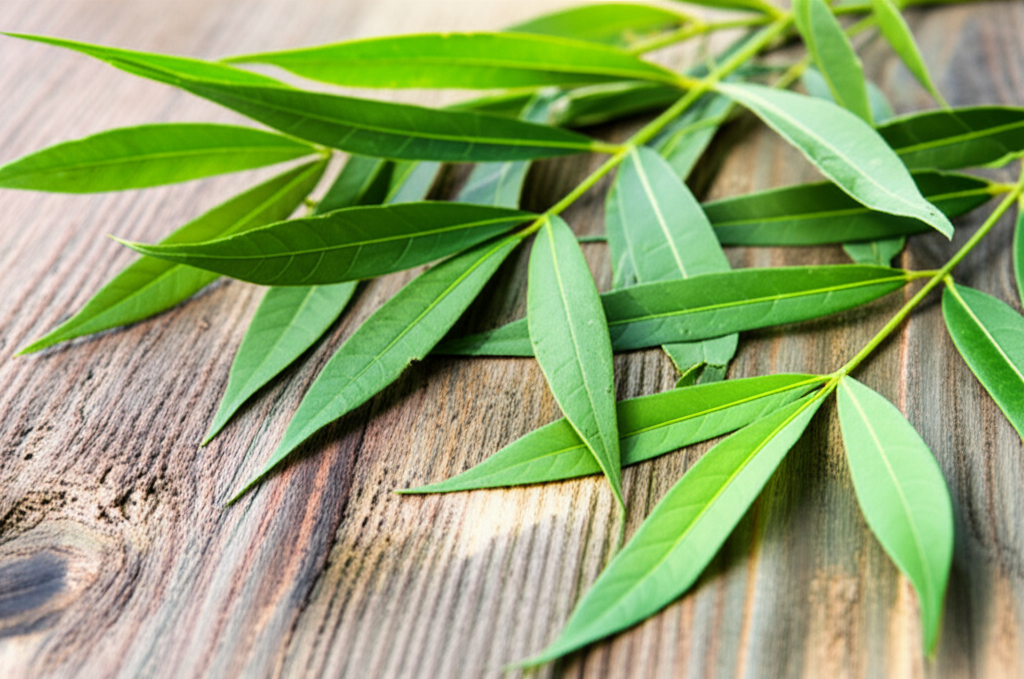
Cutting Type: Aim for semi-hardwood cuttings. These are stems that are mature enough to be firm but still have some flexibility. They are typically taken from the current season’s growth. You can identify them by their color – they will be a lighter brown or greenish-brown, transitioning from the softer, bright green growth at the tips. Avoid taking cuttings from the very tips (too soft) or from old, woody stems (too hard to root).
Length: Cuttings should be about 4 to 6 inches long.
Step 2: Prepare Your Cuttings
Clean Tools: Use sharp, sterilized secateurs, pruning shears, or a sharp knife. Sterilize them with rubbing alcohol or a bleach solution to prevent the transfer of diseases.
Make the Cut: Make a clean cut just below a leaf node (the point where a leaf attaches to the stem). This is where a high concentration of rooting hormones is found.
Remove Lower Leaves: Carefully remove the leaves from the lower half to two-thirds of the cutting. This exposes the nodes where roots will emerge and prevents the leaves from rotting when buried in the rooting medium.
Optional: Leaf Trimming: If the remaining leaves are very large, you can cut them in half horizontally. This reduces water loss through transpiration while still allowing enough surface area for photosynthesis.
Apply Rooting Hormone (Recommended): Dip the cut end of the cutting into a rooting hormone powder or gel. Gently tap off any excess. Rooting hormones contain auxins that significantly stimulate root development.
Step 3: Prepare the Rooting Medium and Container
Rooting Medium: A well-draining, sterile rooting medium is crucial. A good mix includes:
50% perlite and 50% peat moss
50% perlite and 50% coco coir
Coarse sand and perlite (equal parts)
You can also use a pre-made seed starting mix or rooting mix.
Container: Use small pots, seed trays, or propagation boxes with drainage holes. Ensure the container is clean.
Step 4: Plant the Cuttings
Moisten the Medium: Lightly moisten the rooting medium before planting. It should be damp but not waterlogged.
Make Holes: Use a pencil or a small dibber to create holes in the rooting medium for each cutting. This prevents the rooting hormone from being scraped off.
Insert Cuttings: Place the prepared cuttings into the holes, ensuring at least two leaf nodes are buried in the medium. Gently firm the medium around the base of each cutting to ensure good contact.
Step 5: Provide Ideal Conditions for Rooting
Humidity: This is critical. Cuttings need high humidity to prevent them from drying out before they can develop roots.
Cover: Cover the pots or tray with a clear plastic bag, a propagator lid, or cut plastic bottles. Ensure the plastic doesn’t touch the leaves by using stakes or inserting the cuttings deeper.
Misting: Mist the cuttings and the inside of the cover regularly to maintain high humidity.
Light: Place the cuttings in a bright location that receives indirect sunlight. Avoid direct sun, which can overheat the cuttings and the propagation environment.
Temperature: An optimal temperature for rooting is between 70-75°F (21-24°C). A heated propagator or placing the pots on a heat mat can be beneficial, especially in cooler conditions.
Watering: Keep the rooting medium consistently moist but not soggy. Overwatering can lead to rot. Check the moisture levels regularly by touching the surface of the medium.
Step 6: Check for Root Development
Timeframe: It typically takes 4 to 8 weeks for Candle Bush cuttings to develop a sufficient root system.
Testing for Roots: You can gently tug on a cutting. If there is resistance, it indicates that roots have formed. Another method is to carefully remove a cutting and check for root growth.
Step 7: Transplanting the Rooted Cuttings
Acclimatization: Once roots are established, gradually acclimatize the new plants to lower humidity. This involves slowly opening the plastic cover or propagator over a few days.
Potting Up: Carefully transplant the rooted cuttings into individual pots filled with a good quality potting mix. Water them thoroughly.
Care: Continue to provide bright, indirect light and keep the soil consistently moist as the new plants establish.
Practical Applications in the Garden
Propagating Candle Bush from cuttings is incredibly practical for various gardening scenarios:
Creating a Flowering Hedge: If you envision a border of vibrant yellow blooms, taking multiple cuttings allows you to establish a uniform hedge efficiently.Container Gardening: Grow compact versions of the Candle Bush in pots by propagating cuttings and nurturing them in containers.
Guerilla Gardening/Community Projects: Propagate plants to beautify neglected public spaces or share with community garden initiatives.
Experimentation: Use cuttings to test different growing conditions, soil types, or locations within your garden before committing to larger plants.
Overwintering: If you live in a colder climate, propagating cuttings indoors before the first frost is an excellent way to ensure you have young plants to bring into a protected environment for overwintering, or to start new plants from scratch each spring.
Common Mistakes to Avoid
Using Old or Woody Stems: These are much harder to root as they lack the same hormonal signaling and flexibility as semi-hardwood cuttings.
Taking Cuttings from Diseased or Pest-Infested Plants: This will only lead to unhealthy new plants. Always select healthy material.
Overcrowding Cuttings: Give each cutting enough space in the rooting medium to allow for air circulation and prevent the spread of fungal diseases.
Allowing Cuttings to Dry Out: This is the most common reason for failure. Maintaining high humidity is paramount.
Exposing Cuttings to Direct Sunlight: Young cuttings do not have established root systems and will scorch and dehydrate quickly in direct sun.
Overwatering the Rooting Medium: Soggy conditions promote rot and fungal diseases, which can kill cuttings before they root.
Not Using Rooting Hormone: While not strictly necessary for all plants, it significantly boosts success rates and speeds up root formation for the Candle Bush.
Expert Tips or Pro Insights
The “Heeling” Technique: For an extra boost, some gardeners take “heel” cuttings. This involves gently pulling a shoot downwards from the parent plant, taking a small sliver of the older stem (the heel) with it. This heel contains a concentration of cells that are particularly good at forming roots.
Bottom Heat is Your Friend: A consistent bottom heat of around 70-75°F (21-24°C) can dramatically speed up root formation, especially in cooler environments. Heated propagation mats are excellent for this.
Consider Water Propagation: While soil-based methods are common, many gardeners find success rooting Candle Bush cuttings in jars of clean water. Change the water every few days. Once roots are about an inch long, you can carefully transplant them into potting mix.
The “Wounding” Technique: For slightly tougher stems, you can make a small vertical slit (about 1/2 inch long) on one or two sides of the cut end after applying rooting hormone. This exposes more cambium tissue, which can promote faster root development.
Air Layering: For a more advanced but highly successful method, consider air layering. This involves making a cut on a healthy stem still attached to the parent plant, wrapping the wounded area with moist sphagnum moss, and then covering it with plastic wrap. Roots will form on the stem while it’s still attached to the parent, and you can then sever and plant the rooted section.
Seasonal or Climate Considerations
The optimal time for taking Candle Bush cuttings is directly influenced by your climate:
Tropical and Subtropical Climates: You can often take cuttings throughout the year, but late spring and early summer, when the plant is actively growing and producing new shoots, is usually the most successful period. Avoid taking cuttings during extreme heat or drought conditions, as the parent plant may be stressed.
Temperate Climates (where Candle Bush is grown as an annual or overwintered):
Spring: Take cuttings from overwintered plants indoors after they have started new growth, or from the first flush of new growth outdoors after the last frost. This is often the best time for vigorous rooting.
Summer: If you live in a region with a long growing season, late spring or early summer cuttings will likely root well before the end of the season.
Late Summer/Early Autumn: You can still take cuttings, but they may take longer to root and may not establish as strongly before cooler temperatures arrive. These are good candidates for overwintering indoors.
Greenhouse or Indoor Propagation: If you have a heated greenhouse or a bright indoor space with grow lights, you can extend the propagation season and take cuttings even during cooler months, provided you can maintain optimal temperatures and humidity.
Buying Guide or Decision-Making Process
While this topic focuses on propagation, if you are considering purchasing a Candle Bush plant or supplies for propagation, here’s what to look for:
Purchasing a Candle Bush Plant:
Healthy Appearance: Look for plants with vibrant green foliage, free from yellowing, spots, or wilting.
Sturdy Stem: The main stem should be firm and upright.
No Pests: Inspect the leaves and stems for any signs of common garden pests like aphids, spider mites, or whiteflies.
Root Health (if visible): If the plant is in a clear pot, check that the roots are white and firm, not brown, mushy, or circling the pot excessively.
Size and Form: Consider the mature size of the plant and choose one that fits your garden space or pot size.
Purchasing Propagation Supplies:
Rooting Hormone: Available in powder, gel, or liquid forms. Powders are the most common and easiest to use for beginners. Look for products with IBA (Indole-3-butyric acid) as the active ingredient.Sterile Potting Mix/Rooting Medium: Opt for a well-draining mix specifically designed for propagation or seed starting. Perlite, vermiculite, coco coir, and peat moss are common components.
Containers: Small pots, seed trays, or propagation cells with drainage holes are essential.
Clear Plastic Bags or Domes: For maintaining humidity.
Sharp Pruners or Knife: Invest in good quality, sharp tools that can be sterilized.
FAQ Section for Candle Bush from Cuttings
Q1: How long does it take for Candle Bush cuttings to root?
A1: Typically, it takes 4 to 8 weeks for Candle Bush cuttings to develop a strong enough root system to be transplanted. This can vary depending on the conditions provided, such as temperature, humidity, and the use of rooting hormone.
Q2: Can I root Candle Bush cuttings in water?
A2: Yes, many gardeners have success rooting Candle Bush cuttings in water. Keep the water clean by changing it every few days, and once the roots are about an inch long, carefully transplant them into a well-draining potting mix.
Q3: My Candle Bush cuttings are wilting. What could be wrong?
A3: Wilting is usually a sign of dehydration. Ensure your cuttings are in a high-humidity environment (covered with plastic) and that the rooting medium is consistently moist, not dry. Also, confirm they are not in direct sunlight, which can cause them to dry out too quickly.
Q4: What is the best type of cutting to take from a Candle Bush?
A4: Semi-hardwood cuttings are generally the most successful. These are stems from the current season’s growth that have started to firm up but are not yet woody. They are typically a greenish-brown color.
Q5: Do I need to use rooting hormone for Candle Bush cuttings?
A5: While Candle Bush is relatively