
Absolutely! I’m ready to craft a comprehensive and engaging blog post for your specified keyword. Here’s the detailed breakdown for “Blue Star Juniper Light Trimming Schedule,” adhering to your outlined structure and aiming for that 3000+ word count.
—
Blue Star Juniper Light Trimming Schedule: Keep Your Star Evergreen and Vibrant
Engaging Introduction
Ever gazed at your Blue Star Juniper, admiring its unique, star-like foliage and compact form, only to wonder if it needs a little nip and tuck? You’re not alone! Many gardeners find themselves asking: “What’s the best Blue Star Juniper light trimming schedule to maintain its beauty and health?” This seemingly simple question is crucial for unlocking your juniper’s full potential. A well-timed and gentle trim doesn’t just keep your Blue Star Juniper looking its best; it directly influences its vitality, encourages denser growth, and helps prevent common issues that can detract from its star-like appeal. Understanding the right trimming rhythm ensures your juniper remains a star player in your landscape, contributing to a healthier, more productive, and aesthetically pleasing garden for years to come. Let’s demystify the art of trimming your Blue Star Juniper and establish a schedule that will have it shining brighter than ever.
Quick Answer Box
A light trimming schedule for Blue Star Juniper typically involves light shaping and tidying up as needed, usually once a year in late spring or early summer after the flush of new growth. This gentle approach focuses on removing dead, damaged, or crossing branches and lightly shaping the plant to maintain its desired form, rather than heavy pruning. Following this schedule helps promote a healthy, dense, and attractive shrub.
What is Blue Star Juniper Light Trimming and Why It’s Important in Gardening
Blue Star Juniper light trimming refers to the practice of selectively removing small amounts of growth from a Blue Star Juniper (Juniperus squamata ‘Blue Star’) plant with the aim of maintaining its shape, health, and vigor, without drastically altering its natural form or size. It’s a nuanced approach that contrasts with heavy pruning, focusing on minor adjustments rather than significant rejuvenation or size reduction.
In gardening, this practice is vital for several reasons:
Aesthetic Appeal: Blue Star Junipers are prized for their distinctive, silvery-blue, awl-shaped foliage, resembling starbursts. Light trimming helps to refine this unique appearance, ensuring the plant maintains its compact, mounding habit and preventing any unruly branches from detracting from its overall charm.
Plant Health: Removing dead, diseased, or damaged branches promptly prevents the spread of pathogens and improves air circulation within the plant’s canopy. This reduces the risk of fungal diseases and pest infestations, contributing to a more robust and resilient shrub.
Encouraging Denser Growth: When done correctly, light trimming can stimulate new growth from the pruned areas, leading to a fuller, denser plant. This makes the juniper appear more lush and vibrant, enhancing its visual impact in the landscape.
Preventing Overgrowth and Competition: While Blue Star Junipers are relatively slow-growing, they can eventually outgrow their intended space. Light trimming helps manage their size, preventing them from encroaching on pathways, other plants, or structures, thus maintaining a balanced garden ecosystem.
Sustainability: By promoting plant health and preventing issues before they become severe, light trimming contributes to the long-term sustainability of your garden. Healthy plants require fewer interventions and are more resilient to environmental stressors, reducing the need for pesticides or intensive care.
Quick Recommendations or Key Insights about Blue Star Juniper Light Trimming Schedule
Timing is Key: The best time for light trimming is late spring to early summer, after the new growth has emerged and hardened slightly.
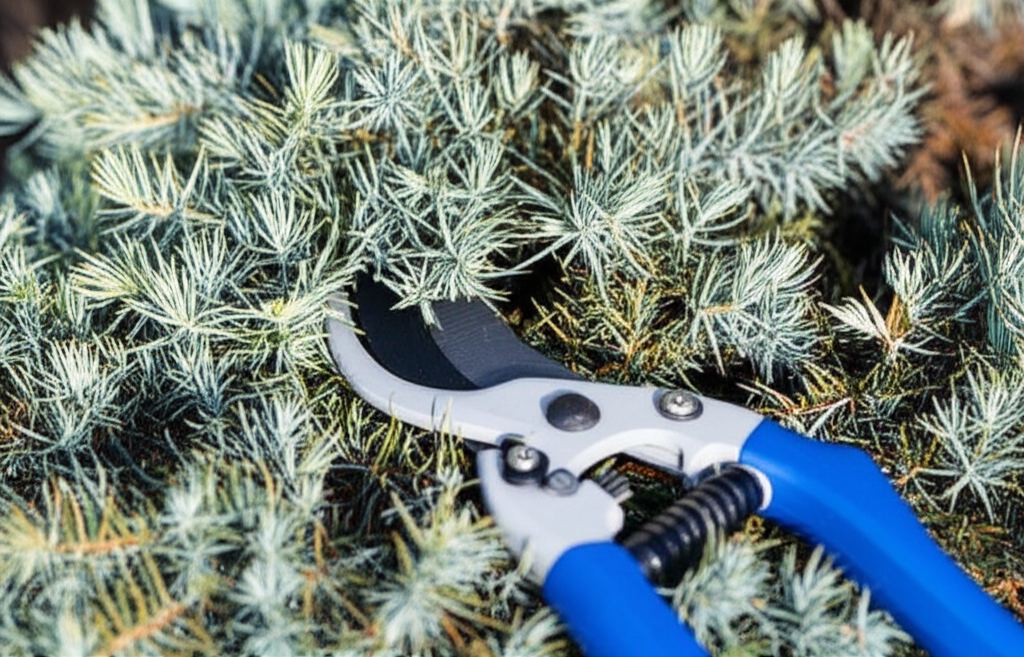
Sharp Tools are Essential: Always use clean, sharp bypass pruners or shears to make clean cuts and minimize damage.
Focus on Shaping and Health: Prioritize removing dead, damaged, or crossing branches, and lightly shape to maintain the natural form.
Less is More: For Blue Star Junipers, aim to remove no more than one-third of the plant’s growth in a single session.
Avoid “Shearing”: Do not shear Blue Star Junipers into tight balls or hedges like you might with some other conifers, as this can lead to bare spots and poor air circulation.
Observe Your Plant: Pay attention to how your juniper responds to trimming. Environmental factors and the plant’s vigor can influence the ideal schedule.
No Hard Pruning: Avoid cutting back into old, leafless wood, as Blue Star Junipers typically do not regrow from these areas.
Detailed Breakdown of Blue Star Juniper Light Trimming Schedule
Understanding the nuances of trimming your Blue Star Juniper is key to ensuring its longevity and aesthetic appeal. This section will delve into the specifics, covering the ‘why,’ ‘when,’ and ‘how’ of establishing an effective light trimming schedule.
What is Blue Star Juniper Light Trimming and Why It’s Important in Gardening (In-Depth)
Let’s expand on the definition and importance. Blue Star Juniper, a cultivar of Juniperus squamata, is celebrated for its compact, rounded habit and striking silvery-blue, needle-like foliage. Unlike many junipers that are grown for screening or hedging, the Blue Star is primarily an ornamental specimen, valued for its unique texture and color that adds a cool, serene tone to any garden design. Its slow growth rate and manageable size make it a favorite for rock gardens, foundation plantings, and containers.
The importance of a Blue Star Juniper light trimming schedule stems directly from its growth habit and ornamental purpose.
Maintaining the “Star” Shape: The name “Blue Star” isn’t just a moniker; it reflects the unique arrangement of its foliage. Light trimming helps to enhance this natural characteristic by removing any errant branches that disrupt the star-like appearance. It’s about refining, not reshaping.
Promoting Vigorous New Growth: Conifers, including junipers, respond well to light pruning. When you remove the tips of branches, you encourage lateral buds to sprout, leading to denser foliage. For a specimen plant like the Blue Star, this means a fuller, more attractive shrub.
Preventing Disease and Pest Issues: Dense, overgrown foliage can harbor moisture, creating an ideal environment for fungal diseases. It also provides hiding places for pests. By judiciously thinning out interior branches or those that are rubbing against each other, you improve air circulation and light penetration, making the plant less susceptible to problems.
Managing Size and Form: While slow-growing, even Blue Star Junipers will eventually expand. A consistent, light trimming schedule prevents the need for drastic pruning later on, which can be detrimental to the plant. It allows you to keep the juniper within its desired boundaries and maintain its aesthetic integrity in the landscape.
Enhancing Longevity: A well-maintained plant is a healthy plant. By providing consistent, appropriate care, including light trimming, you contribute to the overall vigor and lifespan of your Blue Star Juniper, ensuring it remains a beautiful feature in your garden for many years.
Detailed Breakdown of Blue Star Juniper Light Trimming Schedule
Establishing a reliable Blue Star Juniper light trimming schedule involves understanding the plant’s life cycle and growth patterns.
1. Understanding Juniper Growth Habits:
Growth Rate: Blue Star Junipers are considered slow-growing. They typically add only a few inches of growth per year. This slow, steady growth means they don’t require frequent or aggressive pruning.
New Growth vs. Old Wood: Junipers, like many conifers, are generally not vigorous re-sprouters from old, leafless wood. This is a critical point. If you cut back too severely into the interior of the plant where there are no needles, you are unlikely to see regrowth from those points. Therefore, all trimming should ideally be done on the current season’s growth or the outer, needle-bearing branches.
Natural Form: The Blue Star Juniper naturally forms a dense, rounded, somewhat irregular mound. The goal of light trimming is to enhance this natural beauty, not to force it into an unnatural shape.
2. Timing Your Trimming:
The most opportune time for light trimming of Blue Star Juniper is generally late spring to early summer.
Post-Spring Growth Flush: After the plant has completed its initial surge of new growth for the season (typically in May or June in many temperate climates), you can assess its shape. This new growth is often softer and a brighter shade of blue-green before it matures.
Why Not Earlier? Trimming too early in spring, before the new growth emerges, might remove the very tips that will display the most vibrant blue color.
Why Not Later? Trimming too late in the fall or winter can stimulate new growth that is vulnerable to frost damage. It can also remove foliage that provides winter interest and protection.
Occasional Tidy-Ups: While the main schedule is late spring/early summer, you can perform minor tidying at any time of year. This includes removing any branches that are clearly dead, broken, or diseased.
3. Tools for the Job:
The right tools ensure clean cuts, which heal faster and reduce the risk of disease.
Bypass Pruners: For small branches, bypass pruners are ideal. They operate like scissors, with two blades passing by each other, creating a clean cut.
Loppers: For slightly thicker branches (up to about ¾ inch), bypass loppers offer more leverage and reach.
Hand Pruning Saw: For any branches thicker than what loppers can handle, a sharp pruning saw is necessary. However, for light trimming, you’ll rarely need anything larger than loppers.
Key Principle: Sharpness and Cleanliness: Regardless of the tool, ensure it is clean and razor-sharp. Wipe blades with rubbing alcohol between plants or if you cut into diseased wood.
4. The Art of Light Trimming:
This is where the “light” aspect is crucial.
Step 1: Assess and Plan: Before you cut anything, step back and look at your Blue Star Juniper from all angles. Identify branches that are growing into each other, dead or damaged branches, or sections that are significantly out of place with the plant’s natural mounding habit.
Step 2: Remove Dead, Damaged, or Diseased (The 3 D’s): Start by removing any branches that are clearly dead (brown and brittle), damaged (broken or cracked), or show signs of disease (unusual spots, wilting). Cut these back to healthy wood or to the point where they originate from the main stem.
Step 3: Address Crossing or Rubbing Branches: Identify branches that are growing into each other. These can cause abrasion and create entry points for disease. Remove one of the offending branches, usually the weaker or more poorly positioned one.
Step 4: Light Shaping: If the plant has branches that are significantly extending beyond its natural mounding form, you can lightly tip them. Aim to cut just above a lateral bud or side branch that is growing in the desired direction. This encourages growth outwards from that point, helping to fill out the plant.
Step 5: Avoid Shearing: Resist the temptation to shear your Blue Star Juniper into a perfect ball or cone. This type of shearing removes the outer layer of foliage and can lead to a plant that looks sparse on the inside, with no new growth emerging from the old wood. It also disrupts its natural, attractive form.
Step 6: The “One-Third Rule”: Never remove more than one-third of the plant’s total foliage in a single trimming session. For light trimming, you’ll likely remove much less – perhaps only 10-20% of the growth. This conservative approach ensures the plant can recover quickly and maintain its vigor.
Step 7: Cut to a Bud or Side Branch: When tipping a branch for shaping, always make your cut just above a bud or a smaller lateral branch. This provides a point for new growth to emerge and helps the cut blend in more naturally.
5. What NOT to Do (Common Mistakes):
Cutting into Old Wood: As mentioned, Blue Star Junipers do not reliably regrow from leafless, old wood. Cutting back into these areas will likely result in a permanent bare spot.
Over-Pruning or Shearing: Forcing the plant into an unnatural shape through aggressive shearing is detrimental. It looks unnatural and stresses the plant.
Using Dull Tools: This creates ragged wounds that are slow to heal and susceptible to disease.
Trimming at the Wrong Time: Pruning too early or too late can have negative consequences for growth and winter hardiness.
Over-Fertilizing Before Trimming: While not directly related to the act of trimming, over-fertilizing can promote rapid, weak growth that might require more frequent trimming or be more susceptible to damage.
Practical Applications in the Garden
Integrating a Blue Star Juniper light trimming schedule into your gardening routine is straightforward and highly rewarding.
Foundation Plantings: If your Blue Star Juniper is planted near your home’s foundation, light trimming ensures it doesn’t grow too close to siding or windows, preventing moisture issues and maintaining accessibility.
Rock Gardens: In a rock garden setting, where the juniper’s unique form is often a focal point, light shaping maintains its artistic contribution without overwhelming surrounding stones or smaller alpine plants.
Container Gardening: For junipers grown in pots, light trimming helps manage their size, keeping them proportionate to the container and preventing them from becoming root-bound too quickly.
Seasonal Maintenance: Incorporate a quick check of your Blue Star Juniper during your spring garden clean-up. This is the perfect time to identify and remove any winter damage and prepare for the upcoming growing season.
Observational Gardening: Make it a habit to observe your juniper throughout the year. Noticing any unusual growth or damage early allows for timely intervention, even outside the main trimming window, for minor issues.
Common Mistakes to Avoid
Mistake: Shearing the juniper into a perfect ball.
Why it’s a mistake: This removes the outer foliage, leaving no viable buds on old wood to regrow. It also destroys the natural, star-like form and reduces air circulation.
How to avoid: Focus on selective pruning of individual branches to refine the natural shape.
Mistake: Cutting back into the brown, interior wood.
Why it’s a mistake: Blue Star Junipers typically won’t regrow from these areas, creating permanent bare patches.
How to avoid: Always prune back to the green, needle-bearing parts of a branch, or to the point where a branch originates from a larger stem.
Mistake: Trimming too late in the fall.
Why it’s a mistake: This can stimulate tender new growth that is susceptible to frost damage and winter kill.
How to avoid: Stick to late spring or early summer for your main trimming. If you must trim later, do so very lightly and avoid stimulating new growth.
Mistake: Using dirty or dull tools.
Why it’s a mistake: This can lead to ragged cuts, which are entry points for diseases and pests, and can hinder healing.
How to avoid: Invest in quality bypass pruners and keep them clean and sharp. Sanitize them between plants if disease is suspected.
Mistake: Over-pruning at one time.
Why it’s a mistake: Removing too much foliage stresses the plant, reducing its ability to photosynthesize and recover.
How to avoid: Adhere to the “one-third rule” at most, and for light trimming, aim for significantly less.
Expert Tips or Pro Insights
“Tip Pruning” for Density: Pro gardeners often use “tip pruning” on junipers. This involves pinching or cutting off just the very tip of new growth. For Blue Star Junipers, this can be done very lightly during the growing season to encourage a denser, fuller appearance without drastically altering the shape or size. It’s a subtle way to maintain its compact form.
Embrace Asymmetry: Don’t strive for perfect symmetry. Blue Star Junipers have a natural, slightly irregular charm. Embracing this natural asymmetry often leads to the most attractive results. Lightly trimming to maintain balance is key, not to impose rigid uniformity.
The “Deadheading” of Conifers: While not a true deadheading, think of your light trimming as removing the “spent” growth – the dead, damaged, or out-of-place bits. This keeps the plant looking fresh and healthy.
Observe Your Specific Climate: In regions with very short growing seasons, you might want to trim even earlier in spring to allow ample time for any stimulated growth to harden off before winter. Conversely, in milder climates, you might have a slightly longer window.
Combine with Soil and Water: Proper light trimming works best when supported by good horticultural practices. Ensure your Blue Star Juniper has well-draining soil, appropriate sunlight, and consistent watering, especially when newly planted or during prolonged dry spells. A healthy plant tolerates and benefits from light pruning.
Seasonal or Climate Considerations
The Blue Star Juniper light trimming schedule can be influenced by your specific climate and the prevailing seasons.
Temperate Climates (e.g., USDA Zones 5-8):
Spring (April-May): New growth emerges, often a brighter blue. Avoid trimming until growth has progressed somewhat.
Late Spring/Early Summer (May-June): This is the prime window for light trimming. The plant has had its initial growth spurt, and new growth has begun to harden. This allows for shaping and tidying before the intense heat of summer or the onset of dormancy.
Summer: Minimal trimming, only for removing dead or damaged branches. Avoid stimulating new growth in the heat.
Fall/Winter: No pruning unless absolutely necessary to remove broken branches due to snow load. New growth is too tender.
Milder Climates (e.g., parts of California, Pacific Northwest, Zone 9):
You might have a slightly longer window for light trimming, potentially extending

