
Blue Star Juniper Transplant Shock Recovery: Expert Guidance for a Healthy Re-establishment
Engaging Introduction
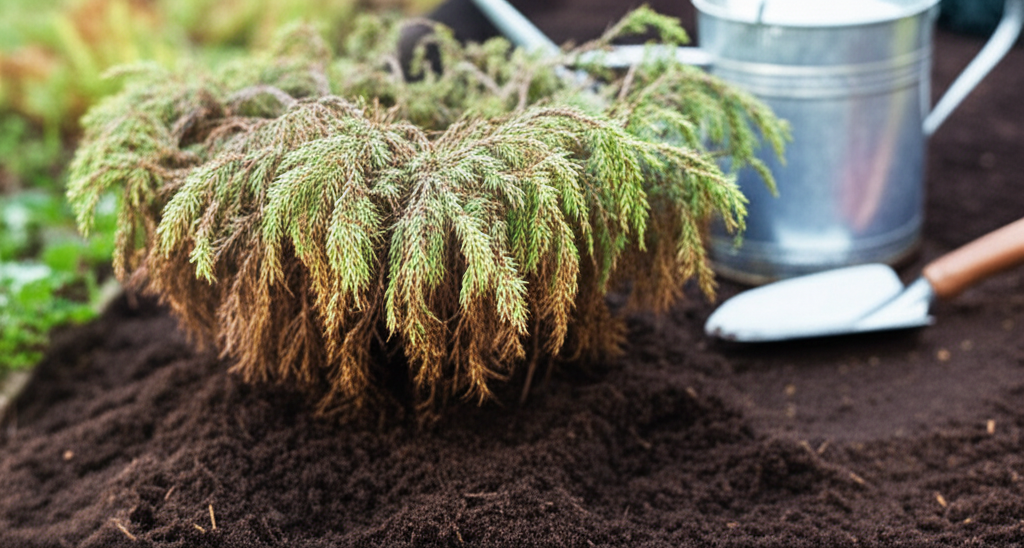
Have you recently transplanted your beloved Blue Star Juniper, only to notice it looking a little… unhappy? Drooping branches, browning needles, or a general lack of vigor can be a gardener’s worst nightmare after putting in the effort to move a plant. But can your Blue Star Juniper recover from transplant shock, and more importantly, how can you ensure it thrives after the move? Understanding the signs and implementing the right recovery strategies is crucial for the health, longevity, and aesthetic appeal of this popular, low-maintenance shrub. Getting this right means the difference between a struggling plant and a vibrant, established fixture in your landscape for years to come.
Quick Answer Box
Yes, Blue Star Juniper can absolutely recover from transplant shock with proper care and attention. The key to successful Blue Star Juniper transplant shock recovery lies in minimizing stress during the move, providing consistent moisture, protecting it from harsh elements, and allowing ample time for its root system to establish in its new home.
What is Blue Star Juniper Transplant Shock and Why It’s Important in Gardening
Transplant shock, in the context of gardening, refers to the physiological stress a plant experiences when it is moved from one location to another. This disruption affects the plant’s ability to absorb water and nutrients through its root system. When a plant is transplanted, a significant portion of its delicate root hairs are inevitably damaged or lost. This makes it challenging for the plant to take up the water and nutrients it needs to support its existing foliage.
For Blue Star Junipers, which are generally hardy and drought-tolerant once established, transplant shock can be particularly noticeable. Their slow-growing nature means they can take a considerable amount of time to recover if not managed correctly. Understanding and addressing transplant shock is vital because it directly impacts the plant’s survival rate, its aesthetic appeal, and the overall success of your landscaping efforts. A plant struggling with shock is more susceptible to pests and diseases, and its growth will be severely hampered, potentially leading to its demise if left unaddressed.
Quick Recommendations or Key Insights about Blue Star Juniper Transplant Shock Recovery
Water Wisely: Consistent, deep watering is paramount, especially in the first few weeks.
Mulch is Your Friend: Apply a layer of organic mulch around the base to retain moisture and regulate soil temperature.
Minimize Root Disturbance: Dig as large a root ball as possible during the move.
Avoid Fertilizing Immediately: Let the plant focus on root establishment before encouraging new growth.
Provide Shade: Protect newly transplanted junipers from intense sun, especially during the hottest parts of the day.
Prune Sparingly: Only remove dead or severely damaged branches; avoid heavy pruning that stresses the plant further.
Be Patient: Recovery takes time; monitor your plant closely and adjust care as needed.
Detailed Breakdown of Blue Star Juniper Transplant Shock Recovery
Understanding the Science: Why Junipers Get Stressed
Blue Star Junipers (Juniperus squamata ‘Blue Star’) are prized for their compact, star-like, silvery-blue foliage and their low-maintenance nature. However, like most plants, they are sensitive to disturbances in their root system. The scientific principle behind transplant shock is the imbalance between water uptake and water loss.
1. Root Damage and Water Uptake: When a juniper is dug up, its root ball is exposed to air, and many fine root hairs, which are responsible for absorbing water and nutrients, are inevitably broken or severed. This reduces the plant’s capacity to draw water from the soil.
2. Transpiration and Water Loss: Simultaneously, the leaves of the juniper continue to transpire, meaning they release water vapor into the atmosphere through small pores called stomata. With a compromised root system, the plant cannot replenish this lost water quickly enough, leading to dehydration.
3. Environmental Stressors: Factors like strong winds, intense sunlight, and high temperatures exacerbate water loss. The plant is essentially fighting a losing battle to stay hydrated.
4. Soil Aeration and Structure: The process of digging and replanting can also disrupt the soil structure around the roots, potentially affecting aeration and drainage, which are crucial for root health.
Practical Applications: Mitigating Shock During and After Transplant
The goal of Blue Star Juniper transplant shock recovery is to create an optimal environment that allows the plant to heal and re-establish its root system.
1. Timing is Everything: The best time to transplant Blue Star Junipers is during their dormant season, typically in early spring before new growth begins, or in the fall after the heat of summer has passed. This minimizes stress as the plant is not actively growing and requires less water.
2. The Root Ball is Key: When preparing to move your juniper, dig a root ball that is significantly larger than you might initially think. Aim for a diameter at least 10-12 inches for every foot of the plant’s height. Water the plant thoroughly a day or two before digging to help bind the soil to the roots.
3. Careful Excavation: Use a sharp spade to cut cleanly around the root ball. Gently lift the plant, keeping the root ball as intact as possible. If possible, wrap the root ball in burlap or a permeable fabric to keep it together during the move.
4. Planting in the New Location: Prepare the new planting hole before you dig up the juniper. The hole should be as deep as the root ball and twice as wide. Ensure good drainage, as junipers dislike waterlogged soil. Gently place the juniper in the hole, ensuring the top of the root ball is level with or slightly above the surrounding soil. Backfill with the native soil, avoiding amendments unless your soil is extremely poor.
5. Watering Strategy: Immediately after planting, water deeply to settle the soil around the roots and eliminate air pockets. For the first few weeks, water regularly, keeping the soil consistently moist but not saturated. As the plant begins to show signs of recovery (new growth, greener foliage), you can gradually reduce the frequency of watering, allowing the soil to dry slightly between waterings.
Common Myths to Debunk
Myth 1: Fertilizing will speed up recovery. Reality: Applying fertilizer too soon can actually harm a stressed plant. Its roots are too damaged to absorb the nutrients effectively, and the added salts can further dehydrate the roots. Wait until you see signs of healthy new growth before considering a light application of a balanced, slow-release fertilizer.
Myth 2: Pruning heavily will help the plant focus energy on roots. Reality: While it might seem logical, heavy pruning removes foliage that is still capable of photosynthesis, which the plant needs to create energy for root development. Only remove branches that are completely dead, brown, and brittle.
Myth 3: Junipers are invincible, so transplant shock isn’t a real issue. Reality: While hardy, junipers are not immune to the stress of transplantation, especially when their root systems are significantly disturbed. Their slow growth rate means recovery can be lengthy if not managed properly.
Quick Recommendations or Key Insights about Blue Star Juniper Transplant Shock Recovery
Water Wisely: Consistent, deep watering is paramount, especially in the first few weeks.
Mulch is Your Friend: Apply a layer of organic mulch around the base to retain moisture and regulate soil temperature.
Minimize Root Disturbance: Dig as large a root ball as possible during the move.
Avoid Fertilizing Immediately: Let the plant focus on root establishment before encouraging new growth.
Provide Shade: Protect newly transplanted junipers from intense sun, especially during the hottest parts of the day.
Prune Sparingly: Only remove dead or severely damaged branches; avoid heavy pruning that stresses the plant further.
Be Patient: Recovery takes time; monitor your plant closely and adjust care as needed.
Detailed Breakdown of Blue Star Juniper Transplant Shock Recovery
Step-by-Step Recovery Guide for Your Blue Star Juniper
Step 1: Assess the Damage and Initial Care
Observe: After transplanting, closely inspect your Blue Star Juniper for signs of stress: yellowing or browning needles, wilting, or drooping branches. These are typical indicators of transplant shock.Water Immediately: Ensure the plant is thoroughly watered right after planting. This helps settle the soil and hydrate the remaining roots.
Mulch: Apply a 2-3 inch layer of organic mulch (like pine bark or shredded wood) around the base of the juniper, keeping it a few inches away from the trunk. Mulch helps retain soil moisture, suppress weeds, and regulate soil temperature, creating a more stable environment for root growth.
Step 2: Consistent Watering and Monitoring
First Few Weeks: Water deeply every 2-3 days, or as needed to keep the soil consistently moist but not waterlogged. The goal is to encourage roots to grow into the surrounding soil.
Long-Term Watering: Once the plant shows signs of recovery (new, healthy growth), you can gradually reduce watering frequency. Allow the top inch or two of soil to dry out between waterings. Blue Star Junipers are drought-tolerant once established, but new transplants need consistent moisture.
Watering Method: Water at the base of the plant, directly onto the root zone, to ensure the water reaches the roots and doesn’t just run off the foliage.
Step 3: Protecting from Environmental Stressors
Sun Protection: If you’re transplanting during a hot, sunny period, provide temporary shade for your juniper. You can use shade cloth, a patio umbrella, or even a piece of plywood supported by stakes. Remove the shade gradually over a week or two as the plant acclimitates.
Wind Protection: Strong winds can accelerate dehydration. If your planting location is exposed, consider using temporary windbreaks.
Avoid Overcrowding: Ensure adequate space around the juniper for air circulation, which helps prevent fungal diseases.
Step 4: Pruning for Recovery
Minimal Pruning: As mentioned, avoid heavy pruning. Focus only on removing branches that are completely dead, dry, and brittle. These will snap easily.
Why Not Prune Heavily? The foliage, even if slightly stressed, is still crucial for the plant to photosynthesize and generate the energy needed for root repair and new growth. Removing too much foliage will hinder this process.
Step 5: When to Introduce Soil Amendments or Fertilizers
Patience is Key: As a general rule, wait at least 4-6 weeks, or until you see clear signs of new, healthy growth, before considering any fertilization.
What to Use: If you choose to fertilize, opt for a balanced, slow-release fertilizer formulated for evergreen shrubs. Follow the product’s instructions carefully, and apply it around the drip line of the plant, not directly against the trunk.
Compost Top-Dressing: An alternative to granular fertilizer is a light top-dressing of compost in the spring, which provides slow-release nutrients and improves soil structure.
Step 6: Long-Term Care and Establishment
Continued Monitoring: Keep an eye on your juniper throughout its first year. Adjust watering based on weather conditions and the plant’s response.
Weeding: Keep the area around the juniper free of weeds, as they compete for water and nutrients.
Pest and Disease Watch: A stressed plant is more vulnerable. Inspect your juniper regularly for any signs of pests or diseases and address them promptly.
Real-Life Example:
Imagine Sarah transplanted her Blue Star Juniper in late April. By mid-May, she noticed some of the inner needles turning brown and the tips of some branches looked droopy. She immediately checked the soil moisture, finding it a bit dry. She watered deeply, applied a fresh layer of mulch, and placed a shade cloth over it during the hottest part of the afternoon. Within two weeks, she saw tiny new shoots appearing on some branches. She continued with consistent watering, gradually removed the shade cloth, and by late summer, the juniper looked much healthier, with most of the brown needles replaced by new, vibrant blue growth.
Common Mistakes to Avoid
Overwatering: While consistent moisture is important, waterlogged soil can lead to root rot, which is detrimental to a stressed plant. Ensure good drainage.
Underwatering: Conversely, letting the soil dry out completely will further dehydrate the plant and hinder root establishment.
Planting Too Deeply: This can suffocate the roots and encourage fungal diseases. Ensure the root flare (where the trunk meets the roots) is at or slightly above soil level.
Fertilizing Too Early: As discussed, this can burn the delicate, damaged roots.
Heavy Pruning Immediately After Transplanting: This removes vital foliage needed for photosynthesis and recovery.
Compacting the Soil: Trampling around the root ball can reduce aeration and make it harder for new roots to grow.
Not Providing Shade During Hot Weather: Intense sun can significantly worsen dehydration in a newly transplanted juniper.
Expert Tips or Pro Insights
Root Stimulants: Some gardeners advocate for using a root stimulant product (often containing auxins or humic acids) at planting time. These can help encourage root development, but ensure you follow the product’s instructions precisely.
Air Layering for Propagation: For experienced gardeners looking to propagate Blue Star Junipers, air layering can be a successful method, as it allows roots to develop on a stem while it’s still attached to the parent plant, minimizing transplant shock for the new plant.
Soil Testing: Before planting, consider a simple soil test. If your soil is very poor, amending the entire planting bed with compost or well-rotted manure before planting can provide a better environment for root establishment. However, avoid amending just the planting hole, as this can create a “bathtub effect” where water collects.
Companion Planting: Consider planting low-growing, drought-tolerant groundcovers or perennials around the Blue Star Juniper once it’s established. This can help retain soil moisture and suppress weeds, reducing competition for resources.
Seasonal or Climate Considerations
Spring Transplanting: Ideal for most climates, as it allows the plant to establish roots throughout the growing season. Watch for late frosts that can damage new growth.Fall Transplanting: Excellent in warmer climates where winters are mild. In colder regions, transplanting in fall requires extra attention to mulching and winter protection, as the plant may not have fully established its root system before the ground freezes.
Summer Transplanting: Generally the most stressful time to transplant due to heat and potential drought. If you must transplant in summer, provide significant shade and increase watering frequency.
Winter Care in Cold Climates: Once established after a fall transplant, ensure adequate winter protection. A thick layer of mulch can insulate the roots from harsh freezes.
Buying Guide or Decision-Making Process
When purchasing a Blue Star Juniper for transplanting, consider the following:
Plant Health: Look for plants with vibrant, silvery-blue foliage and no signs of wilting, yellowing, or pests.Root System: If possible, gently inspect the root ball. It should be firm and healthy, not circling tightly in the pot (root-bound). A root-bound plant will have a harder time establishing.
Container Size: Choose a plant that is appropriately sized for its container. A plant that has outgrown its pot will likely be stressed.
Source: Purchase from a reputable nursery or garden center. They often have healthier plants and can offer advice.
Age/Maturity: Younger, smaller plants generally adapt more quickly to transplanting than older, larger specimens.
FAQ Section for Blue Star Juniper Transplant Shock Recovery
Q1: How long does it take for a Blue Star Juniper to recover from transplant shock?
A1: Recovery time varies depending on the plant’s initial health, the care it receives, and environmental conditions. Generally, you can expect to see signs of recovery within a few weeks to a couple of months. Full establishment can take up to a year or more.
Q2: My Blue Star Juniper’s needles are turning brown. Is it dead?
A2: Browning needles are a common sign of transplant shock, indicating dehydration. As long as the branches are still flexible and there’s any sign of green or new growth, the plant is likely still alive and can recover with proper care. Only branches that are completely dry and brittle are likely dead.
Q3: Can I use a plant growth stimulant for my transplanted juniper?
A3: Yes, plant growth stimulants containing ingredients like humic acids or vitamin B can be beneficial in promoting root development and helping the plant overcome transplant stress. Always follow the product instructions carefully.
Q4: Should I repot my Blue Star Juniper if it looks stressed after transplanting?
A4: No, it is strongly advised against repotting or moving a plant that is already showing signs of transplant shock. This would only introduce further stress. Focus on providing optimal conditions in its current location for recovery.
Q5: My Blue Star Juniper is planted in a very sunny spot. How can I protect it?
A5: If planted in a sunny location, temporary shade is crucial during the initial recovery phase. Use shade cloth, a temporary screen, or even a patio umbrella to shield it from intense midday sun for the first 1-3 weeks.
Conclusion for Blue Star Juniper Transplant Shock Recovery
Successfully recovering a Blue Star Juniper from transplant shock is entirely achievable with patience, consistent care, and an understanding of its needs. By focusing on maintaining optimal soil moisture without waterlogging, protecting it from harsh environmental conditions like intense sun and wind, and refraining from over-fertilizing or heavy pruning, you create the ideal environment for its root system to heal and establish. Remember that every plant is an individual, and recovery timelines can vary, but by implementing these expert strategies, you significantly increase the chances of your Blue Star Juniper thriving in its new home for years to come. Embrace the process, observe your plant’s progress, and enjoy the rewarding transformation from a stressed newcomer to a resilient, beautiful garden feature.