
Here’s a comprehensive blog post addressing your keyword, following your detailed structure and aiming for a substantial word count.
—
Can Blue Star Juniper Survive Transplant Shock? Fast Recovery Tips for Your Garden
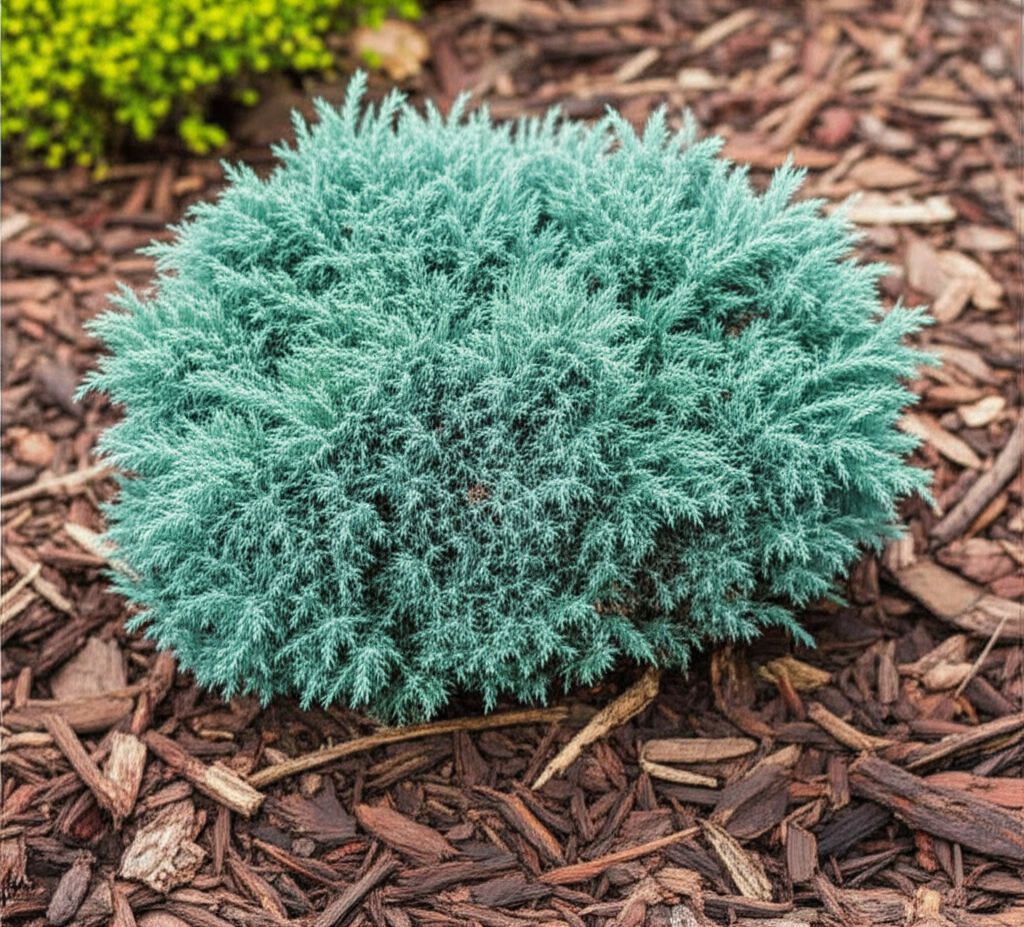
Have you ever planted a beautiful Blue Star Juniper, only to watch its vibrant blue-green foliage turn dull and droopy, a tell-tale sign of transplant shock? It’s a common, disheartening experience for many gardeners, but it doesn’t have to be the end of your juniper’s story. Understanding why this happens and how to mitigate it is key to a thriving, resilient landscape. This knowledge isn’t just about saving a single plant; it’s about fostering healthier root systems, ensuring long-term garden success, and contributing to a more sustainable, less wasteful gardening practice.
Quick Answer Box
Yes, Blue Star Juniper can absolutely survive and recover from transplant shock. The key to fast recovery lies in proper preparation before planting, meticulous aftercare, and providing the right environmental conditions to help the plant establish a strong root system quickly.
What is Blue Star Juniper Transplant Shock and Why It’s Important in Gardening
Blue Star Juniper transplant shock refers to the physiological stress a plant experiences when it is moved from its nursery environment or original planting location to a new one. This stress is primarily caused by the disruption and damage to its root system during the digging and replanting process. The roots are the plant’s lifeline, responsible for anchoring it in the soil, absorbing water, and taking up nutrients. When these roots are disturbed, the plant struggles to meet its basic needs, leading to symptoms like wilting, leaf drop, browning, and stunted growth.
For Blue Star Juniper, a popular evergreen shrub known for its compact, star-like foliage and low-maintenance appeal, transplant shock can be particularly detrimental if not managed. These junipers, while generally hardy, are susceptible to dehydration and root rot if their root ball is compromised and they are planted in unsuitable conditions. Understanding and addressing transplant shock is crucial for several reasons:
Plant Survival: It directly impacts whether your newly planted juniper will survive and establish itself.
Garden Aesthetics: A shocked plant looks unhealthy, detracting from your garden’s visual appeal.
Long-Term Health: Early stress can weaken the plant, making it more vulnerable to pests, diseases, and future environmental challenges.
Economic Value: Replacing a failed plant costs money and time, making successful establishment a worthwhile investment.
Sustainability: Minimizing plant loss reduces waste and the need for resource-intensive replacements.
Quick Recommendations or Key Insights about Blue Star Juniper Transplant Shock Recovery
Water Wisely: Deep, consistent watering is critical, but avoid waterlogging.
Mulch Generously: Retains moisture and regulates soil temperature.
Minimize Root Disturbance: Handle the root ball with extreme care during planting.
Choose the Right Location: Blue Star Junipers need full sun and well-draining soil.
Avoid Fertilizing Immediately: Wait until the plant shows signs of new growth.
Prune Selectively: Remove only dead or clearly damaged branches.
Be Patient: Recovery takes time; don’t over-intervene.
Detailed Breakdown of Blue Star Juniper Transplant Shock Recovery
The Science Behind the Shock: What Happens to the Roots?
When you dig up a Blue Star Juniper, or any plant for that matter, you inevitably sever a significant portion of its root system. Nursery-grown plants, especially those in containers, often have a dense, sometimes circling, root ball. Even with careful digging, a substantial percentage of the fine feeder roots – the ones responsible for most water and nutrient absorption – are left behind in the original soil.
This root damage creates an imbalance: the plant’s foliage continues to transpire (lose water vapor through its leaves), but the compromised root system cannot absorb enough water to replenish this loss. This leads to dehydration, wilting, and the characteristic symptoms of transplant shock. Furthermore, the stress of root disturbance can weaken the plant’s natural defenses, making it more susceptible to opportunistic pathogens in the soil.
Practical Applications: Minimizing Shock from the Start
The best way to manage Blue Star Juniper transplant shock is to prevent it as much as possible. This involves careful planning and execution during the planting process.
1. Timing is Everything:
Best Time: The ideal time to transplant Blue Star Juniper is during its dormant season, typically in early spring before new growth begins or in early fall after the heat of summer has subsided but before the ground freezes. This allows the roots to establish some new growth in cooler, moist soil without the extreme demands of summer heat or the dormancy of winter.
Avoid Peak Stress: Never transplant during hot, dry, or windy weather, as this exacerbates water loss and stress on the plant.
2. Site Selection and Preparation:
Sunlight: Blue Star Juniper thrives in full sun, requiring at least 6-8 hours of direct sunlight daily. Choose a location that meets this requirement.
Soil Drainage: This is paramount. Junipers are highly susceptible to root rot in waterlogged soil. Ensure the planting site has excellent drainage. If your soil is heavy clay, amend it generously with compost and coarse sand or gravel to improve aeration and drainage. Alternatively, consider planting in raised beds or mounds.
Hole Preparation: Dig a planting hole that is at least two to three times wider than the plant’s root ball, but no deeper than the root ball itself. The wider hole allows the roots to spread out into the surrounding amended soil more easily. The depth is critical; planting too deep is a common mistake that can lead to root rot.
3. The Transplanting Process:
Handle with Care: If transplanting from a container, gently slide the plant out. If the roots are tightly circling the pot (root-bound), gently loosen them with your fingers or make a few shallow vertical cuts along the sides of the root ball to encourage outward growth.
Balled and Burlapped (B&B): If your juniper is B&B, place it in the hole. Once positioned, cut away as much of the burlap and any wire cage as possible, especially if the burlap is treated or synthetic, as these materials can impede root growth and water penetration. Natural burlap can often be left on the bottom, but expose the top of the root ball.
Positioning: Place the juniper in the center of the hole so the top of the root ball is level with or slightly above the surrounding soil surface. This prevents the plant from settling too deep.
Backfilling: Use the soil that was removed from the hole, mixed with some compost if your original soil is poor. Gently firm the soil around the root ball to eliminate air pockets, but avoid compacting it too much.
Common Mistakes to Avoid
Planting Too Deep: As mentioned, this is a leading cause of root rot and failure to establish. Always ensure the root flare (where the trunk meets the roots) is at or slightly above soil level.
Amending Only the Hole: If you amend only the planting hole, the roots may be hesitant to grow out into the surrounding native soil, creating a “pot-bound” effect in the ground. It’s better to amend a wider area or, ideally, improve the native soil itself.
Over-Watering: While crucial, excessive watering can suffocate roots and lead to root rot, especially in poorly draining soil. Water deeply but infrequently, allowing the top inch or two of soil to dry out between waterings.
Fertilizing Too Soon: A stressed plant cannot utilize fertilizers effectively. Fertilizing immediately after planting can burn the delicate new roots or encourage top growth before the root system is established, further increasing stress. Wait until you see signs of new growth.
Excessive Pruning: Only remove dead, damaged, or clearly diseased branches. Over-pruning can remove valuable foliage that helps the plant photosynthesize and recover.
Ignoring Mulch: Skipping the mulch step means missing out on vital moisture retention and soil temperature regulation.
Expert Tips or Pro Insights
Root Stimulators/Hormones: For particularly stressed plants or those with significantly disturbed root balls, consider using a liquid root stimulator containing auxins. These can encourage new root development. Follow product instructions carefully.
Temporary Shade: In very hot or windy climates, providing temporary shade for the first few weeks can significantly reduce transpiration and stress. Shade cloth or a temporary burlap screen can be effective.
Watering Techniques: Instead of frequent shallow watering, focus on deep, infrequent watering. This encourages roots to grow deeper into the soil in search of moisture, leading to a more resilient plant. A soaker hose or drip irrigation system is ideal for consistent, deep watering.
Soil Moisture Meter: Use a soil moisture meter to accurately gauge when to water. This prevents guesswork and the common pitfalls of over or under-watering.
Observation is Key: Regularly inspect your Blue Star Juniper for signs of stress or improvement. Your observations will guide your watering and care decisions.
Seasonal or Climate Considerations
Hot, Dry Climates: Plants transplanted during warmer months in arid regions will require more frequent and diligent watering to prevent desiccation. Temporary shade is almost essential.
Cold Climates: Transplanting in fall in colder regions means the plant has a shorter window to establish roots before winter. Ensure the ground doesn’t freeze around the root ball before it has a chance to settle. Fall transplants may benefit from a layer of mulch after the first hard frost to insulate the roots.
Wet Climates: In areas with naturally high rainfall or heavy clay soils that retain moisture, the risk of root rot is significantly higher. Excellent drainage is non-negotiable, and you may need to water less frequently, relying more on the soil moisture meter.
Buying Guide or Decision-Making Process
When purchasing a Blue Star Juniper for transplanting, consider these factors to increase your chances of success:
Root System: Look for plants that are not severely root-bound. Gently inspect the soil surface and, if possible, the sides of the pot for excessive circling roots. A healthy root system should appear fibrous and evenly distributed.
Plant Health: Choose a plant that is vibrant, with good color and no signs of pests or diseases. Avoid plants with yellowing, browning, or wilting foliage before you even get it home.
Container Size vs. Root Ball: The plant’s foliage should be proportionate to its container size. A plant that looks too large for its pot is likely to be root-bound.
Nursery Reputation: Purchase from reputable nurseries that practice good horticultural care. They are more likely to provide healthy, well-maintained plants.
Season of Purchase: While you can buy them year-round, consider your planting schedule. If you purchase in spring or fall, you can plant it immediately. If you buy in summer, you may need to keep it in its container in a shaded, protected spot and transplant it when conditions are more favorable.
FAQ Section for Blue Star Juniper Transplant Shock Recovery
Q1: How long does it take for a Blue Star Juniper to recover from transplant shock?
A1: Recovery times vary greatly depending on the plant’s initial health, the degree of root disturbance, and the post-transplant care. Generally, you might see initial signs of recovery (like improved turgor) within a few weeks, but full establishment, indicated by new, healthy growth, can take several months to a full growing season.
Q2: What are the most common signs of transplant shock in Blue Star Juniper?
A2: The most common signs include wilting or drooping foliage, yellowing or browning leaves, leaf drop, stunted growth, and a general lack of vigor. Sometimes, the plant may appear perfectly fine for a week or two before suddenly declining.
Q3: Can I use a stress-reducing spray on my Blue Star Juniper?
A3: Yes, horticultural anti-transpirant sprays can help reduce water loss from the foliage, giving the damaged roots more time to recover. Apply according to product instructions, usually during cooler parts of the day.
Q4: My Blue Star Juniper is still wilting after a month. What should I do?
A4: Ensure you are watering correctly – deeply but allowing the soil to dry slightly between waterings. Check the drainage of the planting site. If the soil is constantly soggy, you may have drainage issues. Also, confirm it’s receiving adequate sunlight. If the plant is still showing severe distress after a month, it may have suffered irreparable root damage, or there might be an underlying issue with the planting site.
Q5: Should I fertilize my Blue Star Juniper after planting?
A5: It’s best to wait. Fertilizing a stressed plant can do more harm than good. Wait until you observe consistent new growth, which indicates the root system is beginning to establish and can handle nutrient uptake.
Conclusion
Successfully transplanting a Blue Star Juniper and helping it recover from transplant shock is an achievable goal for any gardener. By understanding the science behind root disturbance and implementing careful practices—from site selection and proper planting techniques to consistent, appropriate watering and mulching—you can significantly minimize stress and promote rapid establishment. Remember that patience is a gardener’s virtue; your Blue Star Juniper may take time to show its full vigor, but with diligent care, it will reward you with its unique beauty for years to come. Apply these insights to your next planting, and nurture your juniper into a thriving, resilient addition to your landscape.
—

