
Blue Star Juniper Soil Prep: Essential Training for Thriving Evergreen Groundcover
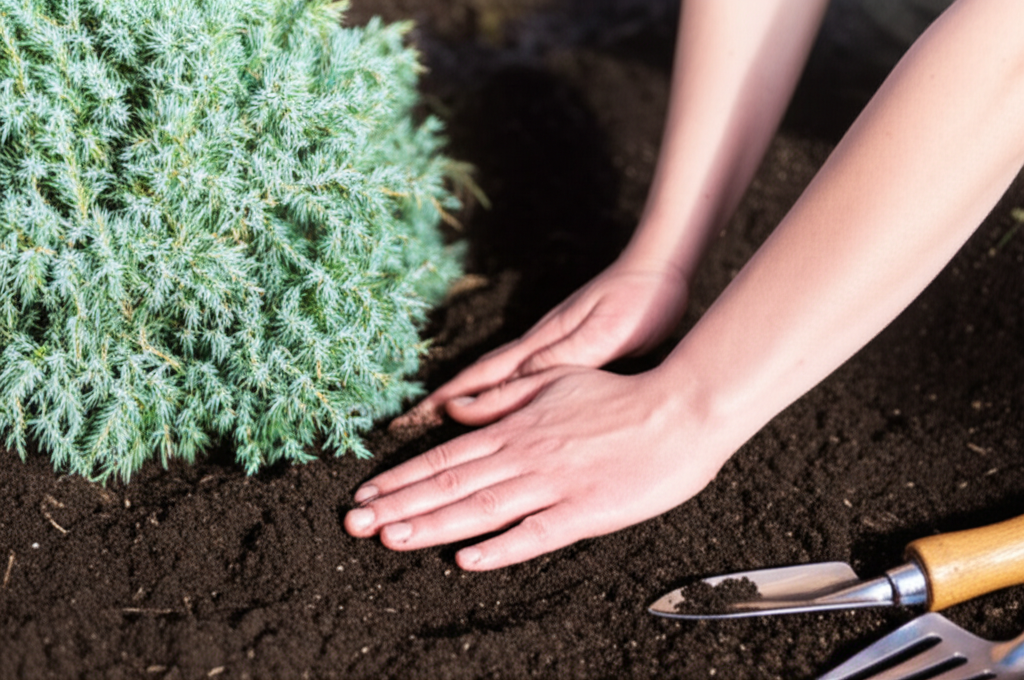
Are you dreaming of a low-maintenance, silvery-blue carpet of evergreen beauty gracing your landscape? The Blue Star Juniper (Juniperus squamata ‘Blue Star’) is a stellar choice, renowned for its compact, mounding habit and striking color. But even the most resilient plants need the right foundation, and when it comes to soil, proper preparation is paramount for the long-term health and vibrancy of your Blue Star Juniper. This comprehensive guide will equip you with the essential training to prepare the perfect soil, ensuring your Blue Star Juniper thrives for years to come.
Understanding how to prepare the soil for your Blue Star Juniper isn’t just about digging a hole; it’s about creating an optimal environment that mimics its native conditions, promotes robust root development, and prevents common issues like root rot. Getting this right from the start sets your plant up for success, reducing the need for extensive intervention later on and contributing to a more sustainable, beautiful garden.
Quick Answer Box
Blue Star Juniper soil preparation training involves ensuring well-draining soil with a slightly acidic to neutral pH. This means amending heavy clay soils with organic matter and grit, while sandy soils benefit from compost to improve water retention. Proper preparation is crucial to prevent root rot, a common issue for junipers in poorly drained conditions, and to provide the nutrients necessary for healthy growth and that signature blue foliage.
What is Blue Star Juniper Soil Preparation Training and Why It’s Important in Gardening
Blue Star Juniper soil preparation training refers to the systematic process of amending and conditioning the soil in the planting area before introducing a Blue Star Juniper. This training encompasses understanding the plant’s specific needs regarding drainage, pH, and nutrient content, and then taking actionable steps to create the ideal soil environment.
This process is vital because Blue Star Junipers, like most junipers, are native to arid or semi-arid regions. Their root systems are adapted to well-draining soils that don’t retain excessive moisture. Inadequate soil preparation can lead to several detrimental issues:
Root Rot: This is the most significant threat. If water sits around the juniper’s roots, the lack of oxygen and the presence of fungi will cause the roots to decay, leading to wilting, yellowing foliage, and eventual plant death.
Nutrient Deficiencies: While junipers are not heavy feeders, they still require essential nutrients. Improper soil pH can lock up nutrients, making them unavailable to the plant, even if they are present.
Stunted Growth: Poorly prepared soil can restrict root growth, preventing the plant from establishing a strong anchor and accessing sufficient water and nutrients, resulting in slow or stunted development.
Increased Susceptibility to Pests and Diseases: Weakened plants due to poor soil conditions are more vulnerable to attacks from pests and diseases.
Therefore, effective Blue Star Juniper soil preparation training is the cornerstone of a healthy, vibrant plant that will enhance your garden’s aesthetic appeal and provide years of enjoyment.
Quick Recommendations or Key Insights about Blue Star Juniper Soil Preparation Training
Drainage is King: Prioritize excellent drainage above all else. Junipers despise “wet feet.”
pH Preference: Aim for a soil pH between 6.0 and 7.0 (slightly acidic to neutral).
Soil Texture Matters: Loamy soil is ideal. Amend heavy clay with organic matter and coarse sand or perlite. Amend sandy soils with compost to improve moisture retention.
Avoid Over-Amending with Rich Organic Matter: While some compost is good, overly rich, moisture-retentive soils can be detrimental.
Test Your Soil: Use a simple soil test kit to determine your current pH and nutrient levels.
Plant on a Slight Mound: Even with good soil prep, planting on a slightly raised mound can further improve drainage.
Mulch Wisely: Use a light layer of mulch that allows air circulation.
Detailed Breakdown of Blue Star Juniper Soil Preparation Training
The Science Behind Blue Star Juniper Soil Needs
From a botanical perspective, Blue Star Junipers belong to the Cupressaceae family, a group of conifers often found in well-drained, sometimes rocky or sandy soils. Their root systems are typically fibrous and spread horizontally, seeking out aeration and avoiding prolonged saturation.
Root Respiration: Plant roots, like all living cells, require oxygen for respiration. In waterlogged soils, the air pockets are filled with water, suffocating the roots. This anaerobic condition can lead to the proliferation of pathogenic fungi that thrive in such environments, causing root rot.
Nutrient Availability and pH: Soil pH influences the solubility and availability of essential plant nutrients. For instance, at very low pH (highly acidic), some micronutrients can become toxic, while at very high pH (alkaline), nutrients like iron and manganese can become unavailable, leading to chlorosis (yellowing of leaves). Junipers generally prefer a pH range where most macronutrients and micronutrients are readily accessible.
Soil Structure and Aeration: The physical structure of the soil – how particles are arranged – determines its ability to hold water, nutrients, and air. Well-structured soil has a good balance of pore spaces, allowing for both water infiltration and aeration. Compacted or heavy clay soils have smaller pore spaces, leading to poor drainage and aeration.
Practical Applications: Preparing the Planting Site
The Blue Star Juniper soil preparation training begins long before you even purchase your plant. It involves assessing your existing soil and making the necessary amendments.
Step 1: Site Selection and Assessment
Sunlight: Blue Star Junipers thrive in full sun (at least 6-8 hours of direct sunlight per day). While they can tolerate some partial shade, their color and density may be reduced.
Drainage Test: Dig a hole about 12 inches deep and 12 inches wide in the intended planting location. Fill it with water. If the water drains completely within a few hours, your drainage is likely adequate. If it remains waterlogged for over 12-24 hours, you’ll need to amend the soil significantly or consider a raised bed.
Step 2: Soil Testing (Optional but Recommended)
Use a home soil test kit or send a sample to your local cooperative extension office. This will reveal your soil’s pH and potentially highlight any major nutrient deficiencies or excesses. This information is invaluable for targeted amendments.
Step 3: Amending the Soil
This is the core of Blue Star Juniper soil preparation training. The goal is to create a loose, well-draining soil mix.
For Heavy Clay Soils:
Excavate: Dig a hole that is at least twice as wide and as deep as the root ball of your Blue Star Juniper.
Amend: Mix the excavated soil with approximately 30-40% coarse sand (not play sand, which can compact), perlite, or small gravel. Incorporate about 20-30% compost or well-rotted manure. The aim is to break up the clay particles and improve aeration and drainage.
Avoid Peat Moss (in excess): While peat moss can improve soil structure, it can become water-retentive when wet and hydrophobic (repellent) when dry. Use it sparingly, if at all, and ensure it’s well-mixed.
For Sandy Soils:
Excavate: Dig the hole as described above.
Amend: Mix the excavated soil with 20-30% high-quality compost or aged manure. This will help improve the soil’s ability to retain moisture and nutrients without becoming waterlogged.
For Existing Garden Beds with Good Drainage:
Even if your soil drains well, incorporating a small amount of compost (10-15%) into the planting hole will provide a nutrient boost and improve soil structure.
Step 4: Creating a Planting Mound (Optional but Beneficial)
If you have any concerns about drainage, even after amending, create a slight mound of the prepared soil where you will plant your juniper. This ensures the base of the plant sits slightly above the surrounding soil level, further aiding water runoff.
Common Mistakes to Avoid in Blue Star Juniper Soil Preparation Training
Planting in Pure Clay: Simply digging a hole in compacted clay and dropping the juniper in will almost guarantee root rot.
Using Too Much Organic Matter: Excessive compost or manure can retain too much moisture, which is detrimental to junipers.
Using Fine Sand: Fine-grained sand can bind with clay to create a concrete-like consistency when wet, worsening drainage. Always opt for coarse sand or grit.
Amending Only the Planting Hole: It’s crucial to amend a wider area around the planting hole, at least twice the width of the root ball, so the roots have well-draining soil to grow into. If you only amend the hole, the roots will hit the compacted, poorly draining native soil and stop growing.
Ignoring Soil pH: While junipers are somewhat tolerant, extreme pH levels can hinder nutrient uptake and overall health.
Over-Compacting the Soil: After planting, water gently to settle the soil, but avoid stomping on it, which can compact the roots.
Expert Tips or Pro Insights for Blue Star Juniper Soil Preparation Training
“The Wider the Hole, the Better”: Professional landscapers often emphasize digging a hole that is 2-3 times wider than the root ball. This provides ample space for roots to spread into loosened soil.
“Amend the Native Soil, Not Replace It”: It’s generally better to amend the existing soil rather than digging out all the soil and replacing it with a completely different mix, which can create a “pot effect” where water pools at the interface. Blend amendments thoroughly with the native soil.
“Consider a Raised Bed for Problematic Sites”: If your garden has severe drainage issues or heavy, compacted clay that’s difficult to amend, a raised bed filled with a suitable soil mix is an excellent solution.
“Know Your Microclimate”: Observe how water drains in different parts of your garden. Some areas might naturally drain better than others.
“Don’t Fertilize Immediately After Planting”: Allow the plant to establish for a few weeks before considering any light fertilization, and even then, only if your soil test indicated a deficiency. The focus of soil prep is structure and drainage, not immediate nutrient loading.
Seasonal or Climate Considerations
Spring Planting: Spring is often the ideal time for planting Blue Star Junipers, especially in cooler climates. This allows the plant to establish its root system before the heat of summer. Soil preparation can be done as soon as the ground is workable.
Fall Planting: Fall is also a good time, particularly in warmer climates. Soil preparation can be done in late summer or early fall. The cooler temperatures and increased rainfall help the plant settle in.
Summer Planting: While possible, summer planting requires more vigilant watering, especially if the soil preparation wasn’t perfect. Avoid planting during extreme heat waves.
Winter Preparation: In regions with very cold winters and frozen ground, soil preparation is best done in the spring or fall. However, you can plan and gather your amendments during the winter months.
Climate Zones: Blue Star Junipers are generally hardy in USDA Zones 4-8. In colder zones (4-5), ensuring excellent drainage is even more critical to prevent winter root damage from freeze-thaw cycles. In warmer zones (7-8), the ability of the soil to retain some moisture (but not become waterlogged) becomes slightly more important due to higher evaporation rates.
Buying Guide: Choosing the Right Soil Amendments
When undertaking Blue Star Juniper soil preparation training, selecting the right amendments is key.
Compost: Look for well-composted, dark, earthy material. Avoid anything that looks like fresh yard waste or has a strong ammonia smell. Good sources include bagged compost from garden centers or bulk delivery from reputable landscape suppliers.
Coarse Sand/Horticultural Grit: This is specifically sized sand for gardening. It’s coarser than play sand and provides excellent drainage and aeration when mixed into clay soils. Available at garden centers and landscape suppliers.
Perlite: This lightweight, volcanic material has a porous structure that improves aeration and drainage. It’s a good alternative to coarse sand, especially if you want to lighten the soil mix.
Aged Manure: Well-rotted manure (cow, horse, chicken) is an excellent source of organic matter and nutrients. Ensure it’s fully composted; fresh manure can burn plant roots.
Vermiculite: While good for retaining moisture and nutrients, use vermiculite sparingly in juniper soil prep, as excessive moisture retention can be an issue.
Key Factors When Buying:
Quality: Always opt for high-quality, reputable brands or suppliers.
Quantity: Estimate the amount of soil you’ll need to amend based on the size of your planting area and the depth you’re working. It’s often better to buy a little extra than to run short.
* Storage: Store amendments in a dry place to prevent them from clumping or decomposing further.
FAQ Section for Blue Star Juniper Soil Preparation Training
Q1: Can I just plant my Blue Star Juniper in potting soil?
A1: While potting soil is formulated for containers and generally drains well, it’s often too rich and moisture-retentive for junipers planted in the ground. It’s best to amend your native soil with a mix of compost and coarse grit or perlite.
Q2: How much compost should I add to clay soil?
A2: For heavy clay soils, aim for a mix where compost makes up about 20-30% of the amended soil volume, combined with 30-40% coarse sand or perlite for optimal drainage and aeration.
Q3: My soil is very sandy. What’s the best way to prepare it for a Blue Star Juniper?
A3: Sandy soil drains very quickly. To prepare it, incorporate 20-30% high-quality compost. This will improve its ability to hold moisture and nutrients without becoming waterlogged, creating a more balanced environment for your juniper.
Q4: Do I need to add lime to my soil if it’s slightly acidic?
A4: Blue Star Junipers prefer a pH of 6.0-7.0. If your soil test indicates a pH significantly below 6.0 (e.g., 5.0 or 5.5), you can gradually amend with dolomitic lime according to the test kit’s recommendations. Avoid over-liming, as it can lead to nutrient deficiencies.
Q5: How deep should I dig the planting hole?
A5: The planting hole should be as deep as the root ball of your juniper, but at least twice as wide. The goal is to loosen the soil around the root ball so roots can easily penetrate the surrounding soil.
Q6: Will mulching help with soil preparation?
A6: Mulching is beneficial after planting, but it’s not part of the soil preparation itself. Mulch helps retain moisture, suppress weeds, and regulate soil temperature, but it should be applied to the soil surface, not mixed in. Ensure the mulch doesn’t touch the trunk of the juniper.
Conclusion for Blue Star Juniper Soil Preparation Training
Mastering Blue Star Juniper soil preparation training is the single most impactful step you can take to ensure your striking silvery-blue juniper flourishes. By understanding its need for well-draining soil with a balanced pH and proactively amending your planting site, you are creating a robust foundation for healthy root development, vibrant foliage, and long-term resilience. Remember, the keys are excellent drainage, appropriate soil structure, and a pH that allows for optimal nutrient uptake. Invest the time in proper preparation now, and you’ll be rewarded with a stunning, low-maintenance groundcover that enhances your garden’s beauty for years to come. Start preparing your soil today and cultivate a thriving Blue Star Juniper for your landscape.

