
Blue Star Juniper Soaker Hose Placement: Ensuring Optimal Hydration for Your Groundcover Gem
Are you struggling to keep your stunning Blue Star Juniper looking its vibrant best, or perhaps wondering if a soaker hose is the ideal solution for its watering needs? The right placement of a soaker hose is crucial for delivering consistent, efficient moisture directly to the root zone, which is especially important for a low-growing, spreading shrub like the Blue Star Juniper. Understanding where to position your soaker hose can mean the difference between a thriving, lush groundcover and a struggling plant susceptible to disease and drought stress.
Quick Answer Box
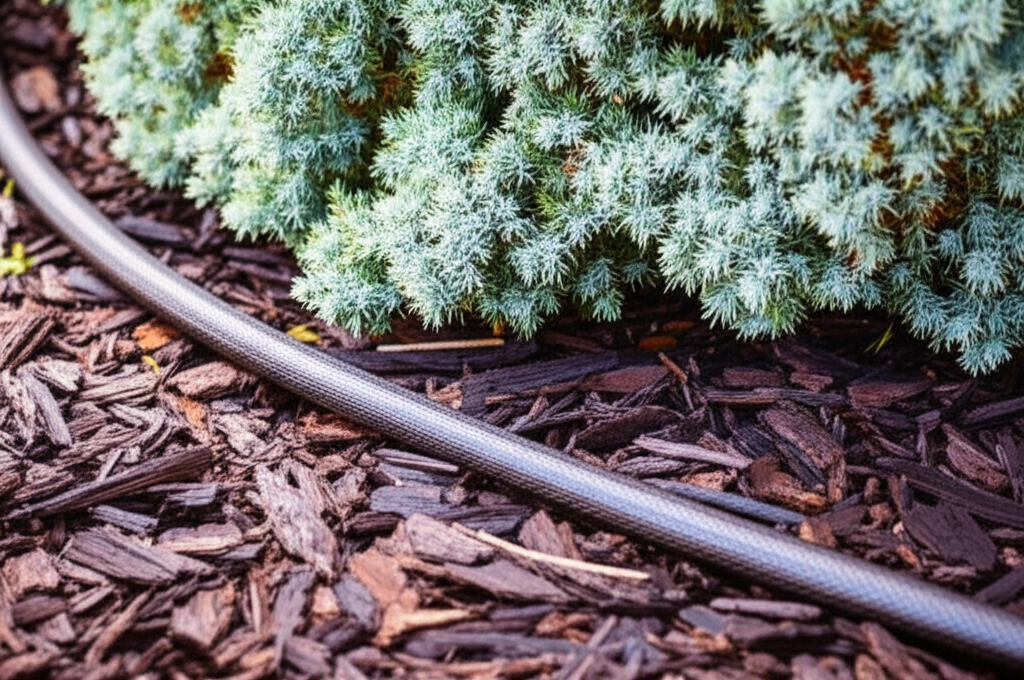
The best placement for a Blue Star Juniper soaker hose is directly at the base of the plant, encircling the root zone without touching the foliage. Position the hose so that water seeps into the soil around the drip line of the juniper, ensuring deep, consistent moisture delivery for optimal growth and health.
What is Blue Star Juniper Soaker Hose Placement and Why It’s Important in Gardening
“Blue Star Juniper soaker hose placement” refers to the strategic positioning of a porous hose designed to slowly release water directly into the soil around Blue Star Junipers. This method of irrigation is highly effective because it mimics natural rainfall patterns, delivering water at a slow, steady rate that allows the soil to absorb it thoroughly. For Blue Star Junipers, a shrub known for its compact, star-shaped blue-green foliage and its preference for well-draining soil, proper soaker hose placement is paramount. It ensures that the roots receive consistent hydration without the risk of overwatering or fungal diseases often associated with overhead watering, which can keep the foliage wet. Efficient water delivery also conserves water, reduces weed growth by not watering bare soil, and promotes deeper root development, leading to a more drought-tolerant and resilient plant.
Quick Recommendations or Key Insights about Blue Star Juniper Soaker Hose Placement
Focus on the Root Zone: Always aim to place the soaker hose around the base of the Blue Star Juniper, extending to the outer edge of its canopy (the drip line).
Avoid Foliage Contact: Never let the soaker hose directly touch the juniper’s needles to prevent fungal diseases and needle browning.
Gentle Curve: Lay the hose in a gentle curve or a circle around the plant, not in tight, sharp angles that can obstruct water flow.
Depth is Key: Ensure the hose is positioned to allow water to penetrate at least 6-12 inches deep, encouraging strong root growth.
Observe and Adjust: Regularly check soil moisture by digging a little with your finger or a trowel to ensure the soaker hose is working effectively and adjust placement or watering duration as needed.
Consider Mature Size: When placing, think about the eventual mature size of your Blue Star Juniper to ensure the watering coverage will be adequate as it grows.
Detailed Breakdown of Blue Star Juniper Soaker Hose Placement
Understanding the Blue Star Juniper’s Needs
The Blue Star Juniper (Juniperus squamata ‘Blue Star’) is a popular evergreen shrub celebrated for its striking, silvery-blue foliage that resembles a starburst. It’s a cultivar of the flaking juniper, native to mountainous regions, which often translates to a preference for well-draining soil and good air circulation. This means that while they need consistent moisture, they are highly susceptible to root rot if their roots remain waterlogged. Their growth habit is typically slow and compact, forming a dense, mounding shrub that rarely exceeds 2-3 feet in height and spread. This compact nature makes them ideal for rock gardens, borders, and as specimen plants, but also means their root systems are concentrated relatively close to the main stem.
The Science Behind Soaker Hose Irrigation for Junipers
Soaker hoses work on the principle of osmosis and capillary action. The porous material of the hose allows water to slowly seep out through thousands of tiny pores. This slow, continuous release saturates the surrounding soil. For Blue Star Junipers, this is ideal because:
Direct Root Zone Delivery: Water is delivered precisely where the plant’s roots can access it, minimizing water loss through evaporation from the soil surface or transpiration from leaves.
Consistent Moisture Levels: Unlike overhead sprinklers, which can lead to cycles of drying and saturation, soaker hoses maintain a more stable moisture level in the root ball. This is crucial for junipers, which prefer consistently moist, but not soggy, soil.
Aeration and Drainage: By delivering water slowly, the soil has time to absorb it, maintaining better aeration within the root zone. Blue Star Junipers, being sensitive to poor drainage, benefit greatly from this controlled watering.
Reduced Fungal Pressure: Overhead watering can create a moist microclimate on juniper foliage, which is a breeding ground for fungal diseases like Phomopsis blight or Juniper tip blight. Soaker hoses bypass the foliage entirely, significantly reducing this risk.
Practical Applications in the Garden
New Plantings: When you first plant a Blue Star Juniper, lay the soaker hose in a spiral pattern starting from the base of the plant and extending outwards to just beyond the root ball. This ensures the newly establishing roots receive consistent moisture as they grow.
Established Plants: For mature Blue Star Junipers, the soaker hose should be positioned to cover the entire drip line. The drip line is the area directly beneath the outermost branches, where most of the feeder roots are located. A circular or slightly irregular oval pattern around the plant is usually best.
Multiple Plants: If you have several Blue Star Junipers planted in a group, you can connect multiple soaker hoses or use a single, longer hose to water the entire area, ensuring each plant receives adequate moisture. Overlap the watering zones slightly to ensure no dry spots occur between plants.
Seasonal Adjustments: In hotter, drier months, you might need to run the soaker hose for longer periods or more frequently. In cooler, more humid seasons, reduce the duration and frequency to prevent overwatering.
Common Mistakes to Avoid
Placing the hose too close to the trunk: This can lead to trunk rot or bark issues due to constant moisture. Keep the hose a few inches away from the main stem.
Allowing the hose to touch the foliage: As mentioned, this is a prime way to invite fungal diseases. Ensure the hose is laid on the soil surface or slightly buried, but never resting on the leaves.
Overwatering: Even with a soaker hose, overwatering is possible. Rely on checking soil moisture rather than a rigid schedule. If the soil is constantly saturated, reduce watering time or frequency.
Underwatering: Conversely, if the soil is dry more than an inch or two down, the hose isn’t delivering enough water or isn’t running long enough.
Sharp Bends: Laying the hose in tight, sharp bends can restrict water flow and lead to uneven watering. Gentle curves are best for consistent output.
Ignoring the Drip Line: Placing the hose only directly at the base of the plant will not encourage roots to spread outwards, leading to a shallow root system that is less resilient to drought.
Expert Tips or Pro Insights
Burying the Hose: For a tidier appearance and to further reduce evaporation, you can gently bury the soaker hose a few inches beneath the soil surface. Be careful not to bury it too deeply, as this can hinder water penetration to the roots. A layer of mulch over the hose is also an excellent option.
Mulch is Your Friend: Always apply a 2-3 inch layer of organic mulch (like pine bark, shredded wood, or compost) around the Blue Star Juniper, keeping it a few inches away from the trunk. Mulch helps retain soil moisture, suppresses weeds, and moderates soil temperature, complementing the function of the soaker hose.
Watering Time: The best time to water with a soaker hose is in the early morning. This allows the soil to absorb moisture throughout the day, and any residual surface moisture has time to evaporate before nightfall, further reducing disease risk.
Zone Watering: If you have a large garden with various plant types, consider creating different watering zones. Blue Star Junipers, with their specific needs, might be in one zone, while drought-tolerant succulents might be in another. This allows for tailored watering schedules.
Pressure Regulation: Ensure your water pressure isn’t too high for your soaker hose. Many soaker hoses have a recommended maximum operating pressure to prevent them from bursting or leaking excessively. A pressure regulator might be necessary if your home’s water pressure is high.
Seasonal or Climate Considerations
Spring: As temperatures begin to rise and new growth emerges, consistent moisture is vital. Start with regular watering based on soil moisture checks.
Summer: This is the most critical period for watering Blue Star Junipers. Increased temperatures and potential lack of rainfall mean more frequent and potentially longer watering sessions with the soaker hose. Monitor soil moisture daily if necessary.
Autumn: As temperatures cool and rainfall becomes more common, gradually reduce the frequency and duration of watering. The goal is to ensure the plant is well-hydrated going into winter but not waterlogged.
Winter: In most climates, established Blue Star Junipers are quite drought-tolerant once their root systems are developed. If you experience prolonged dry spells during winter (especially in regions with mild winters or where the ground doesn’t freeze solid), a light watering might be necessary. However, avoid watering if the ground is frozen.
Climate Zones: In hotter, arid climates, you will likely need to water more frequently and for longer durations than in cooler, humid regions. Adjust your soaker hose usage based on local precipitation and temperature. For example, in Zone 7, summer watering might be weekly, while in Zone 9, it could be every 3-4 days.
Buying Guide or Decision-Making Process
When purchasing a soaker hose for your Blue Star Juniper, consider these factors:
Length: Measure the circumference of your Blue Star Juniper’s mature drip line and add a little extra for flexibility. Soaker hoses come in various lengths, from 25 feet to 100 feet or more.
Material: Most soaker hoses are made from recycled rubber or porous plastic. Rubber hoses tend to be more durable and flexible but can be more expensive. Plastic hoses are lighter and often more affordable.
Diameter: Common diameters are 1/2 inch and 3/8 inch. Smaller diameters are often better for tighter spaces and more precise watering, which can be ideal for individual shrubs.
Brand and Durability: Read reviews and choose a reputable brand known for producing durable, reliable soaker hoses. Look for hoses with reinforced fittings.
Connectors: Ensure the hose comes with appropriate connectors for your spigot and any potential extensions. Some systems offer multi-hose connectors for larger areas.
Water Pressure Compatibility: Check the manufacturer’s recommendations for operating water pressure.
FAQ Section for Blue Star Juniper Soaker Hose Placement
Q1: How often should I water my Blue Star Juniper with a soaker hose?
A1: The frequency depends on your climate, soil type, and the season. As a general guideline, check the soil moisture 1-2 inches down every 2-3 days. Water when it feels dry. In hot summers, this might be every 2-4 days; in cooler periods, it could be weekly or less.
Q2: Can I bury a soaker hose for my Blue Star Juniper?
A2: Yes, you can bury a soaker hose a few inches deep. This helps conserve water, keeps the hose out of sight, and protects it from UV damage. Ensure the soil is not too compacted, as this can impede water flow.
Q3: My Blue Star Juniper’s needles are turning brown. Could it be from the soaker hose placement?
A3: Brown needles can be caused by several factors, including overwatering, underwatering, fungal diseases, or improper soil drainage. If the soaker hose is touching the foliage or if the soil is consistently waterlogged, this could be the culprit. Adjust placement to keep the hose away from foliage and ensure the soil drains well.
Q4: How long should I run my soaker hose for a Blue Star Juniper?
A4: The duration varies greatly. For a typical 1/2 inch soaker hose, running it for 30-60 minutes per session might be sufficient, but this needs to be adjusted based on soil type and conditions. The goal is to moisten the soil to a depth of 6-12 inches. A simple test is to run it and then check soil moisture at different depths.
Q5: Is a soaker hose better than a drip irrigation system for Blue Star Junipers?
A5: Both are excellent, water-efficient methods. Soaker hoses are generally simpler and less expensive to install for individual plants or small areas. Drip irrigation systems offer more precise control with individual emitters, which can be advantageous for larger landscapes or plants with very specific water needs. For most home gardeners, a soaker hose is a perfectly effective and user-friendly choice for Blue Star Junipers.
Conclusion
Mastering the Blue Star Juniper soaker hose placement is a key step towards cultivating a vibrant, healthy, and resilient shrub. By understanding the juniper’s specific needs for well-draining soil and consistent, yet not excessive, moisture, and by strategically positioning your soaker hose to deliver water directly to the root zone without touching the foliage, you can significantly enhance its growth and appearance. Remember to monitor soil moisture diligently, adjust your watering based on seasonal changes and weather conditions, and embrace best practices like mulching to create the ideal environment for your Blue Star Juniper. Implementing these techniques will ensure your stunning, star-shaped juniper thrives for years to come, providing a captivating splash of blue in your garden.

