
Blue Star Juniper Rejuvenation Pruning: How to Revitalize Your Shrub
Engaging Introduction
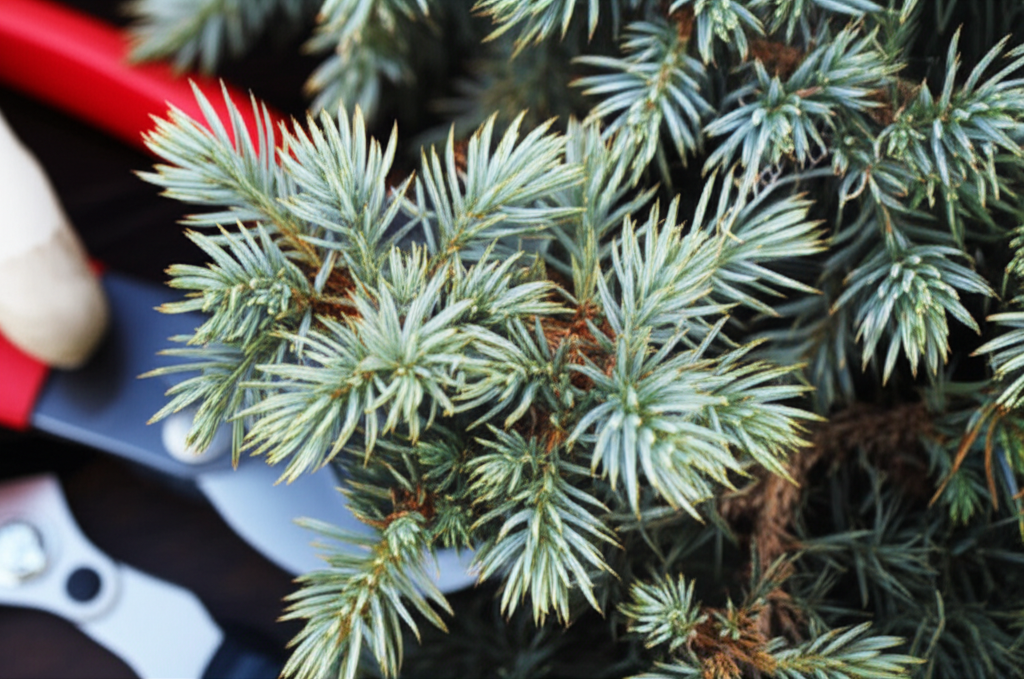
Is your beloved Blue Star Juniper looking a little less vibrant, perhaps a bit leggy or overgrown? You might be wondering, can you prune a Blue Star Juniper to rejuvenate it? The answer is a resounding yes, and understanding the art of Blue Star Juniper rejuvenation pruning is key to maintaining its distinctive, star-like foliage and compact form. Proper rejuvenation pruning not only breathes new life into your shrub, encouraging denser growth and a more appealing shape, but it also plays a crucial role in preventing disease and improving air circulation, ultimately contributing to a healthier, more productive garden ecosystem.
Quick Answer Box
Yes, you can absolutely prune a Blue Star Juniper to rejuvenate it. Effective Blue Star Juniper rejuvenation pruning involves removing dead, damaged, or overgrown branches, and can even involve more drastic measures to encourage a fuller, healthier plant. This process revitalizes the shrub by stimulating new growth and improving its overall structure and appearance.
What is Blue Star Juniper Rejuvenation Pruning and Why It’s Important in Gardening
Blue Star Juniper rejuvenation pruning refers to the practice of selectively or drastically cutting back a Blue Star Juniper (Juniperus squamata ‘Blue Star’) shrub to improve its health, shape, and vigor. This can involve anything from light shaping to more significant “rejuvenation” cuts that encourage dense, new growth from the base or older wood.
This type of pruning is vital for several reasons:
Health: Removing diseased, damaged, or crossing branches prevents the spread of pathogens and reduces stress on the plant. Good air circulation, promoted by pruning, is essential for preventing fungal diseases common in dense junipers.
Aesthetics: Blue Star Junipers are prized for their compact, mounding habit and striking blue-green foliage. Over time, they can become leggy, sparse, or outgrow their intended space. Rejuvenation pruning restores their desirable form and appearance.
Vigor: By removing older, less productive wood, you encourage the plant to channel energy into producing fresh, vigorous new growth. This leads to a fuller, more robust shrub.
Longevity: Regular, appropriate pruning can extend the lifespan of your Blue Star Juniper, ensuring it remains a beautiful feature in your landscape for years to come.
Quick Recommendations or Key Insights about Blue Star Juniper Rejuvenation Pruning
Timing is Key: The best time for significant rejuvenation pruning is late winter or early spring, just before new growth begins.
Sharp Tools: Always use clean, sharp bypass pruners, loppers, or a pruning saw to make clean cuts and minimize damage.
Assess First: Before cutting, take a step back and assess the shrub’s overall shape, health, and your rejuvenation goals.
Start Small: If unsure, begin with lighter pruning and gradually increase the severity if needed.
Consider the Purpose: Are you shaping, thinning, or performing a drastic rejuvenation? Your goal will dictate the pruning technique.
Never Cut to Bare Wood (Generally): Blue Star Junipers generally do not regrow from old, completely bare wood like some other shrubs. Focus on cutting back to a side branch or bud.
Detailed Breakdown of Blue Star Juniper Rejuvenation Pruning
Can You Prune a Blue Star Juniper to Rejuvenate It?
Yes, you absolutely can prune a Blue Star Juniper to rejuvenate it. This shrub, while relatively low-maintenance, can benefit immensely from strategic pruning to maintain its compact, mounded shape and vibrant blue-green color. Rejuvenation pruning is not just about aesthetics; it’s about promoting the plant’s long-term health and vitality.
The Scientific Perspective (Botany & Plant Biology):
Blue Star Junipers, like many conifers, respond to pruning by producing new growth from dormant buds. However, their ability to regrow from old, completely dormant wood is limited. This means that rejuvenation pruning needs to be approached with an understanding of how and where new growth originates.
Apical Dominance: Junipers exhibit apical dominance, meaning the terminal bud (at the tip of a branch) usually grows more vigorously than lateral buds. Pruning can disrupt this, encouraging lateral buds to sprout and create a bushier plant.
Bud Types: New growth primarily emerges from leaf axils (where a leaf meets a stem) or from small buds already present on the branches. Cutting back to a point where these buds exist is crucial for successful regrowth. Cutting into wood that has no visible buds or needles is unlikely to result in new growth.
Hormonal Regulation: Pruning influences the plant’s hormone balance. Removing older, less productive branches can redirect hormones to stimulate growth in younger, healthier sections.
Practical Applications:
The practical application of pruning a Blue Star Juniper involves understanding its growth habits and applying the right techniques at the right time.
Renewal Pruning: This involves gradually removing about one-third of the oldest, woodiest stems each year over a three-year period. This method is less drastic than a single heavy prune and allows the plant to recover more easily, ensuring continuous foliage coverage.
Thinning: Removing crowded or crossing branches improves light penetration and air circulation, reducing the risk of fungal diseases and encouraging healthier growth throughout the plant.
Shaping: While not strictly rejuvenation, regular shaping pruning helps maintain the desired compact, mounding form and prevents the shrub from becoming too large or unruly.
Common Myths:
Myth 1: You can cut Blue Star Junipers back to any point, even bare wood, and they will regrow.
Reality: Unlike some deciduous shrubs that readily sprout from old wood, junipers, including Blue Star, have limited ability to regrow from completely bare, old branches that lack any foliage or small buds. Always aim to cut back to a point with foliage or a visible bud.
Myth 2: Pruning blue star junipers is difficult and will ruin their shape.
Reality: With the right tools and techniques, pruning is quite manageable. The goal is to enhance, not destroy, the natural beauty of the Blue Star Juniper.
Myth 3: Blue Star Junipers don’t need pruning at all.
Reality: While they are slow-growing, they can eventually become leggy or overgrown, especially in less-than-ideal conditions, making rejuvenation pruning beneficial for maintaining health and appearance.
How to Perform Blue Star Juniper Rejuvenation Pruning: Step-by-Step Gardening Instructions
Performing rejuvenation pruning on a Blue Star Juniper requires a methodical approach to ensure the best results.
Step 1: Assess Your Juniper
Before you pick up any tools, take a step back and examine your Blue Star Juniper. Identify areas that are:
Dead, dry, or damaged.
Diseased (look for discoloration, wilting, or unusual growths).
Crossing or rubbing against other branches.
Leggy or sparse, with large gaps.
Overgrown and losing its desirable shape.
Step 2: Gather Your Tools
Ensure you have the right equipment:
Sharp Bypass Pruners: For small branches (up to 1/2 inch thick).
Sharp Loppers: For branches up to 1.5 inches thick.
Pruning Saw: For larger, thicker branches.
Gloves: To protect your hands from sap and needles.
Safety Glasses: To protect your eyes from flying debris.
Rubbing Alcohol or Bleach Solution: For sanitizing your tools between cuts, especially if dealing with disease.
Step 3: Sanitize Your Tools
Clean your pruners, loppers, and saw with rubbing alcohol or a bleach solution to prevent the spread of diseases from one part of the plant to another, or from other plants.
Step 4: Begin with Dead, Damaged, and Diseased Wood
Always start by removing any branches that are clearly dead, broken, or show signs of disease. Cut these back to healthy wood or to the ground if the entire branch is affected. When cutting diseased wood, make the cut several inches below the visible signs of disease to ensure you remove all infected tissue.
Step 5: Address Crossing and Rubbing Branches
Identify any branches that are growing into each other or rubbing. Remove the weaker or poorly positioned branch to prevent wounds that can invite pests and diseases.
Step 6: Light Shaping and Thinning
Now, begin to address the overall shape and density:
Thinning: Look for areas where branches are too crowded. Remove some of these branches at their point of origin (where they meet a larger branch or the main stem) to improve air circulation and light penetration. Aim to open up the center of the shrub.
Shaping: Trim back branches that are extending too far beyond the desired silhouette. Make cuts just above a side branch or a cluster of needles that is pointing in the direction you want new growth to occur.
Step 7: Consider More Aggressive Rejuvenation (If Necessary)
If your Blue Star Juniper is severely overgrown, leggy, or sparse, you might consider a more significant rejuvenation prune.
Gradual Rejuvenation: This is the preferred method. Over a period of 2-3 years, remove about one-third of the oldest, thickest stems down to the ground or to a strong side branch. This allows the plant to recover gradually and maintain a fuller appearance throughout the process.
Drastic Rejuvenation (Use with Caution): In some cases, you might cut the entire shrub back by about one-third to one-half of its total height. However, this is a riskier approach for Blue Star Junipers, as they may not respond as vigorously as other plants. Ensure you are cutting back to a point with foliage or small, viable buds. Avoid cutting into the old, bare woody core if possible.
Step 8: Make Clean Cuts
Ensure all cuts are made cleanly with your sharp tools. Avoid tearing or crushing the bark. For larger branches, use the three-cut method to prevent tearing:
1. Make a small undercut about 6-12 inches away from the trunk.
2. Make a second cut further out from the first, going all the way through to remove the weight of the branch.
3. Make a final clean cut just outside the branch collar to remove the stub.
Step 9: Clean Up
Remove all pruned branches and debris from around the base of the juniper. This helps prevent pests and diseases from harboring in the garden.
Step 10: Follow Up
Water the juniper well after pruning, especially if the weather is dry. Keep an eye on new growth and address any signs of stress.
Real-Life Example:
Imagine a Blue Star Juniper that has grown wide and a bit sparse in the center, with some lower branches starting to die back due to lack of light. You would start by removing the dead lower branches. Then, you’d thin out some of the inward-growing, crossing branches in the middle. Finally, you might lightly trim back some of the overgrown outer branches, cutting back to a point where a side branch emerges, encouraging outward and downward growth to restore its mounded shape.
Practical Applications in the Garden
Soil Preparation and Planting:
While rejuvenation pruning isn’t directly related to initial soil preparation, a healthy, well-pruned juniper contributes to better soil conditions by allowing more light and air to reach the soil surface, promoting beneficial microbial activity. If you’re planting a new Blue Star Juniper, ensure it’s in well-draining soil, as poor drainage can lead to root rot and make the plant more susceptible to issues that would require rejuvenation.
Plant Care Routines:
Watering: After rejuvenation pruning, provide consistent watering to help the plant recover. Once established, Blue Star Junipers are drought-tolerant, but new growth is more sensitive.
Fertilizing: Generally, Blue Star Junipers don’t require heavy fertilization. If you do fertilize, use a balanced, slow-release fertilizer in early spring before new growth begins, but avoid over-fertilizing, which can lead to weak, rapid growth.
Mulching: Apply a layer of mulch around the base of the juniper (keeping it a few inches away from the trunk) to retain soil moisture, suppress weeds, and regulate soil temperature.
Seasonal Planning:
Late Winter/Early Spring (February-March): This is the prime time for significant rejuvenation pruning. The plant is dormant, and you can clearly see the branch structure. The plant will have the entire growing season to recover.
Summer: Light shaping and removal of dead or damaged branches can be done during the summer, but avoid heavy pruning as it can stress the plant during hot weather.
Fall: Avoid major pruning in the fall, as new growth stimulated by fall pruning may not have time to harden off before winter frost.
Common Mistakes to Avoid
Pruning at the Wrong Time: Pruning too late in the season can lead to frost damage on new growth. Pruning during extreme heat can stress the plant.
Using Dull or Dirty Tools: This can lead to ragged cuts that are prone to disease and slow healing.
Over-Pruning: Removing too much of the plant at once can shock it, leading to dieback or failure to recover, especially if cutting into completely bare wood.
Cutting Back to Bare Wood: As mentioned, Blue Star Junipers have limited ability to regrow from old, leafless wood. Always cut back to a point with foliage or small buds.
Not Removing All Dead/Diseased Wood: Leaving any diseased material can allow the problem to persist or spread.
Ignoring the Natural Shape: While rejuvenation is about improvement, try to work with the plant’s natural growth habit rather than forcing an unnatural shape.
Expert Tips or Pro Insights
“Gradual Rejuvenation is Your Best Friend”: Most professional horticulturists advocate for a gradual rejuvenation approach for junipers. Instead of a single harsh prune, spread the most significant cuts over two to three years. This allows the plant to recover more gracefully and reduces the risk of shocking it.
“Read the Plant, Not Just the Calendar”: While late winter/early spring is ideal, observe your specific plant and local climate. If an unusually warm spell occurs in late winter, you might be able to start pruning slightly earlier. Conversely, if winter is prolonged, wait until the risk of severe frost has passed.
“Think About Light and Air”: When thinning, visualize how removing a branch will improve light penetration and air circulation to previously shaded areas of the shrub. This is key to preventing fungal issues and encouraging denser growth.
“Don’t Be Afraid of a Little Chaos”: Sometimes, a particularly dense or overgrown juniper might look a bit rough immediately after pruning. Trust the process; the new growth will fill in and create a much more refined appearance.
“Consider the Purpose of the Pruning”: If you’re simply shaping, use lighter cuts. If you’re trying to reduce size or overcome legginess, more strategic, slightly deeper cuts might be needed.
Seasonal or Climate Considerations
Seasons:
Winter (Late Winter/Early Spring): The ideal time for significant rejuvenation pruning. The plant is dormant, making it less susceptible to stress. You can clearly see the structure, and the plant has the entire growing season to recover.
Spring: New growth emerges. You can perform light shaping and remove any remaining dead wood. Avoid heavy pruning, as it can remove new growth.
Summer: Generally, avoid major pruning. Lightly trim back any errant branches that are significantly out of place or causing issues. Water well if pruning in hot, dry conditions.
Fall: Refrain from any significant pruning. New growth stimulated by fall pruning is vulnerable to frost damage. You can remove any dead or diseased branches, but keep cuts minimal.
Climate & Planting Zones:
Cold Climates (Zones 3-5): Pruning should be strictly confined to late winter/early spring before bud break. Ensure the plant has adequate winter protection, especially when young or after a pruning.
Temperate Climates (Zones 6-7): The late winter/early spring window is still best. You have a slightly longer period before new growth starts, offering more flexibility.
Mild Climates (Zones 8-9): You can prune slightly earlier in late winter. The growing season is longer, allowing for more vigorous recovery. You might even get away with a very light shaping prune in early fall, but it’s still generally safer to avoid.
Soil Drainage: In all climates, well-draining soil is paramount. Poor drainage exacerbates root problems, which can weaken the juniper and make it less responsive to pruning.
Buying Guide or Decision-Making Process
While this section is about pruning, understanding what makes a healthy Blue Star Juniper to begin with can inform your rejuvenation decisions. If you’re buying a new one or assessing an existing one, consider:
Form: Look for a plant with a dense, mounded shape, free of significant dead or sparse areas.
Foliage Color: The characteristic blue-green color should be consistent and vibrant. Yellowing or browning needles can indicate stress, disease, or poor growing conditions.
Trunk and Branch Health: Inspect the bark for any signs of damage, cracking, or disease. Ensure branches are sturdy.
Root System (if possible): For potted plants, check for roots circling the pot excessively, which can indicate it’s root-bound and may need repotting and root pruning before planting.
When deciding on pruning tools, invest in quality:
Bypass Pruners: Essential for clean cuts on smaller branches. Brands like Felco or Fiskars offer reliable options.
Loppers: For branches too thick for pruners. Look for long handles for leverage.
Pruning Saw: A curved blade saw designed for wood is best. Brands like Bahco or Corona are good choices.
Key Factors to Consider When Buying Tools:
Sharpness: Blades must be sharp for clean cuts.
Durability: Invest in tools made from high-quality steel that will last.
*

