
Sure, here is a blog post on the topic “Blue Star Juniper: Effortless Initial Watering” for the keyword “Blue star juniper initial watering schedule.”
Blue Star Juniper Initial Watering Schedule: Your Key to a Thriving Evergreen
Are you wondering about the perfect blue star juniper initial watering schedule to ensure your new evergreen shrub establishes a robust root system and thrives for years to come? Getting the initial watering right is absolutely critical for the long-term health and resilience of your Blue Star Juniper. Overwatering or underwatering during this crucial establishment phase can lead to root rot, stunted growth, or even plant death. Understanding the right approach means healthier plants, a more beautiful garden, and less worry for you.
Quick Answer Box
The ideal blue star juniper initial watering schedule involves deep, infrequent watering. For the first few weeks after planting, water thoroughly every 3-5 days, ensuring the soil is moist but not waterlogged. As the juniper establishes, gradually extend the watering intervals to once a week, then to every two weeks, depending on rainfall and soil conditions, always checking the soil moisture before watering.
What is Blue Star Juniper Initial Watering and Why It’s Important in Gardening
Blue Star Juniper (Juniperus squamata ‘Blue Star’) is a popular, low-growing evergreen shrub prized for its striking, silvery-blue, star-shaped foliage. It’s a hardy and relatively low-maintenance plant once established, making it a favorite for rock gardens, borders, and as a ground cover. However, like any newly planted shrub, its success hinges on proper initial care, specifically its watering schedule.
Initial watering refers to the critical period immediately following planting, typically the first few weeks to months. During this time, the juniper’s root system is fragile and has not yet expanded into the surrounding soil to access moisture independently. The plant relies entirely on the water you provide in the planting hole and the surrounding backfill.
Why it’s important in gardening:
Root Establishment: Proper initial watering encourages deep root growth. When the surface dries out, roots are prompted to grow downwards in search of moisture, creating a strong anchor and access to a more stable water supply.
Preventing Transplant Shock: Newly planted shrubs are susceptible to transplant shock, a condition where the plant struggles to adapt to its new environment due to damaged or underdeveloped roots. Consistent, appropriate watering helps mitigate this stress.
Avoiding Root Rot: Overwatering is a common killer of newly planted shrubs. Waterlogged soil deprives roots of oxygen, leading to root rot, a fungal disease that can quickly kill a plant.
Promoting Vigorous Growth: A well-watered and established root system is the foundation for healthy foliage and overall plant vigor.
Quick Recommendations or Key Insights about Blue Star Juniper Initial Watering Schedule
Soak the root ball thoroughly when planting.
Water deeply and less frequently rather than shallowly and often.
Check soil moisture by sticking your finger 2-3 inches into the soil. Water only if it feels dry.
Mulch generously around the base to retain soil moisture and regulate temperature.
Adjust watering based on weather: Increase frequency during hot, dry spells; decrease during cool, wet periods.
Listen to your plant: Wilting can indicate underwatering, but also overwatering. Always check the soil first.
Detailed Breakdown of Blue Star Juniper Initial Watering Schedule
Understanding the nuances of watering your Blue Star Juniper during its establishment period is key. Let’s break down the process to ensure your plant gets the best possible start.
The Science Behind Initial Watering: Root Development and Water Uptake
When you plant a Blue Star Juniper, its root system is essentially a compact ball of soil and roots. These roots are not yet equipped to explore the vastness of your garden bed. The soil in the planting hole is often richer and retains moisture better than the surrounding native soil, creating a tempting but potentially problematic environment.
The goal of initial watering is to encourage the roots to grow outwards and downwards, seeking out new soil and moisture. This is a delicate balance:
Water Replenishment: You need to ensure the root ball and the surrounding soil remain consistently moist but never saturated.
Oxygen Availability: Roots need oxygen to respire and grow. Waterlogged soil suffocates roots, leading to anaerobic conditions where harmful bacteria and fungi thrive.
Osmotic Pressure: Plants absorb water through osmosis, a process that relies on a gradient of water potential between the soil and the root cells. Consistent moisture helps maintain this gradient.
Step-by-Step Guide to Your Blue Star Juniper Initial Watering Schedule
The first few weeks are the most critical. Here’s a practical, actionable schedule:
Phase 1: The First 2-3 Weeks (Critical Establishment)
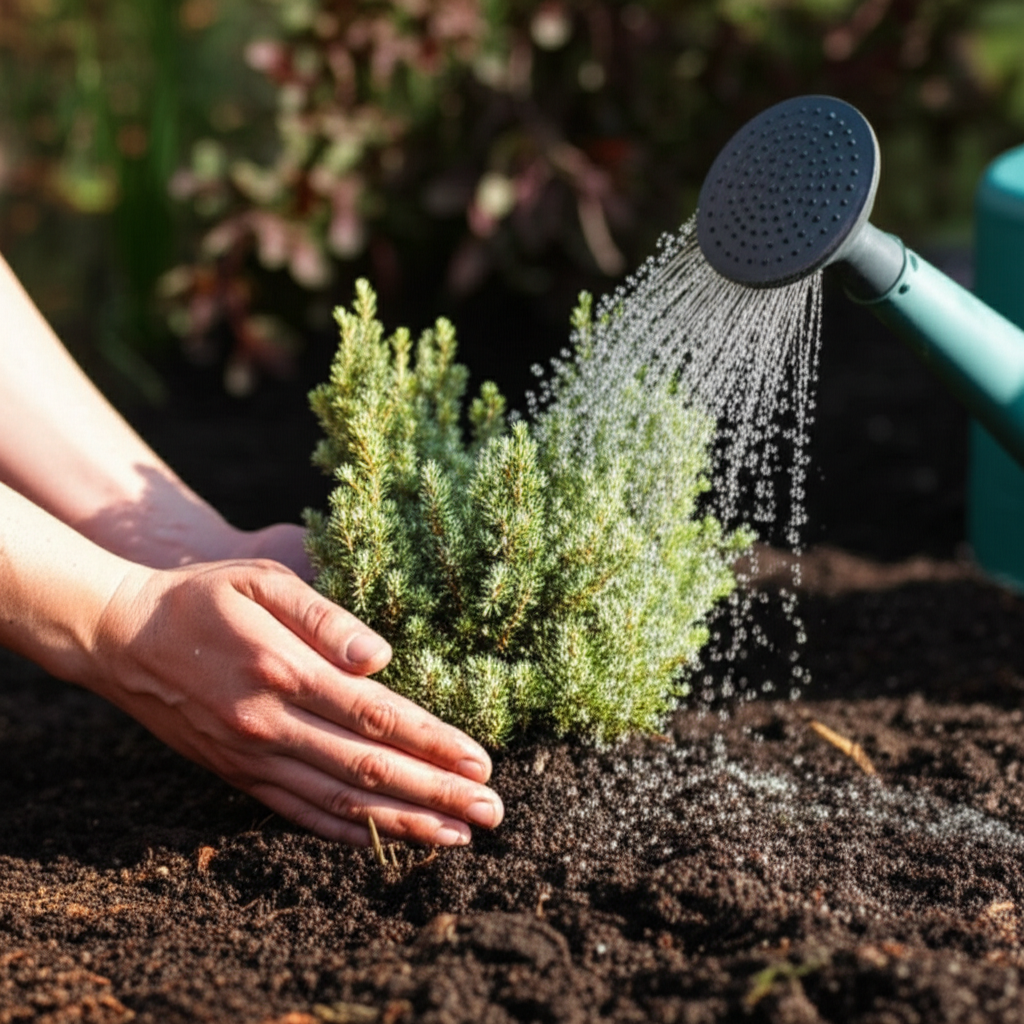
1. Immediate Post-Planting Soak: After backfilling the planting hole, water the entire area thoroughly. Allow the water to soak in deeply, settling the soil around the roots and eliminating air pockets. This is your first, and arguably most important, watering.
2. Watering Frequency: Aim to water deeply every 3-5 days. The specific interval depends heavily on your climate, soil type, and current weather conditions.
3. How to Check Soil Moisture: This is the most crucial step. Dig your finger 2-3 inches into the soil near the base of the juniper, but not so close that you disturb the main root ball.
If the soil feels dry: Water thoroughly.
If the soil feels moist: Hold off watering and check again the next day.
4. Watering Method: Use a gentle stream from a watering can or hose, or a soaker hose placed around the drip line. Water at the base of the plant, allowing the water to penetrate the soil deeply. Avoid overhead watering, which can promote fungal diseases. Aim to saturate the root zone.
Phase 2: Weeks 3-8 (Root Expansion)
1. Gradually Extend Intervals: Continue checking soil moisture every 3-5 days. As the weather remains consistent, you can start to extend the watering intervals to approximately once a week.
2. Deep Watering Remains Key: Even with longer intervals, ensure each watering is deep and thorough. The goal is to encourage roots to grow downwards in search of moisture as the upper soil layers dry out.
3. Observe Your Plant: Look for signs of stress. Wilting leaves can indicate a need for water, but also, paradoxically, overwatering if the soil is soggy. Always confirm soil moisture before watering.
Phase 3: Beyond 2 Months (Transition to Mature Watering)
1. Reduce to “As Needed”: Once your Blue Star Juniper has been in the ground for about 2-3 months and you’ve observed consistent, healthy growth, you can transition to a more “as-needed” watering schedule.
2. Rainfall and Soil: Rely more on natural rainfall. Continue to check soil moisture, especially during dry spells. Junipers are drought-tolerant once established, so they will generally only need supplemental watering during prolonged periods of drought or extreme heat.
3. Seasonal Adjustments: In cooler, wetter climates, you may find your established juniper rarely needs additional water. In hotter, drier regions, you might still need to water occasionally during the summer months.
Common Myths About Watering New Plants
Myth 1: “Water a little bit every day.” This is a recipe for disaster. Shallow watering encourages shallow root growth, making the plant more vulnerable to drought. It also keeps the soil surface constantly wet, which can lead to fungal issues and root rot.
Myth 2: “If the leaves look droopy, it needs water.” While wilting can mean thirst, it can also be a sign of overwatering where roots have rotted and can no longer absorb water. Always check the soil moisture first.
Myth 3: “Once planted, I don’t need to worry about watering.” This is true for very few plants. Most newly planted shrubs require consistent care during their establishment phase.
Myth 4: “The rain will take care of it.” Natural rainfall is great, but it may not always penetrate deeply enough to reach the developing root system, especially in the early stages or during dry spells.
Expert Tips or Pro Insights for Blue Star Juniper Watering
The “Finger Test” is Non-Negotiable: Professional gardeners live by this simple test. It’s the most reliable way to gauge soil moisture without specialized equipment.
Don’t Fertilize Too Early: Avoid fertilizing a newly planted juniper for at least 6-12 months. The energy should be focused on root establishment, not on foliage growth. Fertilizing can sometimes stress a plant that is already working hard to adapt.
Consider Soil Type: Sandy soils drain quickly and require more frequent watering. Clay soils retain moisture longer and are more prone to waterlogging, so allow them to dry out more between waterings.
Watering Can vs. Hose: For small plantings, a watering can allows for precise application at the base. For larger areas, a soaker hose or drip irrigation system provides slow, consistent watering directly to the root zone, minimizing evaporation and runoff.
Planting Depth Matters: Ensure you plant your Blue Star Juniper at the same depth it was in its nursery pot. Planting too deep is a common mistake that can suffocate the crown and lead to rot.
Seasonal or Climate Considerations
Spring Planting: If you plant in spring, you’ll have the advantage of moderate temperatures and increasing natural rainfall to aid establishment. However, spring can also bring unpredictable dry spells.
Summer Planting: Planting in summer is the most challenging due to heat and potential drought. You will likely need to water more frequently and be extra vigilant about checking soil moisture. Provide temporary shade if extreme heat is expected.
Fall Planting: Fall is an excellent time to plant as cooler temperatures and increased rainfall help the juniper establish roots before winter dormancy. You’ll still need to monitor moisture, especially if the fall is unusually dry. Water until the ground freezes.
Winter Watering: Even in winter, if your region experiences extended dry periods and the ground is not frozen, your newly planted juniper may need occasional watering to prevent desiccation (drying out). Evergreens can lose moisture through their needles year-round.
Climate Zones:
Hot, Arid Climates: Require more frequent watering and careful monitoring. Mulching is especially important to conserve moisture.
Temperate Climates: Watering needs will vary significantly with natural rainfall.
Cool, Humid Climates: Overwatering is a greater risk. Ensure excellent drainage and be very conservative with supplemental watering.
Buying Guide or Decision-Making Process: Choosing a Blue Star Juniper
While this post focuses on watering, a quick note on selection:
Health Check: Look for plants with vibrant, blue-green foliage, free from brown or yellow spots.
Root System: If possible, gently check the root ball. It should be firm and white or light brown, not mushy or dark. Avoid plants that are “root-bound” (roots circling tightly around the pot).
* Container Size: A plant that has been in its current pot for a reasonable amount of time will generally establish better than one that has been crammed into a too-small pot.
FAQ Section for Blue Star Juniper Initial Watering Schedule
Q1: How do I know if I’m watering my Blue Star Juniper too much?
A1: Signs of overwatering include yellowing or browning needles, wilting despite moist soil, and a mushy or foul-smelling soil at the base of the plant. Always check soil moisture before watering.
Q2: How do I know if I’m not watering enough?
A2: Underwatering typically shows as dry, brittle, or drooping foliage that may turn brown and crispy. The soil will be dry several inches down.
Q3: Can I use a sprinkler system for initial watering?
A3: While a sprinkler can water the area, it’s often less effective for initial watering as it may not deliver enough water to the root zone deeply. It also wets the foliage, which can encourage disease. Watering directly at the base with a hose, soaker hose, or watering can is preferred.
Q4: How long does it take for a Blue Star Juniper to become established?
A4: Generally, a Blue Star Juniper is considered established after its first full growing season, typically around 6-12 months, depending on your climate and the care provided.
Q5: Should I water my Blue Star Juniper differently in winter?
A5: Yes. During winter, growth slows, and water needs decrease. However, if there’s a prolonged dry spell and the ground isn’t frozen, evergreens can still benefit from occasional watering to prevent desiccation.
Conclusion for Blue Star Juniper Initial Watering Schedule
Mastering the blue star juniper initial watering schedule is your secret weapon to cultivating a stunning, long-lived evergreen shrub. By providing deep, infrequent watering and diligently checking soil moisture, you empower your new Blue Star Juniper to develop a strong, resilient root system. Remember, the goal is to mimic natural conditions that encourage roots to seek out moisture, rather than providing a constant, shallow supply. With careful attention during these crucial early weeks and months, you’ll pave the way for a vibrant, healthy Blue Star Juniper that will be a beautiful focal point in your garden for years to come. Now, go forth and water wisely to ensure your juniper thrives!

