
Absolutely! Here’s a comprehensive blog post focusing on “How to Bake with Elephant Ear Taro,” designed to be SEO-optimized, highly detailed, and engaging for gardeners of all levels.
—
How to Bake with Elephant Ear Taro: Unlock the Delicious Potential of this Versatile Root Vegetable
Have you ever looked at your majestic elephant ear plants and wondered if that substantial underground corm held culinary secrets beyond ornamental beauty? Can you actually eat those impressive tubers, and more importantly, how do you prepare them to unlock their delicious, starchy goodness? The question of how to bake with elephant ear taro is one that sparks curiosity for many gardeners, especially those cultivating these tropical beauties. Understanding how to safely and deliciously prepare elephant ear taro not only expands your gardening harvest’s potential but also introduces a nutritious and satisfying staple food into your diet, contributing to a more sustainable and self-sufficient garden-to-table lifestyle.
Quick Answer Box
Yes, you can bake elephant ear taro! When properly prepared and cooked, elephant ear taro (Colocasia esculenta) bakes into a tender, slightly sweet, and wonderfully starchy root vegetable, similar in texture to a potato or sweet potato. Ensure you always cook elephant ear taro thoroughly, as it contains calcium oxalate crystals that can cause irritation if consumed raw.
What is Elephant Ear Taro and Why It’s Important in Gardening
Elephant ear taro, scientifically known as Colocasia esculenta, is a tropical plant renowned for its large, heart-shaped leaves that resemble elephant ears. However, its true culinary significance lies beneath the soil in its starchy underground corm, often simply called taro or dasheen. This corm is a vital food source in many tropical and subtropical regions worldwide, prized for its energy-rich carbohydrates.
In a gardening context, growing elephant ear taro offers a dual benefit: striking ornamental appeal with its dramatic foliage and a valuable food crop. For gardeners in suitable climates, it provides a reliable and abundant harvest of a nutritious staple. Understanding how to process and cook this tuber is key to harnessing its full potential, transforming a garden curiosity into a delicious meal. The importance of taro in gardening extends to its role in permaculture systems, where it can be grown in moist areas, and its ability to provide a caloric yield from a relatively small footprint.
Quick Recommendations or Key Insights about Baking Elephant Ear Taro
Always Cook Thoroughly: Raw taro contains calcium oxalate crystals, which can cause throat irritation and discomfort. Baking, boiling, steaming, or frying until tender eliminates these crystals.
Peel Carefully: Use gloves if you have sensitive skin, as the sap can sometimes cause mild irritation. A sharp knife or vegetable peeler works best.
Pre-treatment for Baking: While not strictly necessary for all varieties, some gardeners find soaking peeled and cut taro in cold water for 30 minutes helps remove excess starch and improve texture.
Flavor Pairings: Taro bakes beautifully with herbs like rosemary, thyme, and sage, as well as spices like garlic powder, onion powder, and a pinch of nutmeg.
Versatile Texture: Baked taro can range from firm and potato-like to soft and mashable, depending on baking time and variety.
Detailed Breakdown of How to Bake with Elephant Ear Taro
Baking elephant ear taro is a straightforward process that yields a comforting and versatile side dish. The key is understanding the tuber’s properties and ensuring it’s cooked to perfection.
The Science Behind Baking Taro: From Irritant to Edible
Elephant ear taro tubers contain microscopic needle-shaped crystals of calcium oxalate. These crystals are the plant’s defense mechanism against herbivores. When consumed raw, these crystals can pierce the soft tissues of the mouth and throat, causing a burning, itching, and swelling sensation. Fortunately, heat effectively neutralizes these crystals by breaking down their structure. Baking, along with other cooking methods like boiling or steaming, is highly effective in rendering taro safe and palatable. The baking process also converts complex starches into simpler sugars, contributing to its slightly sweet flavor and tender texture.
Practical Applications in the Garden: Harvesting and Preparation
The journey from garden to oven begins with a successful harvest. Elephant ear taro is typically ready for harvest about 8-10 months after planting, when the leaves begin to yellow and die back.
1. Harvesting: Carefully dig around the base of the plant using a garden fork or spade, being careful not to damage the corms. Gently lift the entire plant from the soil. The main corm will be at the base, with smaller cormels (daughter corms) attached.
2. Cleaning: Brush off as much soil as possible. Then, wash the corms thoroughly under running water to remove all remaining dirt.
3. Peeling: This is a crucial step. Use a sharp knife or a sturdy vegetable peeler to remove the tough outer skin. For larger tubers, you might find it easier to cut them into manageable pieces before peeling. If you have sensitive skin, wearing gloves during this process is advisable due to the sap.
4. Cutting: Once peeled, cut the taro into your desired baking size – cubes, wedges, or even slices. For even cooking, aim for uniform pieces.
5. Soaking (Optional but Recommended): For a cleaner flavor and improved texture, especially if you notice any sliminess, soak the cut taro pieces in cold water for about 30 minutes to an hour. Drain and pat dry thoroughly before seasoning.
Baking Elephant Ear Taro: Step-by-Step Instructions
Here’s a reliable method for baking elephant ear taro:
Yields: 4-6 servings
Prep time: 20 minutes
Cook time: 40-60 minutes
Ingredients:
1.5 – 2 lbs elephant ear taro (Colocasia esculenta), harvested and cleaned
2-3 tablespoons olive oil or other cooking oil
1 teaspoon salt (or to taste)
½ teaspoon black pepper (or to taste)
Optional seasonings: Garlic powder, onion powder, paprika, dried rosemary, dried thyme, cumin, or your favorite spice blend.
Equipment:
Sharp knife
Cutting board
Vegetable peeler or knife for peeling
Large mixing bowl
Baking sheet
Parchment paper (optional, for easier cleanup)
Instructions:
1. Preheat your oven: Set your oven to 400°F (200°C). If using parchment paper, line your baking sheet now.
2. Prepare the Taro: Peel the cleaned taro corms and cut them into uniform pieces (e.g., 1-inch cubes or ½-inch thick wedges).
3. Season the Taro: Place the cut taro pieces in the large mixing bowl. Drizzle with olive oil and toss to coat evenly.
4. Add Seasonings: Sprinkle the salt, pepper, and any other desired seasonings over the taro. Toss again to ensure all pieces are well-coated.
5. Arrange on Baking Sheet: Spread the seasoned taro pieces in a single layer on the prepared baking sheet. Avoid overcrowding the pan, as this will cause the taro to steam rather than roast, resulting in a less desirable texture. Use a second baking sheet if necessary.
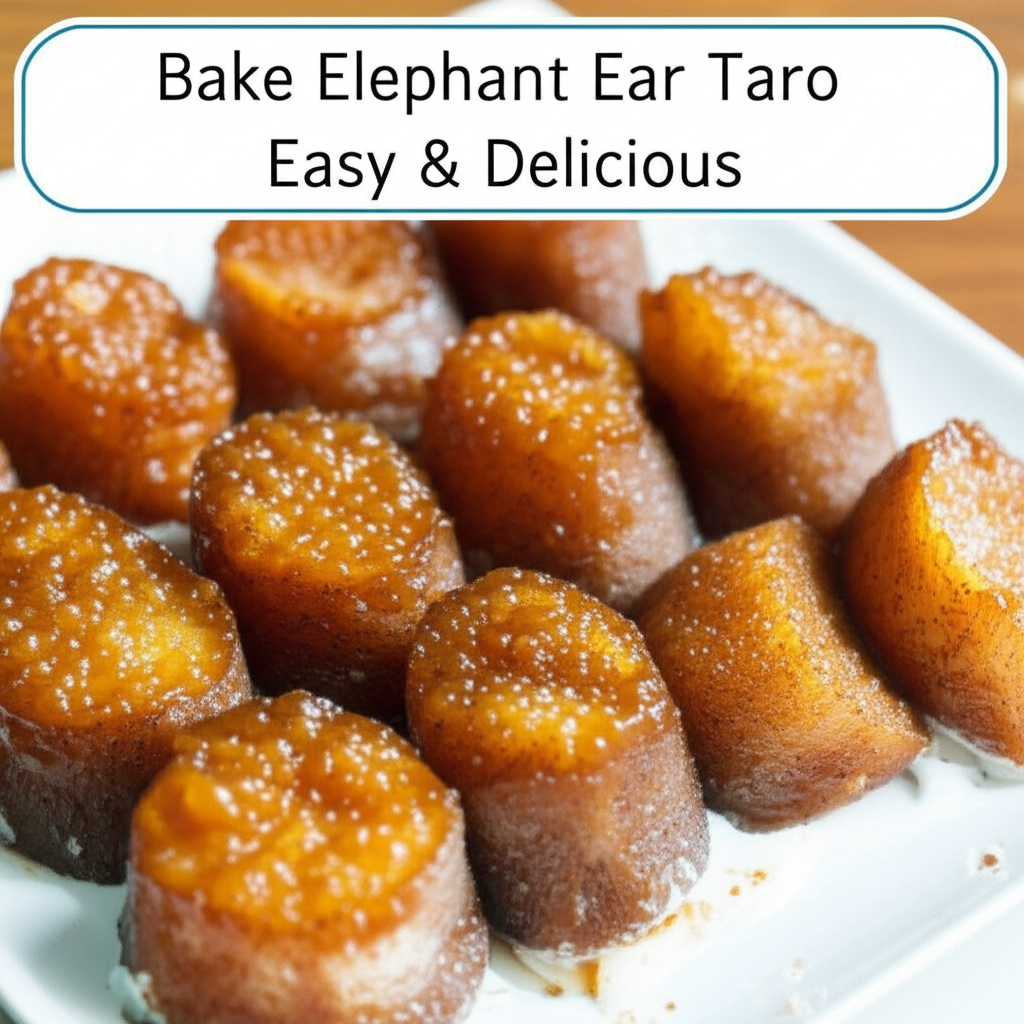
6. Bake: Place the baking sheet in the preheated oven. Bake for 40-60 minutes, or until the taro is tender when pierced with a fork and has golden-brown edges. The exact time will depend on the size of your pieces and your oven.
7. Flip Midway: For even cooking and browning, flip or stir the taro pieces about halfway through the baking time (around 20-30 minutes).
8. Check for Doneness: The taro is ready when it is tender throughout and has achieved a pleasing golden-brown color. You can test a piece by piercing it with a fork or skewer; it should go in easily.
9. Serve: Remove from the oven and serve hot as a delicious side dish.
Common Mistakes to Avoid When Baking Taro
Under-baking: This is the most critical mistake. Insufficient cooking means the calcium oxalate crystals remain, leading to an unpleasant mouthfeel. Always ensure the taro is completely tender.
Overcrowding the Baking Sheet: As mentioned, this leads to steaming rather than roasting. Give the taro pieces space to breathe so they can develop crispy edges.
Not Peeling Properly: Leaving any of the tough outer skin on can result in a less pleasant texture and potentially more irritation if not fully cooked.
Using Raw Taro in Recipes: Never incorporate raw taro into any dish, baked or otherwise. It must always be cooked thoroughly.
Ignoring Skin Irritation: If you have very sensitive skin, always wear gloves when handling and peeling raw taro, as the sap can cause a mild, temporary rash or itchiness.
Expert Tips or Pro Insights for Baking Taro
Pre-boiling for Crispier Results: For an extra crispy exterior, you can par-boil the taro pieces for about 10-15 minutes until slightly tender, then drain them thoroughly and pat them dry before proceeding with the roasting process. This pre-cooking helps to evaporate surface moisture, promoting better browning and crispiness.
The “Mash Test”: A good indicator of doneness is when a piece of taro can be easily mashed with a fork. This means the starches have fully broken down.
Flavor Infusions: For a deeper flavor, consider marinating the taro pieces in your oil and seasoning mixture for at least 30 minutes (or even overnight in the refrigerator) before baking.
Taro Varieties: While this guide applies broadly, some taro varieties might have slightly different textures or cooking times. Experimentation is key to finding your favorite.
Roasting with Other Vegetables: Taro bakes beautifully alongside other root vegetables like carrots, sweet potatoes, or parsnips. Just ensure they are cut to similar sizes for even cooking.
Seasonal or Climate Considerations
While taro is a tropical plant and thrives in warm, humid conditions, its corms can be harvested and stored for later use.
Growing Season: In cooler climates where taro cannot overwinter outdoors, it is typically grown as an annual during the warmer months. Harvest before the first frost.
Harvesting Time: The ideal time to harvest is when the plant naturally begins to die back in the fall. If you’re in a region with a very short growing season, you might need to harvest slightly earlier.
Storage: Properly cured taro corms can be stored in a cool, dry, and dark place for several months, similar to potatoes. This allows you to enjoy baked taro well into the cooler seasons, even if you don’t have a greenhouse.
Climate Impact on Texture: In very humid climates, taro may grow faster and larger, potentially leading to a slightly softer texture when baked compared to taro grown in drier conditions.
Buying Guide or Decision-Making Process: Sourcing Your Taro
If you don’t grow your own elephant ear taro, you can often find it at:
Farmers’ Markets: Look for vendors specializing in ethnic produce or root vegetables.
Asian or International Grocery Stores: Taro root (often labeled dasheen or Chinese potato) is a common staple in many Asian cuisines.
Well-stocked Produce Sections: Some larger supermarkets are beginning to carry taro.
When selecting taro:
Look for Firmness: Choose corms that are firm and free from soft spots, bruises, or signs of mold.
Check for Dryness: The skin should be relatively dry. Excessive moisture can indicate spoilage.
Size Matters (for cooking): Smaller to medium-sized corms are often preferred for baking as they tend to be less fibrous and cook more evenly. However, larger ones are perfectly usable.
* Consider the Source: If buying from a market, ask the vendor about the freshness and how it was stored.
FAQ Section for How to Bake with Elephant Ear Taro
Q1: Is it safe to eat elephant ear taro?
A1: Yes, it is safe to eat elephant ear taro, but only after it has been thoroughly cooked. Raw taro contains calcium oxalate crystals that can cause irritation. Baking, boiling, steaming, or frying until tender neutralizes these crystals.
Q2: How long does it take to bake elephant ear taro?
A2: Typically, baked elephant ear taro takes between 40 to 60 minutes at 400°F (200°C), depending on the size of the pieces and your oven. It’s ready when tender and golden-brown.
Q3: What does baked taro taste like?
A3: Baked taro has a mild, slightly sweet, and earthy flavor. Its texture is often compared to a potato or sweet potato – fluffy and tender when cooked through.
Q4: Can I bake taro with the skin on?
A4: It is strongly recommended to peel the taro before baking. The skin is tough and fibrous, and while cooking might soften it slightly, it won’t become as palatable or easily digestible as the peeled flesh. Peeling also ensures all potential irritants are removed.
Q5: My baked taro is still a bit itchy. What went wrong?
A5: This usually means the taro was not cooked long enough. The calcium oxalate crystals need sufficient heat and time to break down. Ensure the pieces are completely tender when pierced with a fork.
Conclusion
Unlocking the culinary potential of your elephant ear plants by learning how to bake with elephant ear taro is a rewarding experience for any gardener. From harvesting these starchy treasures from your own soil to transforming them into a delicious, wholesome side dish, the journey is a testament to the bounty of your garden. Remember the golden rule: always cook taro thoroughly to neutralize the calcium oxalate crystals, ensuring a safe and enjoyable eating experience. With its mild, slightly sweet flavor and satisfyingly tender texture, baked taro offers a versatile addition to your meal rotation, proving that beauty and sustenance can indeed grow together. So, dig into your harvest, preheat that oven, and discover the delicious comfort of baked elephant ear taro – your palate and your garden will thank you.

